In the last post, we learned how to load and interact with test harnesses and used Angular Material component test harnesses in the examples. Now, let's use the @angular/cdk/testing API to create custom component test harnesses.
Check out the second in this series ⬇️

Tidy up your tests using component test harnesses (2/3)
Alisa ・ Nov 30 '21
Creating a test harness for a custom component
If you have a shared/core component (or any component for that matter), you can write a component test harness implementation.
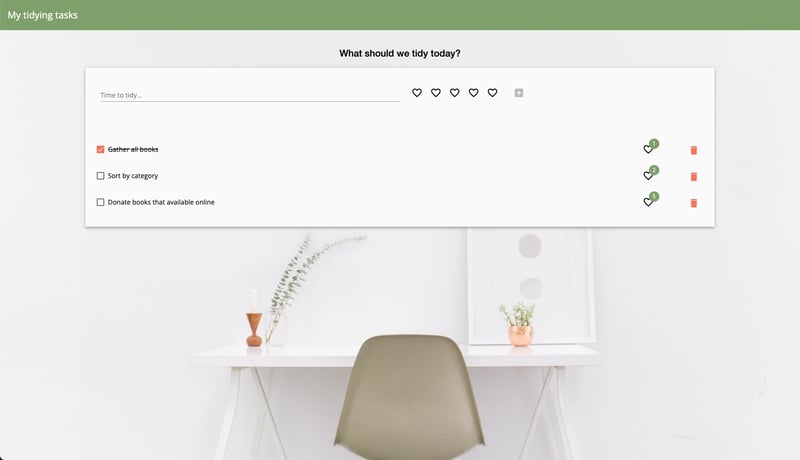
We'll use a component from a sample To-do list example app written using Angular Material UI components.
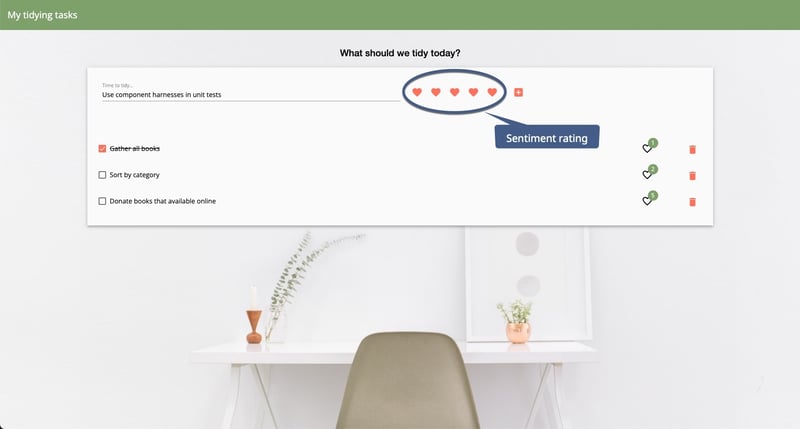
We'll focus on a custom UI component displays five heart buttons. This component helps assign a sentiment rating to your task. We're busy people, so we might want to optimize which items we work on first by the satisfaction we'll get for completing the task. This sentiment-rating component is the component we'll use as an example for the custom component test harness.
This post assumes knowledge of building a site using Angular and writing unit tests using Karma. The examples shown are from the project GitHub repo.
 alisaduncan
/
component-harness-code
Sample app with unit tests with and without test harnesses, and a custom component test harness for the component test harness presentation
The component code
The component comprises five Angular Material icon buttons where the icon is a filled heart or an outline heart. The number of filled hearts is the sentiment rate. This component uses Angular Material components, but you can use any elements in the component. A snippet of the component code looks like this.
@Component({
  selector: 'app-sentiment-rating',
  template: `
    <button mat-icon-button
      *ngFor="let rating of sentimentRating; index as i"

      <mat-icon *ngIf="i >= rate">favorite_border</mat-icon>
      <mat-icon *ngIf="rate > i">favorite</mat-icon>
    </button>
  `
})
export class SentimentRatingComponent {
  public sentimentRating = [1, 2, 3, 4, 5];
  @Input() public rate = 0;
}
Create a filter
First, we'll want to support finding and filtering the component test harness by rate. Filters make it easier for consumers to find the specific component test harnesses.
To do so, we create an interface that extends from CDK's testing API and add a property for filtering.
import { BaseHarnessFilters } from '@angular/cdk/testing';

export interface SentimentRatingHarnessFilters extends BaseHarnessFilters {
  rate?: number;
}
Implement the component test harness
Next, we'll implement the component test harness by creating the class and extending it from CDK's testing API. We need to set the static property hostSelector, which should be the same selector as the component we're creating the test harness.
import { ComponentHarness } from '@angular/cdk/testing';

export class SentimentRatingHarness extends ComponentHarness {
  static hostSelector = 'app-sentiment-rating';
}
We need to be able to get the elements that make up the component. In this case, it's five buttons. We can use the base class' helper method locatorForAll('selector'). The base class also has helper methods locatorFor and locatorForOptional so that you can target an individual element or an optional element.
The locator methods work by finding the elements by the selector and creating a function that returns the elements. Creating a function that returns the elements instead of directly returning them optimizes for change detection, and you get elements that match the current state of the DOM. We'll add this property to the SentimentRatingHarness implementation.
private _rateButtons: AsyncFactorFn<TestElement[]> = this.locatorForAll('button');
Now that we have access to the elements in the component template, we want to create the API that developers will use when interacting with the component test harness. All API methods return a promise of some kind. For a sentiment rating component, we'll want to get the rate and set a rate.
Get the sentiment rate
The first public method we'll add is getting the rate. We want first to get the rate buttons and then return the number of buttons where the icon is a filled heart. We'll use the parallel helper method to count the filled heart icons because we're making a couple of different async calls. The method looks like this.
public async getRate(): Promise<number> {
  const btns = await this._rateButtons();
  return (await parallel(() => btns.map(b => b.text()))).reduce((acc, curr) => curr === 'favorite' ? ++acc : acc, 0);
}
Set the sentiment rate
To set the rate, we want to click the button that matches the requested rate. Since we're accepting a parameter, we should add error handling for the requested rate.
public async setRate(rate: number): Promise<void> {
  if (rate <= 0) throw Error('Rate is 1 or greater');
  const btns = await this._rateButtons();
  if (btns.length < rate) throw Error('Rate exceeds supported rate options');
  return (await btns[rate - 1]).click();
}
Now we have a component test harness that supports setting and getting a rate.
Add filtering
Let's add the filter we created earlier by adding a static method with to the SentimentRatingHarness that creates the filtering predicate. We add the option to filter by, in this case, 'rate' and implement the predicate by returning the test harness that matches the requested rate. The code looks like this.
static with(options: SentimentRatingHarnessFilters): HarnessPredicate<SentimentRatingHarness> {
  return new HarnessPredicate(SentimentRatingHarness, options).addOption('rate', options.rate, async (harness, rate) => await harness.getRate() === rate);
}
With this consumers can call getHarness(SentimentRatingHarness.with({rate: 5})).
Test the test harness
Yay, we did it! Are we done? No, not quite. You want to test the test harness. Yes, this sounds like some sort of test inception. But you want to treat your component test harness like a public API, which it is. You will create a test host for your component and write tests utilizing your component test harness to test the component test harness. If you aren't familiar with this pattern, read more about it on Angular's documentation.
Tidy tests that spark joy
I hope you're inspired to tidy up your tests now! If you'd like to learn more, please check out my slides and the code for the sample todo app. The code contains all implementation of the component test harness, examples of testing the component test harness, and lots of unit tests with and without test harnesses.
Angular has excellent documentation on using Angular Material component harnesses and the Test Harness API if you want to dive in even deeper.
Check out my slides on SpeakerDeck for the presentation that inspired this series.
Let me know in the comments if you plan to try using test harnesses or your experience with them.


