In today's digital tide, businesses collect data like sponges, but it's all trapped in different systems, creating silos that stifle collaboration and growth. Boomi, a leading integration platform, bridges these data silos, connecting your systems and automating workflows to unleash the power of your data for seamless collaboration and real-time insights across your organization.
Moreover, Boomi goes beyond just seamless integration; by leveraging its support for incredible tools like Eyer, it ensures that your integrations are seamless and intelligently monitored and optimized.
Now, while Boomi promises ease of use, leveraging Docker takes it further. This containerization expert bundles everything — operating system, requirements, and the Boomi Atom itself — into a single, readily installable package. This simplifies both installations and ensures consistent software behavior across any environment. No more configuration hassles or compatibility concerns — Docker streamlines the process, and this article shows you how.
Prerequisites
To get the most out of this article, you must have the following:
- A Boomi platform account: if you do not have one, create a 30-day free trial account
- A Docker version of at least 19.03.8. Run the docker -v command to check your current version. If you are running an older version, download and install the latest Docker from the official Get Docker documentation.
- A basic understanding of Docker and its commands
Installing a Boomi Atom
The Boomi Atom is a lightweight, dynamic runtime engine where your Boomi processes can be executed. After deploying your integration processes into an Atom, it contains all the components required to run your processes end-to-end, including connectors, transformation rules, decision handling, and processing logic. There are two different options for installing a Boomi Atom based on your integration needs, and they are:
- Local installation: This option is for you if your integration connects to resources within your network, like databases, file systems, or other on-premise applications. You need to install the Atom on a computer that can access all these resources. This article will guide you through the local installation process.
- In the cloud: You can also set up to run your processes virtually on an Atom within a Boomi Atom cloud(or in another Atom Cloud if you have access to one) if your integration scenario requires only internet-accessible applications or data locations.
Creating a new Boomi environment
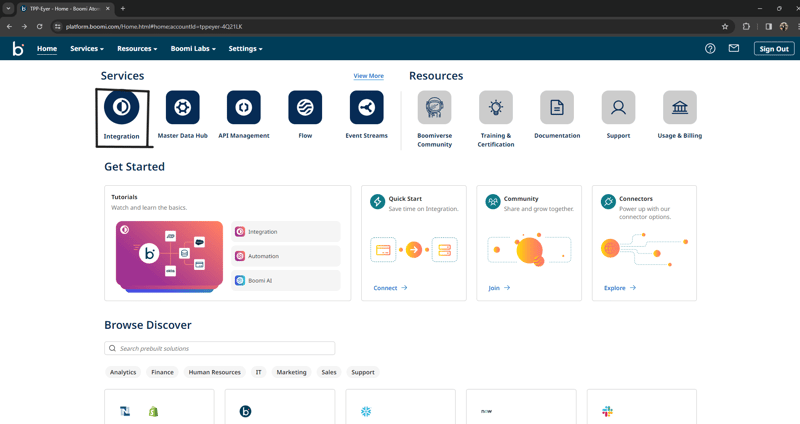
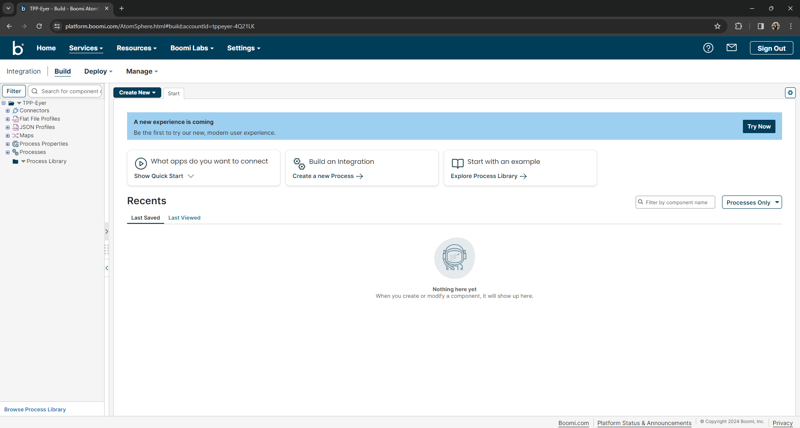
First, create a new Boomi environment to host your Atom. Log in to your Boomi account and navigate to the Integrations page.
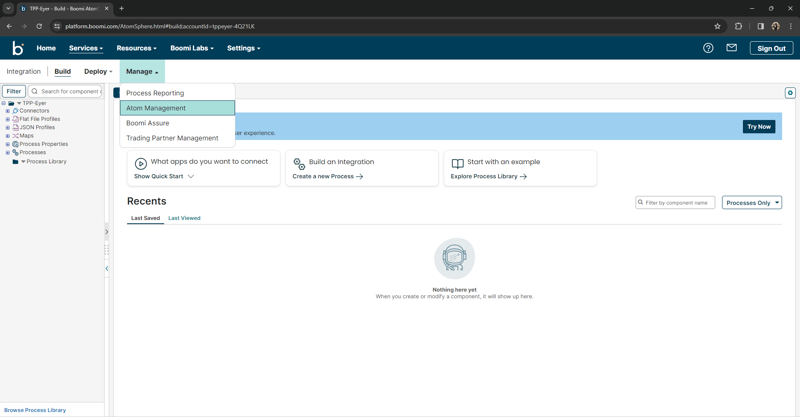
Next, navigate to the Manage tab and select Atom Management from the dropdown menu.
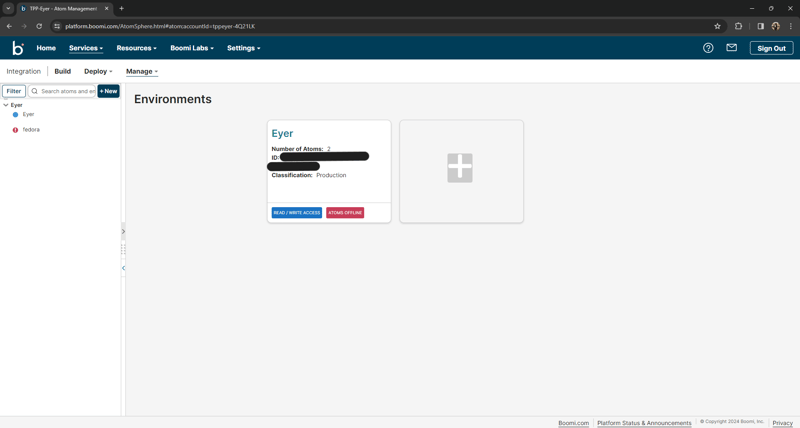
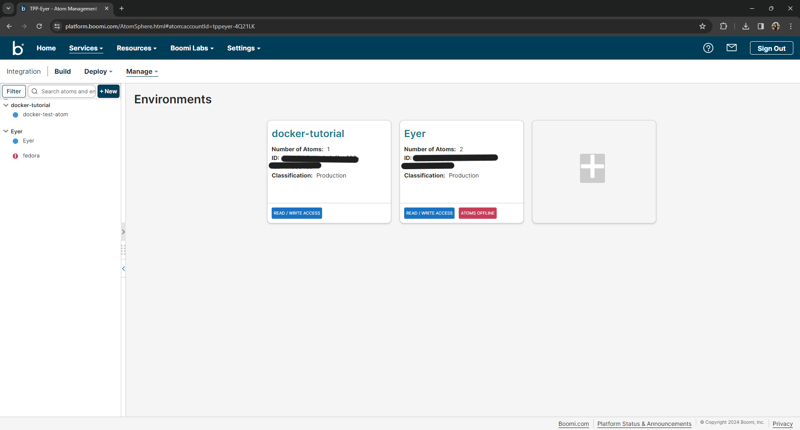
Selecting Atom Management will direct you to the Environments page.
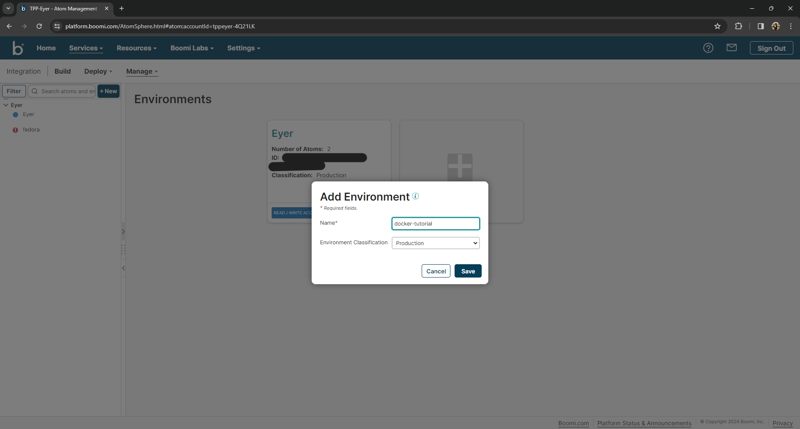
To create a new environment, click the "+" sign. Provide a name and select your desired environment classification before clicking Save.
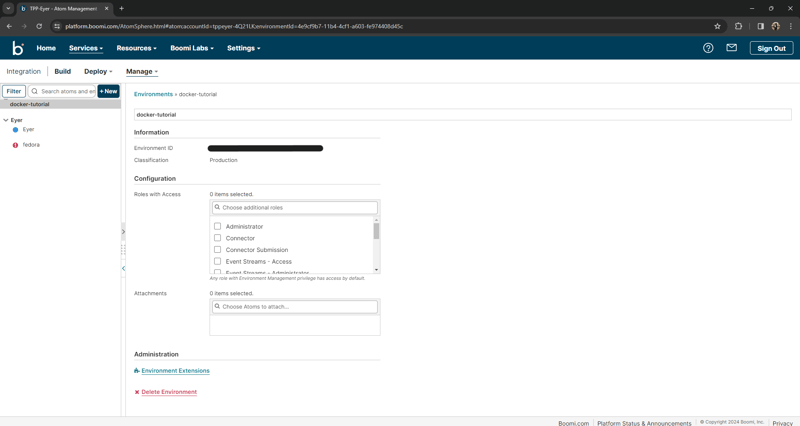
Once you've saved your new environment, head to its dedicated page by clicking on it. There, locate and copy the Environment ID. You'll need this ID to tell the Boomi Atom exactly where to be created. If not explicitly specified, the Atom appears in the Unattached Atoms list within Atom Management.
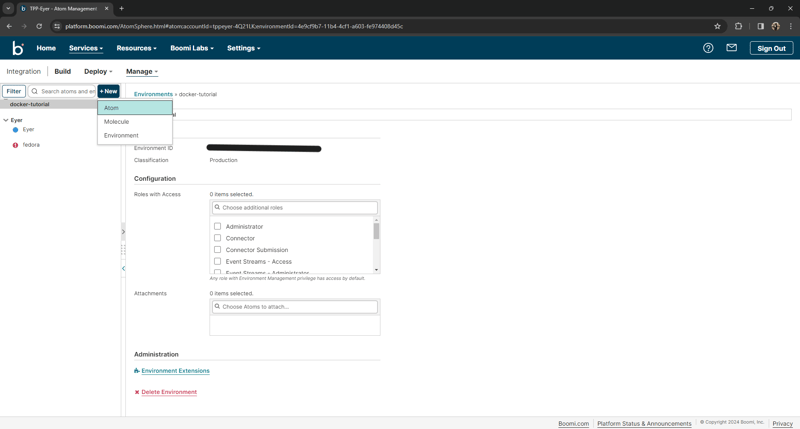
In your new Boomi environment, navigate to the +New button at the top of the page. From the available options, select the Atom tab to begin creating a Boomi Atom.
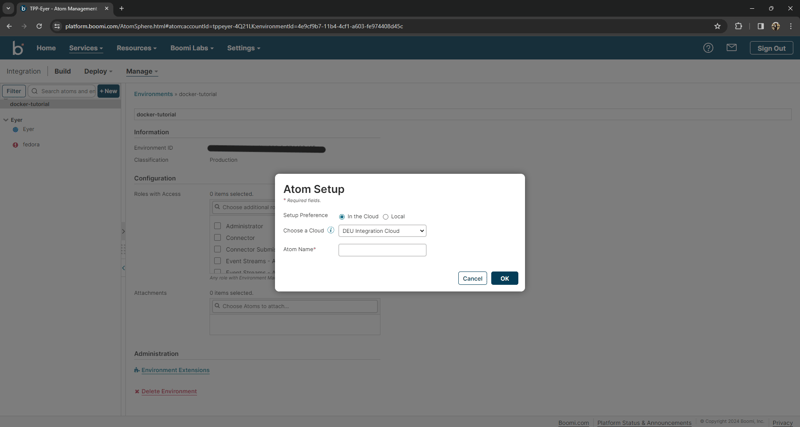
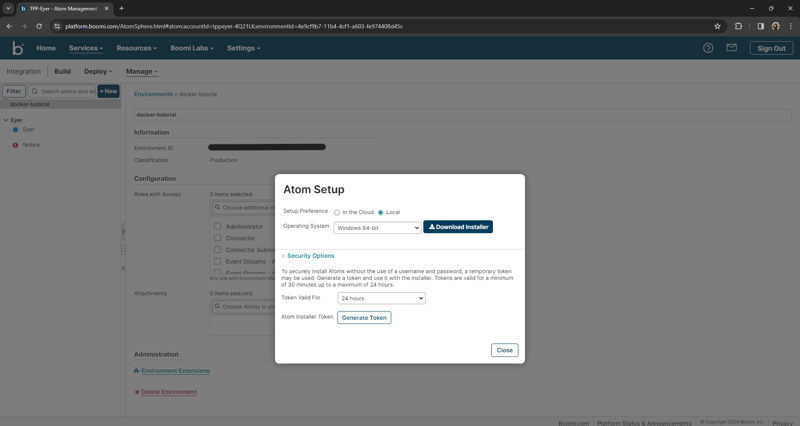
Selecting Atom opens up the Atom setup modal.
Select Local for the Setup Preference, as this guide covers local Boomi installation.
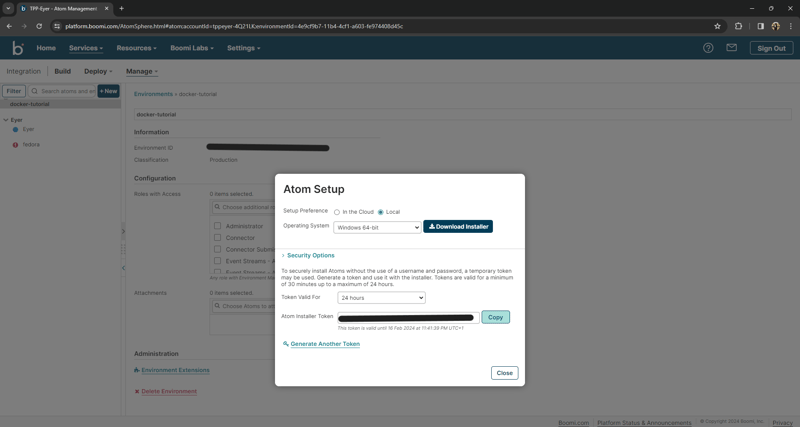
Expand the Security Options section in the Atom Setup and click Generate Token. Copy the provided Atom Installer Token. You will need this token later to authenticate your Docker container.
Once your environment is configured, the next step is to install the Boomi Atom using its Docker image.
Pulling the Boomi image
A Docker image is a read-only template containing all the instructions and components needed to create a Docker container, an isolated environment running an application or service. The Boomi Atom Docker image is no different, as it contains the following components:
- A minimal Red Hat Enterprise Linux Universal Base Image (RHEL UBI)
- The latest Boomi-supported version of Java
- Code to retrieve, set up, and invoke the Atom 64-bit installer
To prevent compatibility issues, ensure you download the latest Boomi Docker image. As of this writing, the most recent version is 5.0.2.-rhel. You can always verify the latest release on Docker Hub.
Setting up your app
Before pulling or downloading the docker image, create a project directory in which your image will live.
mkdir <name of your project> // make a new project directory
cd <name of your project> // change the current directory to the project directory
Pulling the Docker Boomi Atom Image
To download the Boomi Atom Docker image, run the following command, replacing <image_tag> with the specific version you want:
docker pull boomi/atom:<image_tag>
Creating a docker-compose.yml file
Next, open up your project’s directory in your text editor. In your text editor, create a docker-compose.yml file and paste the following code while updating the placeholders with your values:
services:
  atom:
    image: boomi/atom:5.0.2-rhel
    container_name: <your name of the container>
    volumes:
      - <your host directory>:/mnt/boomi:Z
    environment:
      - BOOMI_ATOMNAME=<your atom name>
      - INSTALL_TOKEN=<your atom installer token>
      - BOOMI_ENVIRONMENTID=<your environment ID>
      - ATOM_LOCALHOSTID=<your atom name>
    ports: [9090:9090]
These fields in the code block configure your Boomi Docker Container:
-
image: This specifies the base Docker image for creating the container -
container: This allows you to personalize the container name, making it easier to identify and manage -
- <your host directory>:/mnt/boomi:Z: This mounts a host directory onto the container's /mnt/boomi directory with the "Z" compression option. Make sure the host directory exists and has the necessary permissions -
BOOMI_ATOMNAME: This allows you to give your installed Atom a custom name. This name will show up on the AtomSphere Atom Management page -
INSTALL_TOKEN: This field specifies the unique Atom Installer Token you copied from your Atom Setup security options. It authorizes the installation process -
BOOMI_ENVIRONMENTID: This field holds the Boomi environment ID that you copied after creating your Boomi environment -
ATOM_LOCALHOSTID: Specifies a unique and persistent local host ID independent of any assigned IP address. It ensures consistent identification within the container
Once you've finished creating your docker-compose.yml file, launch the container by running the command docker compose up -d. If successful, you should find a new Atom listed within your Boomi environment on the Boomi website.
You've successfully installed the Boomi Atom runtime on Docker! Head to the Boomi documentation for the next steps to learn how to create your first integration process.
Conclusion
Seamless data integration is not a convenience but a necessity for businesses striving to stay ahead. As you've seen throughout this article, Boomi offers a powerful solution for tackling data silos, acting as a bridge that seamlessly connects disparate applications and databases. But the benefits don't stop there; by harnessing the power of Docker, you can further streamline your integration journey with simplified deployment, enhanced portability, and resource efficiency.
This article shows you how to get started. Exploring the intricacies of installing Boomi Atom runtime on Docker, from creating environments to pulling the Docker image and configuring the runtime environment.
Check out the Boomi website to learn more about what Boomi offers.

