
Gitness is an open source development platform from Harness that hosts your source code repositories and runs your development life cycle pipelines.
This tutorial covers how to build and test a Golang application with Gitness.
Installation
You can install Gitness on any computer running Docker.
Run this command to start Gitness:
docker run -d \
  -p 3000:3000 \
  -v /var/run/docker.sock:/var/run/docker.sock \
  -v /tmp/gitness:/data \
  --name gitness \
  --restart always \
  harness/gitness
Visit http://localhost:3000 in your browser and you will be greeted with the Gitness login page.
Click the Sign Up link.
 |
|---|
Enter your desired user ID, email address and password, then click Sign Up.
 |
|---|
| ℹ️ Note |
|---|
| By default, the first user to sign up will be granted administrator access. To learn more about how to configure Gitness, refer to the configuration documentation. |
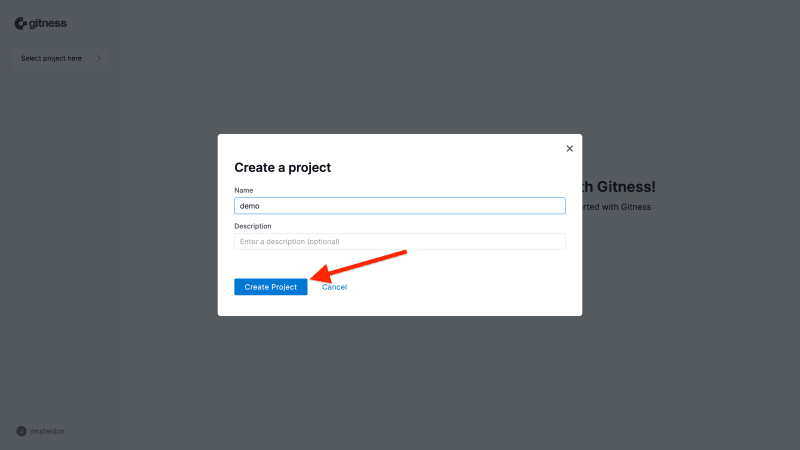
Create Project
Create a project which will contain the Git repository.
Click the New Project button.
 |
|---|
Give the project a name and optional description, then click the Create Project button.
 |
|---|
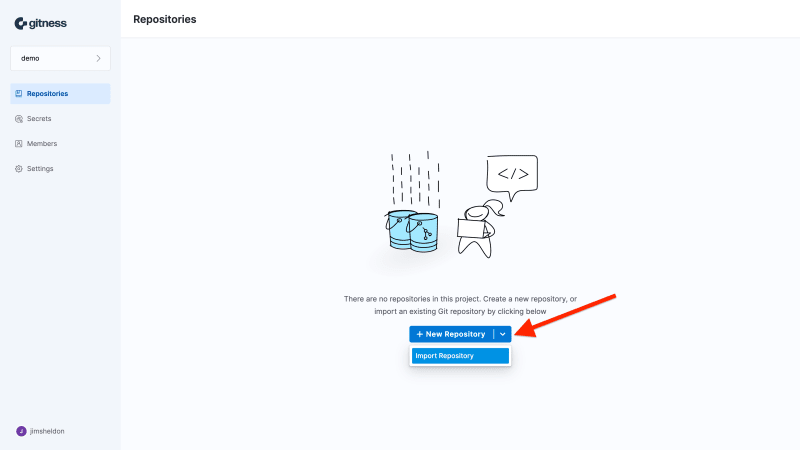
Import Repository
Expand the New Repository drop-down menu and select Import Repository.
 |
|---|
jimsheldon/go-outyet, is a simple Golang application that reports whether a version of Golang has been released yet.
Enter https://github.com/jimsheldon/go-outyet in the Repository URL field, then click Import Repository.
 |
|---|
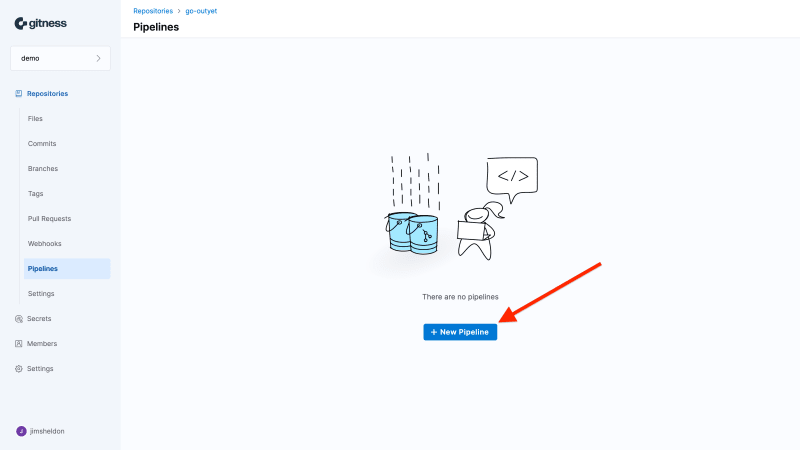
Create Pipeline
Click on the imported repository, then open the Pipelines view from the menu on the left.
 |
|---|
Click the New Pipeline button.
 |
|---|
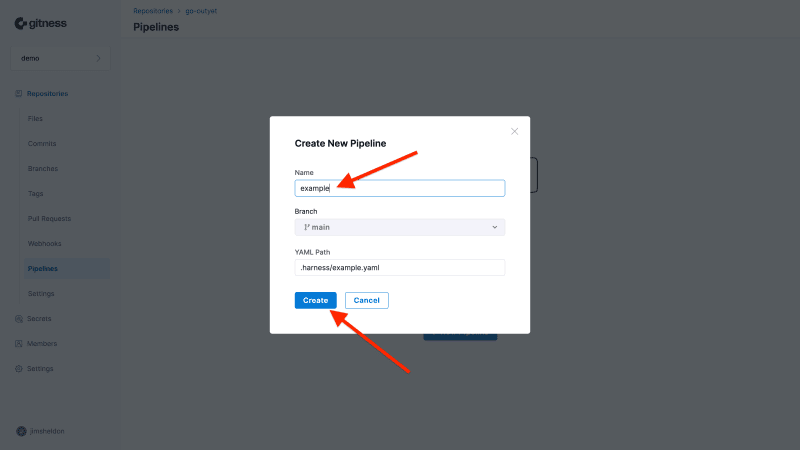
Give the pipeline a name, the YAML path will be generated automatically (it can be changed if desired), then click the Create button.
 |
|---|
Gitness can automatically generate a pipeline based on the code in the repository.
Click the Generate button above the pipeline editor.
 |
|---|
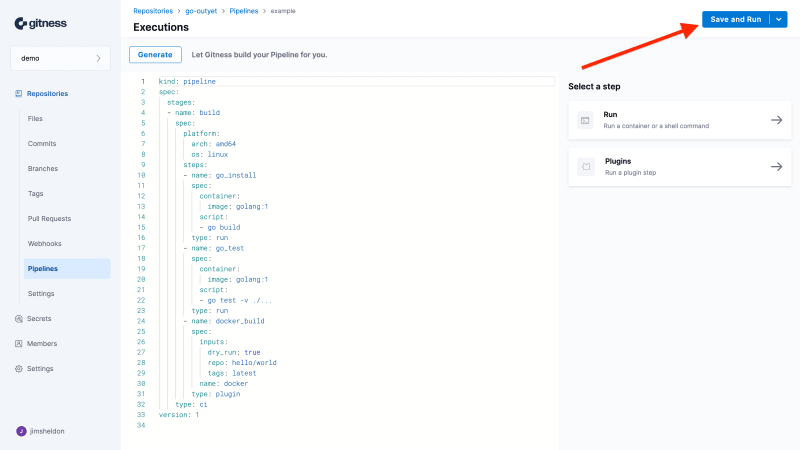
Examine the pipeline that was generated, you will see run steps that build and test the app, and a Docker build plugin step.
The build step compiles the binary, and the test step runs unit tests from the main_test.go file.
The Docker build step builds a Docker image from the Dockerfile file, but does not publish the image (the dry_run: true setting prevents publishing).
Click Save and Run button.
 |
|---|
| ℹ️ Note |
|---|
| Gitness will commit the pipeline file to your repository and create a default pipeline trigger for pull request events, which can be customized if desired. |
Run Pipeline
Click the Run pipeline button in the window that appears.
 |
|---|
You will see the pipeline execution view.
 |
|---|
Congratulations, you just imported a repository and ran a pipeline! 🎉
In this tutorial, we have just scratched the surface of what is possible with Gitness 😄
Next Steps
- Create triggers to automatically run the pipeline on certain events
- Define conditions to only run specific steps for certain events
- Set values dynamically at runtime with expressions
- Review samples for other languages and write some pipelines of your own!
Resources
Cover image by Josh Olalde on Unsplash


