It took me a long time to get my hands dirty. Let me explain: I've been actively contributing to Astro's documentation for over a year.
There are between 5 and 10 of us, if not more, offering you text entirely in French. We do it voluntarily in our spare time, and it helps me learn a little more English every day, as well as informing me about Astro. Not to mention that it encourages the community to help each other with this framework. In short, in Open Source, we're never alone. But you should know that, in a year of contributions, I've NEVER touched Astro. Not even for a simple project or to test it and see how it works.
Even today, I don't know enough about it as I should. In a way, I feel like an impostor. But to remedy that, I created Mr. Robøt's documentation with Astro Starlight!
Introducing Astro Starlight
Let's go step by step, before we tackle Starlight, let's talk about Astro.
Astro is a framework for creating content-driven websites. Whether it's for a personal blog, e-commerce or marketing, these are just a few examples.
It's based on a frontend architecture, with its frontmatter, and its ability to be JavaScript-free. Yes, you read that right. Zero client-side JavaScript. That's where Astro's speed comes from, and that's why it scores 100 points in all Lighthouse categories!
Lighthouse test results on the docs.mrrobot.app page. Note that all four scores (performance, accessibility, best practices, SEO) are 100/100.
You've got loads of other great features, it's customizable, server-first, Islands integration. In short, you'll find more information on the documentation than my simple paragraph. 😆
And where does Starlight fit into all this?
Yes, yes, here we come! As far as I'm concerned, it's just like grafting a limb onto Astro. In the proper sense, it's a module! A module that adds other functionalities specifically to make documentation, quite simply! It's easy to configure, ready to use as soon as you create a new project, in short, it's everything you want when you need to have documentation published on time. I'm not counting the fact that the site generated is responsive, which should be the basis. The theme is customizable, and you can of course modify the CSS as you wish. After all, it's based on Astro!
Initiate code
All you need is Node.js version 18.14.1 or higher, and access to your terminal. On your client, you can initiate it by typing :
yarn create astro --template starlight
If you wish, after installation you can add a framework such as React, Vue, Svelte, Tailwind and others with npx astro add. (See documentation to add an integration).
thomasbnt@thomasbnt:~/lab$ yarn create astro --template starlight
yarn create v1.22.19
[1/4] Resolving packages...
[2/4] Fetching packages...
[3/4] Linking dependencies...
[4/4] Building fresh packages...
success Installed "create-astro@4.6.0" with binaries:
      - create-astro

 astro   Launch sequence initiated.

   dir   Where should we create your new project?
         ./interstellar-inclination
      ◼  tmpl Using starlight as project template
 ██████  Template copying...

  deps   Install dependencies?
         Yes
 ██████  Installing dependencies with yarn...

    ts   Do you plan to write TypeScript?
         No
      ◼  No worries! TypeScript is supported in Astro by default,
         but you are free to continue writing JavaScript instead.

   git   Initialize a new git repository?
         No
      ◼  Sounds good! You can always run git init manually.

  next   Liftoff confirmed. Explore your project!

         Enter your project directory using cd ./interstellar-inclination
         Run yarn dev to start the dev server. CTRL+C to stop.
         Add frameworks like react or tailwind using astro add.

         Stuck? Join us at https://astro.build/chat

╭──❄️─╮  Houston:
│ ◠ ◡ ◠  Good luck out there, astronaut! 🚀
╰─────╯
Done in 52.80s.
The process is so simple, over the years we've simplified certain tasks, and this one, the fact of not having to look for one package version and not the other, I think it's just great, a time saver. Thank you Astro. 💜🚀
This gives you something like this:
.
├── README.md
├── astro.config.mjs
├── node_modules
├── package-lock.json
├── package.json
├── public
│   └── favicon.svg
├── src
│   ├── assets
│   │   └── houston.webp
│   ├── content
│   │   ├── config.ts
│   │   └── docs
│   │       ├── guides
│   │       │   └── example.md
│   │       ├── index.mdx
│   │       └── reference
│   │           └── example.md
│   └── env.d.ts
└── tsconfig.json
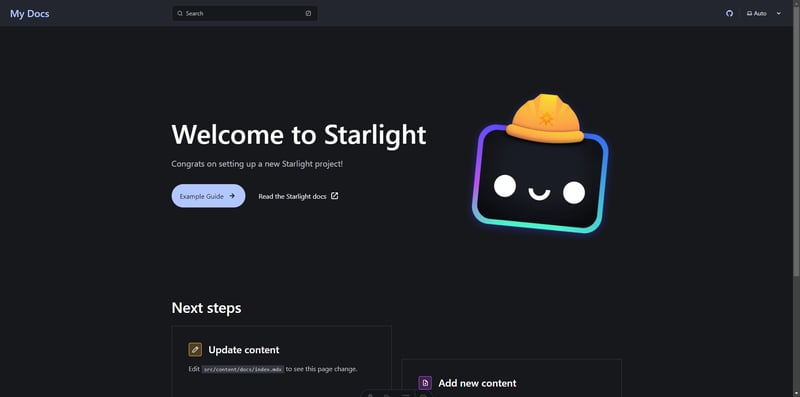
All you have to do is.... launch the website, and go to http://localhost:4321/!
yarn dev
The content of your documentation is written in English by default, but everything is editable. I remind you that this is code, and that the next chapter is... editing a page!
Modify a page
Open your beautiful IDE, and you'll notice that a README file is there to guide you. Feel free to read it and get a feel for how it works, as well as having the documentation always at your fingertips.
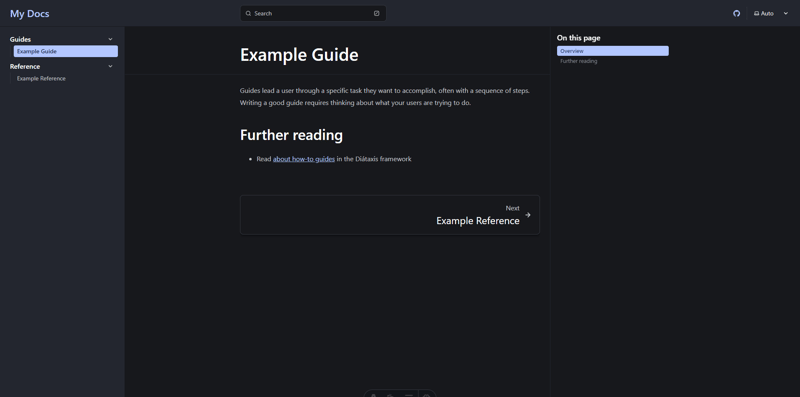
We're going to directly modify that page you saw just above, the index. It's the one we'll see when we get to the documentation, the one that should make the first impression and guide us with some additional information like social networks.
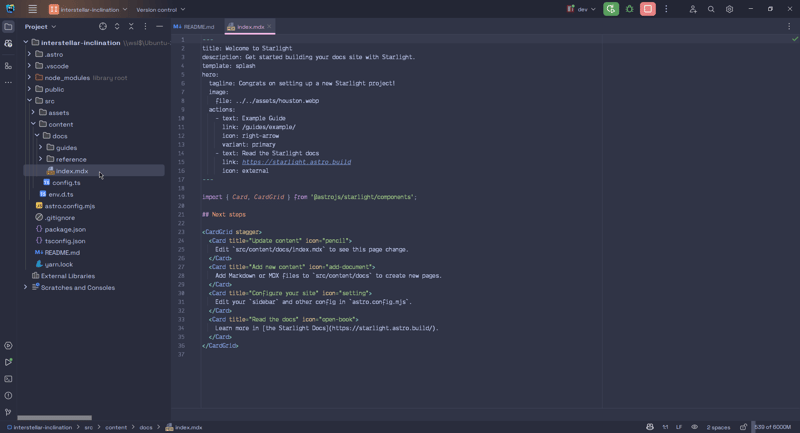
To do this, we go to src/content/docs/index.mdx :
We find the frontmatter, the part at the very top between the --- hyphens, which declares the page title, description and template used and other functionalities we can add. In this example, we're going to keep it simple, because for the record I'm not an expert in the field, and guiding you through a place that even I don't know much about is like stepping on nettles, it hurts. 😆
But you're about to see how to add some nice little features like status badges, or the ability to highlight or hide the page.
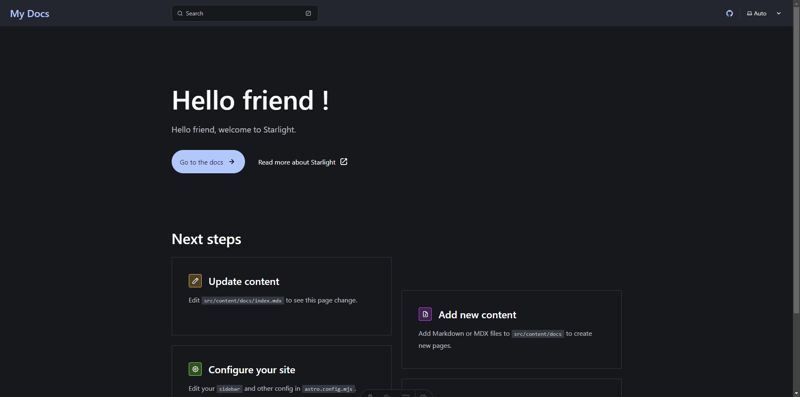
In short, let's change the title, for example, and remove the Houston image on the right (sorry).
As you can see just below, there are components,
import { Card, CardGrid } from '@astrojs/starlight/components';

## Next steps

<CardGrid stagger>
    <Card title="Update content" icon="pencil">
        Edit `src/content/docs/index.mdx` to see this page change.
    </Card>
    <Card title="Add new content" icon="add-document">
        Add Markdown or MDX files to `src/content/docs` to create new pages.
    </Card>
    <Card title="Configure your site" icon="setting">
        Edit your `sidebar` and other config in `astro.config.mjs`.
    </Card>
    <Card title="Read the docs" icon="open-book">
        Learn more in [the Starlight Docs](https://starlight.astro.build/).
    </Card>
</CardGrid>
By default, Starlight includes them, but you can add your own. See components documentation.
Let's move on to a documentation page (click on the blue button if you haven't edited the code). This is where you can document whatever you want, a project, a kind of wiki... whatever you want ✨
All files are located in /src/content/docs, so each folder you make allows you to sort them. In this case, for example, there are two folders, guides/ and reference/. The result for this page is /src/content/docs/guides/example.md ! By the way, the file is in .md but you can change it to .mdx. I think you'll have fewer errors with your IDE.
Let's modify the whole thing to make something more complete!
astro.config.mjs
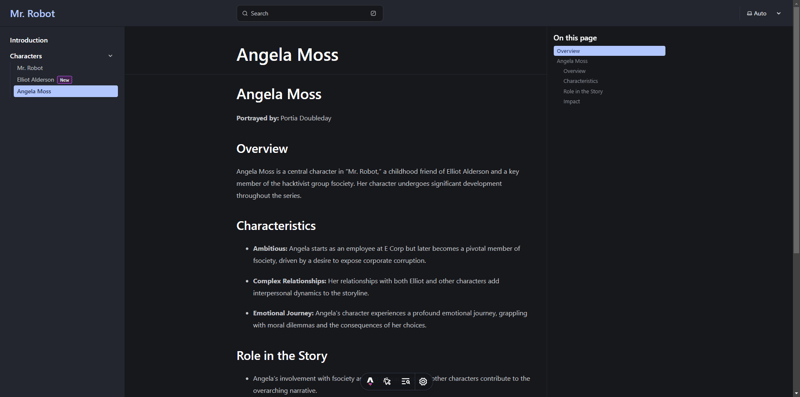
This file is important, as it creates the menu on the left (sidebar), the social network links on the top right, the title you'll have at the top left of the documentation, and lots of other options.
Here, I'm going to modify the sidebar part to refer to the pages I've modified/added for this example.
import { defineConfig } from 'astro/config';
import starlight from '@astrojs/starlight';

// https://astro.build/config
export default defineConfig({
    integrations: [
        starlight({
            title: "'Mr. Robot',"
            sidebar: [
                {
                    label: 'Introduction',
                    link: '/introduction/',
                },
                {
                    label: 'Characters',
                    autogenerate: { directory: 'characters' },
                },
            ],
        }),
    ],
});
The Introduction page stands alone, so I've removed the items and added a link directly. As for the characters, instead of adding them page by page, I simply used autogenerate. It allows you to... generate... automatically from your targeted folder (in this case characters). Here's how it works:
And this is how my file is organized:
.
├── characters
│   ├── angelamoss.mdx
│   ├── elliotalderson.mdx
│   └── mrrobot.mdx
├── index.mdx
└── introduction.mdx
autogenerate
By default with autogenerate, files are displayed in alphabetical order, but I tell it that the "Mr. Robot" page should be at the very top, with the order attribute directly in the frontmatter. Be very careful with the tabulation of your frontmatter, I've had quite a few errors.
---
title: "Mr. Robot"
sidebar:
  order: 1
---
Badges
I mentioned it above, and you can see it on the screenshot, a colored badge has appeared just to the right of a text, and it looks like this in code (still in the frontmatter):
sidebar:
   order: 1
   badge:
      text: 'New'
      variant: tip
As you can see, your documentation takes shape very quickly! On the right are the steps/titles in the page, and on the left your menu that encompasses it all. 🚀
Now we're going to take a look at a bonus part of Starlight. The one I particularly like, the one that brings people together: internationalization!
Internationalization (i18n)
Full documentation is great.
Source code that can be edited by anyone is great.
Sharing this documentation on the other side of the world is super coo.... But what if the person doesn't understand what it says?
And that's where internationalization comes in! 🦸♀️🦸♂️
In Astro Starlight, we can, in just a few lines, add the possibility of putting the documentation in several languages. Nothing is magic, everything is fantastic! On a more serious note, you'll understand how it's handled with these bits of code:
import { defineConfig } from 'astro/config';
import starlight from '@astrojs/starlight';

// https://astro.build/config
export default defineConfig({
    integrations: [
        starlight({
            title: 'Mr. Robot',
            sidebar: [
                {
                    label: 'Introduction',
                    link: '/introduction/',
                },
                {
                    label: 'Characters',
                    autogenerate: { directory: 'characters' },
+                   translations: {
+                       fr: 'Personnages',
+                   },
                },
            ],
+           defaultLocale: 'root',
+           locales: {
+               root: {
+                   label: 'English',
+                   lang: 'en',
+               },
+               fr: {
+                   label: 'Français',
+                   lang: 'fr',
+               },
+           },
        }),
    ],
});
Here, the default language is en for English. And we've added fr for French as another choice. So we can choose our language on the website in the top right-hand corner:
The drop-down list of languages available for documentation. Here we have English and French. This gives your /src/content/docs folder :
.
├── characters
│   ├── angelamoss.mdx
│   ├── elliotalderson.mdx
│   └── mrrobot.mdx
├── fr
│   └── characters
│       └── elliotalderson.mdx
├── index.mdx
└── introduction.mdx
Each language has its own folder, and in each folder the folder name must match that of the root language.
Exemple : introduction.mdx (EN) → /fr/introduction.mdx (FR)
You have the official guide on how to integrate i18n into your project.
Thank you for reading all the way to the end, and please feel free to share your documentation around the world and even here, it could be a little gold mine for some, and a discovery for others! Here's a perfect example of documentation, from Mr. Robøt, listing the commands and functions of the Discord robot.

