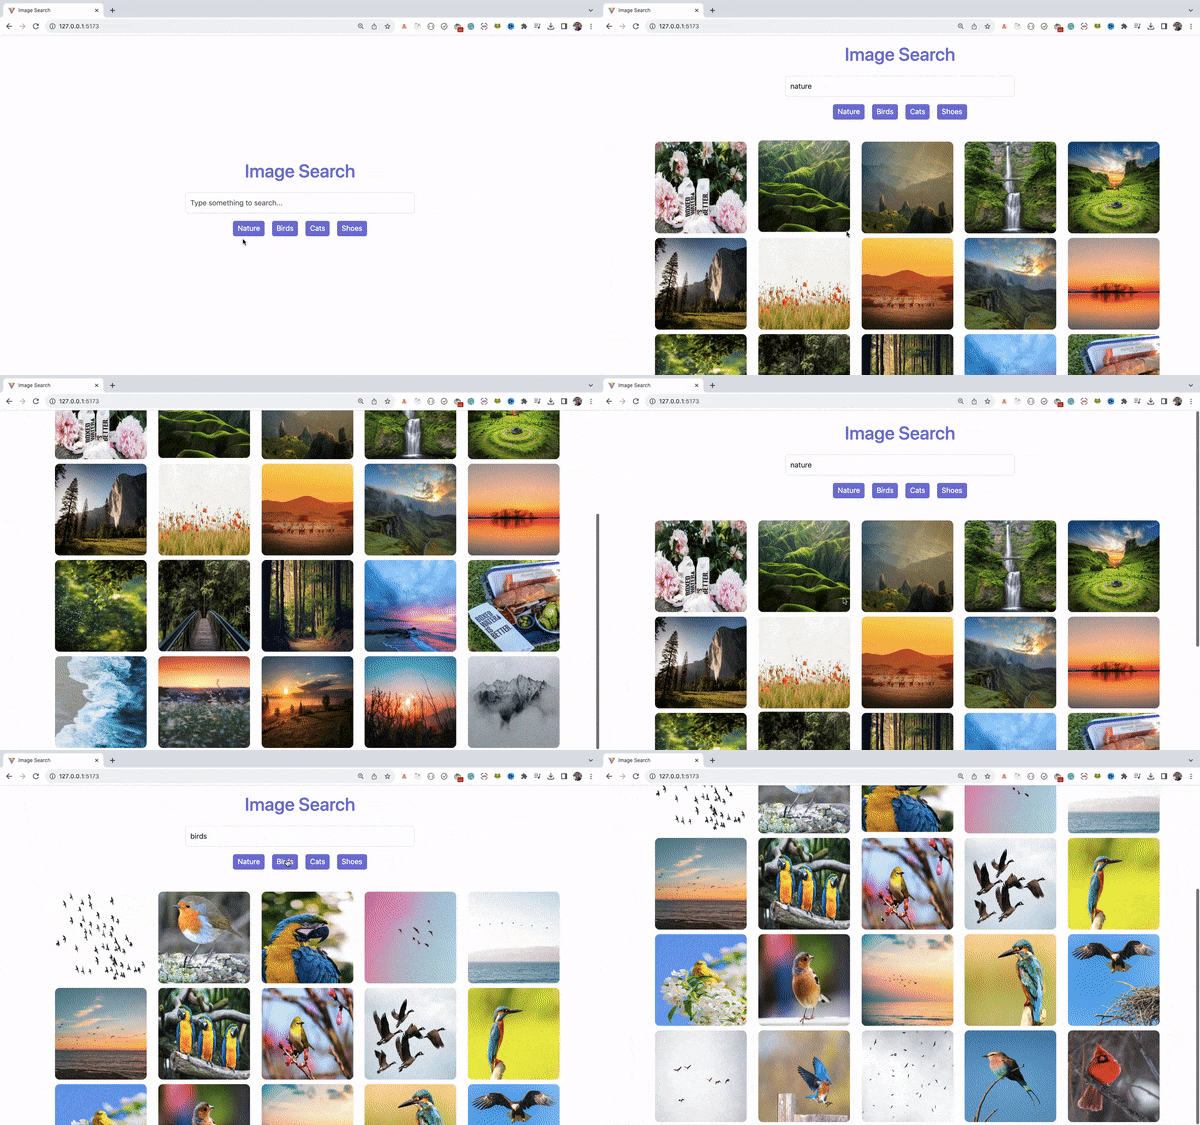
In this article, we will build step-by-step a beautiful Unsplash Image Search App with pagination using React.
By building this app, you will learn:
How to build an application using Unsplash API in React
How to make API Calls in different scenarios
How to use
useCallbackhook to avoid function re-creationHow to use ESLint to fix application issues
How to Implement Pagination in React
and much more...
Want to watch the video version of this tutorial? You can check out the video below:
Initial Project Setup
We will use Vite to create a project which is a popular alternative to create-react-app.
Execute the following command to create a vite project:
npm create vite
Once executed, you will be asked some questions.
For the project name, enter unsplash_image_search.
For framework, select React and for variant select JavaScript:
Once the project is created, open the project in VS Code and execute the following commands from the terminal:
cd unsplash_image_search
npm install
npm run dev
Access the application by navigating to http://127.0.0.1:5173/.
You will see the default application screen as shown below:
Next, delete the App.css file and replace the contents of the App.jsx file with the following content:
import React from 'react';
import './index.css';

const App = () => {
  return <div>Welcome to Unsplash Image Search</div>;
};

export default App;
Now, open the index.css file and add the contents from this GitHub repo to it.
Let's install Bootstrap and react-bootstrap npm packages by executing the following command:
npm install bootstrap react-bootstrap
Open the main.jsx file and add the following line of code on the first line, to add the base bootstrap CSS file:
import 'bootstrap/dist/css/bootstrap.min.css';
The complete main.jsx file will look like this:
import 'bootstrap/dist/css/bootstrap.min.css';
import React from 'react';
import ReactDOM from 'react-dom/client';
import App from './App.jsx';
import './index.css';

ReactDOM.createRoot(document.getElementById('root')).render(
  <React.StrictMode>
    <App />
  </React.StrictMode>
);
Now, restart the application by executing npm run dev command.
You will see the welcome message displayed on the screen as shown below:
How to Add Search Input
Now, replace the contents of App.jsx file with the following content:
import React from 'react';
import { Form } from 'react-bootstrap';
import './index.css';

const App = () => {
  return (
    <div className='container'>
      <h1 className='title'>Image Search</h1>
      <div className='search-section'>
        <Form>
          <Form.Control
            type='search'
            placeholder='Type something to search...'
            className='search-input'
          />
        </Form>
      </div>
    </div>
  );
};

export default App;
Here, we're displaying the title of Image search inside a container class, which is a Bootstrap class, to add some margin to the left and right of the page.
Then we added a form with a type of search.
If you check the application, you will see the following screen:
Now, we need to store the value entered by the user somewhere in the component.
As we will have only one input field on the page, we will use the useRef hook instead of the useState hook.
Using the useRef hook does not re-render the component when its value changes, which is good for performance improvement. On the other hand, changing state re-renders the component, so all of the child components will also re-render.
Inside the App.jsx file, declare the useRef hook as shown below:
const searchInput = useRef(null);
Don't forget to add import for useRef hook at the top of the file:
import React, { useRef } from 'react';
Also, add a ref prop for the search input, like this:
<Form.Control
   type='search'
   placeholder='Type something to search...'
   className='search-input'
   ref={searchInput}
/>
Your complete App.jsx file will look like this:
import React, { useRef } from 'react';
import { Form } from 'react-bootstrap';
import './index.css';

const App = () => {
  const searchInput = useRef(null);
  return (
    <div className='container'>
      <h1 className='title'>Image Search</h1>
      <div className='search-section'>
        <Form>
          <Form.Control
            type='search'
            placeholder='Type something to search...'
            className='search-input'
            ref={searchInput}
          />
        </Form>
      </div>
    </div>
  );
};

export default App;
How to Handle the Form Submit Action
When we enter any search term in the search box and press the enter key, we want to add the search functionality.
To do so, add an onSubmit handler to the Form tag and create a handleSearch method. And assign it to the onSubmit prop like this:
import React, { useRef } from 'react';
import { Form } from 'react-bootstrap';
import './index.css';

const App = () => {
  const searchInput = useRef(null);

  const handleSearch = (event) => {
    event.preventDefault();
    console.log('submitted');
  };

  return (
    <div className='container'>
      <h1 className='title'>Image Search</h1>
      <div className='search-section'>
        <Form onSubmit={handleSearch}>
          <Form.Control
            type='search'
            placeholder='Type something to search...'
            className='search-input'
            ref={searchInput}
          />
        </Form>
      </div>
    </div>
  );
};

export default App;
Here, we have added <Form onSubmit={handleSearch}> and inside the handleSearch method we used the event.preventDefault method.
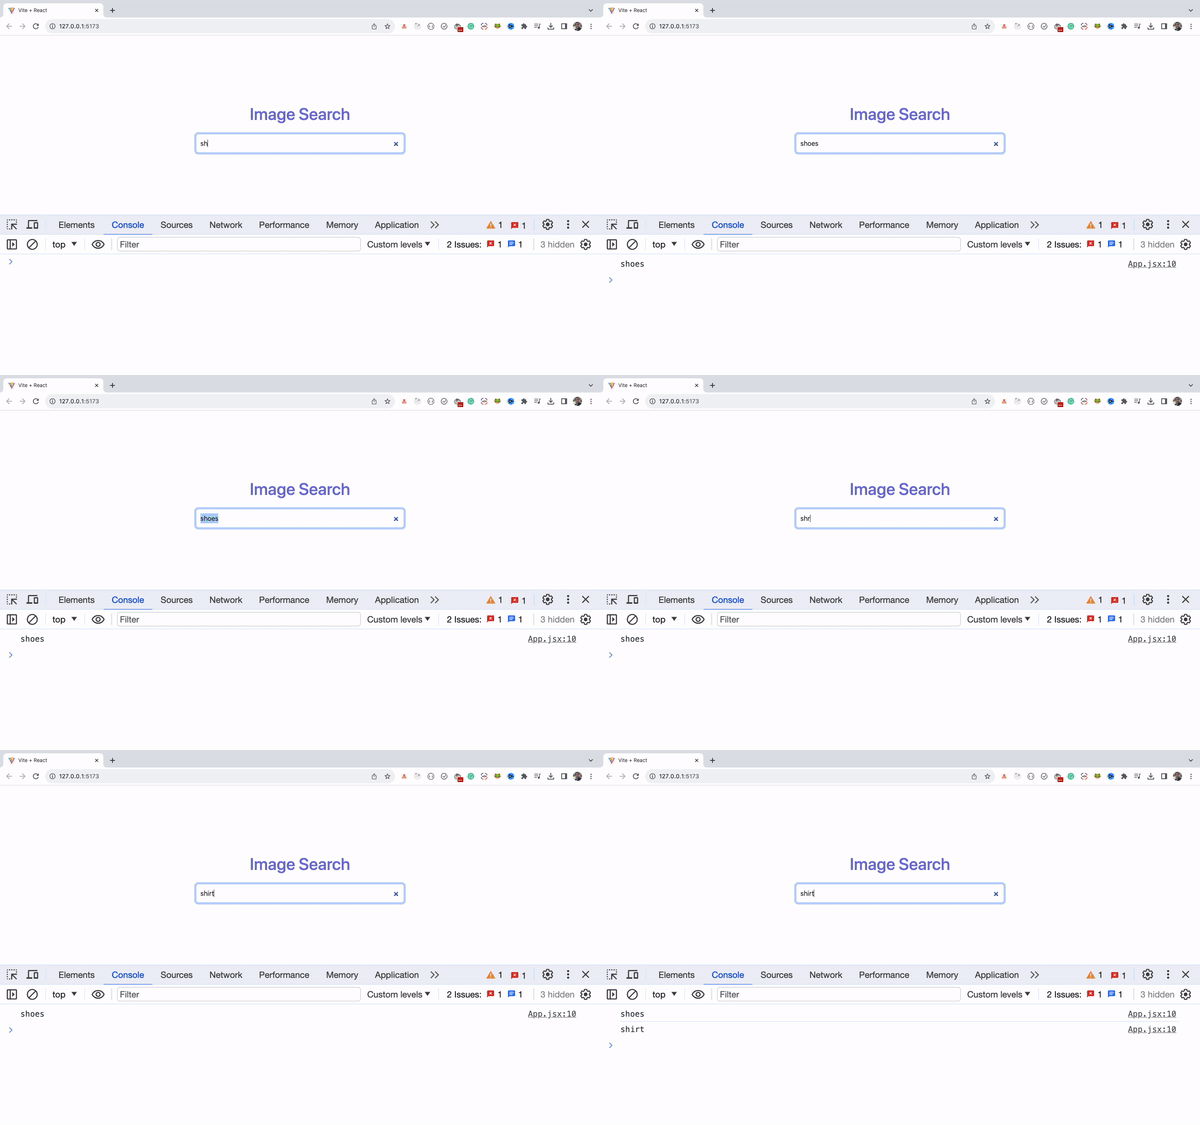
Once the form is submitted by pressing the enter key in the search box, the page will not refresh and a submitted text will be displayed in the console as shown below:
Now, instead of printing "submitted", we can print the value entered by the user using searchInput.current.value.
Here, searchInput is the ref and searchInput.current will be the actual search box input. Also, using searchInput.current.value will give the actual value entered by the user.
So, replace the handleSearch method with the following code:
const handleSearch = (event) => {
  event.preventDefault();
  console.log(searchInput.current.value);
};
And now you will see the entered value displayed in the console:
How to Add Quick Search Options
Now, let's add action buttons with a class of filters for a quick search just below the search-section div:
<div className='container'>
      <h1 className='title'>Image Search</h1>
      <div className='search-section'>
        ...
      </div>
      <div className='filters'>
        <div>Nature</div>
        <div>Birds</div>
        <div>Cats</div>
        <div>Shoes</div>
      </div>
</div>
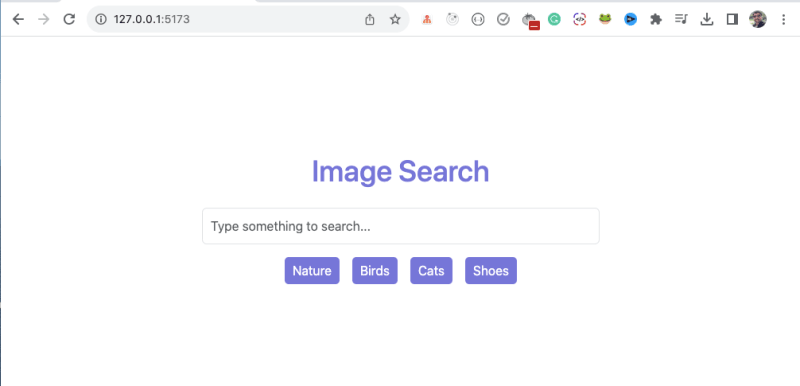
Now, the application will look like this:
When we click on any of the displayed buttons, we can display the clicked button value in the input search box, so we can use it for searching the images.
Change the filters div to the below code:
<div className='filters'>
   <div onClick={() => handleSelection('nature')}>Nature</div>
   <div onClick={() => handleSelection('birds')}>Birds</div>
   <div onClick={() => handleSelection('cats')}>Cats</div>
   <div onClick={() => handleSelection('shoes')}>Shoes</div>
</div>
In the above code, when you click on any option, we're passing the selected option to the handleSelection method.
Now, add a new handleSelection method inside the App component as shown below:
const handleSelection = (selection) => {
  searchInput.current.value = selection;
};
Your complete App.jsx file will look like this:
import React, { useRef } from 'react';
import { Form } from 'react-bootstrap';
import './index.css';

const App = () => {
  const searchInput = useRef(null);

  const handleSearch = (event) => {
    event.preventDefault();
    console.log(searchInput.current.value);
  };

  const handleSelection = (selection) => {
    searchInput.current.value = selection;
  };

  return (
    <div className='container'>
      <h1 className='title'>Image Search</h1>
      <div className='search-section'>
        <Form onSubmit={handleSearch}>
          <Form.Control
            type='search'
            placeholder='Type something to search...'
            className='search-input'
            ref={searchInput}
          />
        </Form>
      </div>
      <div className='filters'>
        <div onClick={() => handleSelection('nature')}>Nature</div>
        <div onClick={() => handleSelection('birds')}>Birds</div>
        <div onClick={() => handleSelection('cats')}>Cats</div>
        <div onClick={() => handleSelection('shoes')}>Shoes</div>
      </div>
    </div>
  );
};

export default App;
How to Get Access to the Unsplash API
Now, to implement the image search, we need to get the API key from Unsplash Website.
Navigate to this URL, and click on the "Register as a developer" button displayed at the top right corner of the page. Create your account by entering all the necessary details.
Once registered, you will be redirected to this page as shown below:
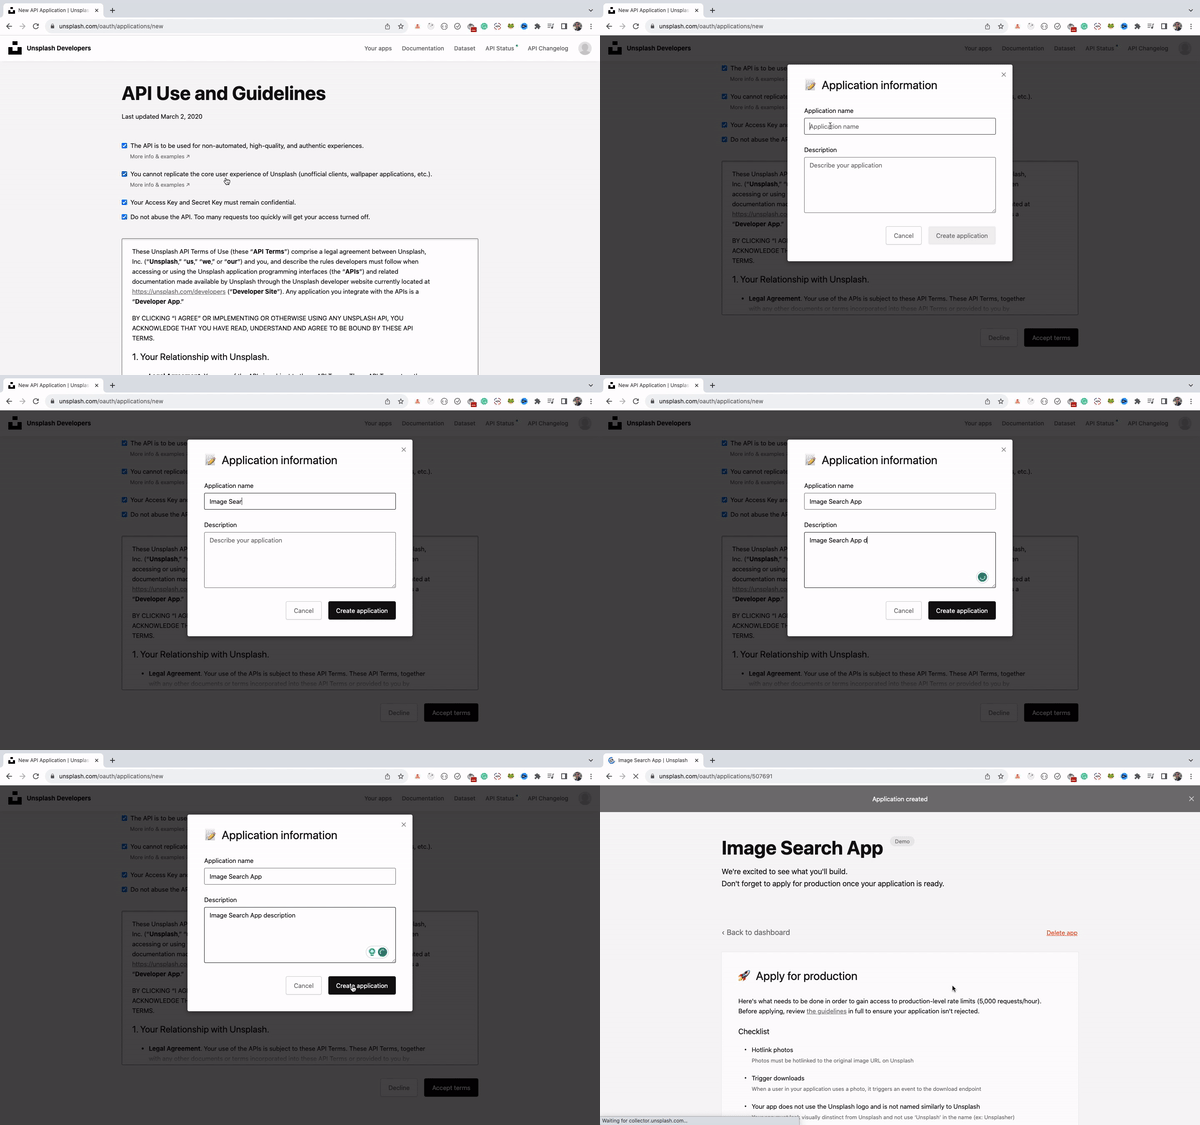
Click on the New Application button. On the next screen:
Check all the checkboxes and click on
Accept TermsbuttonEnter values for
Application nameandDescriptionand clickCreate applicationbutton
Scroll down a bit and copy the Access Key which is displayed on the screen:
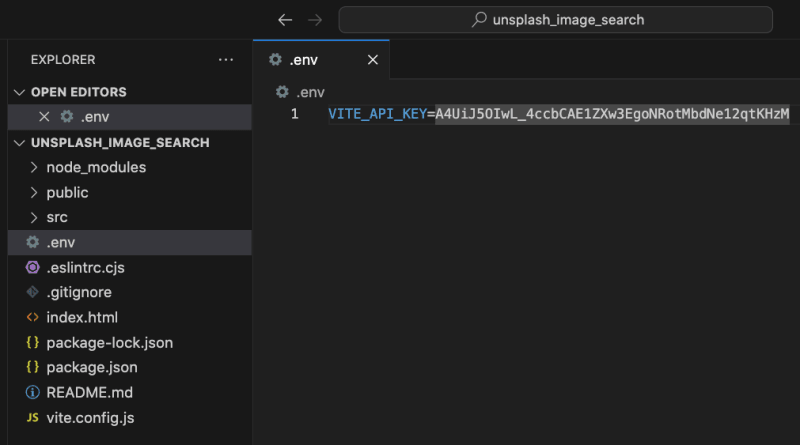
Next, create a new .env file in your project and add a new environment variable with the name VITE_API_KEY. Also, assign the copied value of the API key to it:
VITE_API_KEY=A4UiJ5OIwL_4ccbCAE1ZXw3EgoNRotMbdNe12qtKHzM
Make sure to start the variable name with VITE_ so it will be accessible in the application.
Your application folder structure will look like this:
Also, make sure to add .env in the .gitignore file so the file will not be pushed to GitHub when changes are pushed to GitHub.
Now, navigate to Unsplash Documentation and click on the Search photos by keyword section. And copy the following base API URL: https://api.unsplash.com/search/photos.
Now, open App.jsx file and paste that copied URL as API_URL after all import statements, like this:
const API_URL = 'https://api.unsplash.com/search/photos';
According to the documentation, the search photos API with the above URL accepts the query, page and per_page as the query parameters. Just note this, as we will be using it soon.
How to Make an API Call to the Unsplash API
To make an API call, let's first install the axios npm library by executing the following command from the project folder:
npm install axios
Once installed, start the application again by executing the npm run dev command.
Next, declare a new constant just below the API_URL constant:
const IMAGES_PER_PAGE = 20;
Here, we're specifying to display 20 images per page when we will implement pagination. You can change it to any value you want.
Add a new fetchImages function inside the App component like this:
const fetchImages = async () => {
  try {
    const { data } = await axios.get(
      `${API_URL}?query=${
        searchInput.current.value
      }&page=1&per_page=${IMAGES_PER_PAGE}&client_id=${
        import.meta.env.VITE_API_KEY
      }`
    );
    console.log('data', data);
  } catch (error) {
    console.log(error);
  }
};
Here, we have defined a fetchImages function which is declared async so we can use await inside it.
If you're not aware of promises and async/await, I highly recommend checking out this article.
Then, inside the fetchImages function, we're making a GET API call using axios to the URL which we have stored in the API_URL constant: https://api.unsplash.com/search/photos.
For the API URL, we're passing the following query parameters using template literal syntax:
querywith the value of user entered or quick search option valuepagewith a value of1to get the first page dataper_pagewith the value of20which is defined in the constantIMAGES_PER_PAGEclient_idwith the value of the API key from the.envfile.
As we're using Vite, to access environment variables from the .env file, we need to use import.meta.env.VITE_API_KEY.
Here, VITE_API_KEY is the environment variable we declared in the .env file.
Also, import the axios library at the top of the file like this:
import axios from axios;
The updated App.jsx file will look like this:
import axios from 'axios';
import React, { useRef } from 'react';
import { Form } from 'react-bootstrap';
import './index.css';

const API_URL = 'https://api.unsplash.com/search/photos';
const IMAGES_PER_PAGE = 20;

const App = () => {
  const searchInput = useRef(null);

  const fetchImages = async () => {
    try {
      const { data } = await axios.get(
        `${API_URL}?query=${
          searchInput.current.value
        }&page=1&per_page=${IMAGES_PER_PAGE}&client_id=${
          import.meta.env.VITE_API_KEY
        }`
      );
      console.log('data', data);
    } catch (error) {
      console.log(error);
    }
  };

  const handleSearch = (event) => {
    event.preventDefault();
    console.log(searchInput.current.value);
  };

  const handleSelection = (selection) => {
    searchInput.current.value = selection;
    fetchImages();
  };

  return (
    <div className='container'>
      <h1 className='title'>Image Search</h1>
      <div className='search-section'>
        <Form onSubmit={handleSearch}>
          <Form.Control
            type='search'
            placeholder='Type something to search...'
            className='search-input'
            ref={searchInput}
          />
        </Form>
      </div>
      <div className='filters'>
        <div onClick={() => handleSelection('nature')}>Nature</div>
        <div onClick={() => handleSelection('birds')}>Birds</div>
        <div onClick={() => handleSelection('cats')}>Cats</div>
        <div onClick={() => handleSelection('shoes')}>Shoes</div>
      </div>
    </div>
  );
};

export default App;
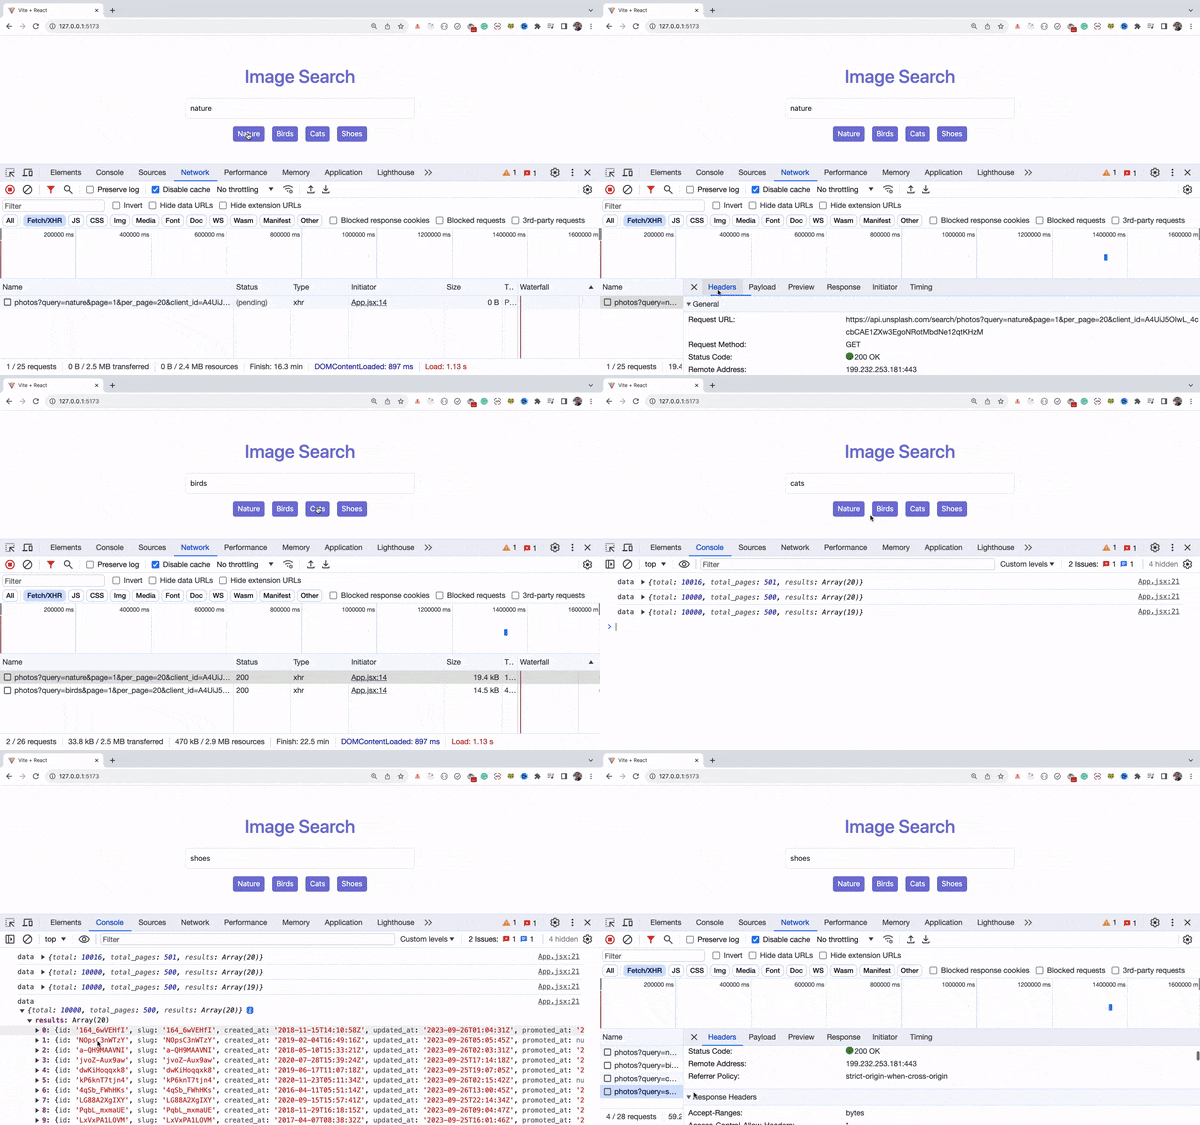
If you check the application, you will see that, on every click of the quick search option, the API call is made to the Unsplash API, and we get the data for the selected option.
To make an API call when we enter the search text and press enter key, we need to call the fetchImages function from the handleSearch function also.
To do this, add a call to fetchImages function inside the handleSearch function as shown below:
const handleSearch = (event) => {
    event.preventDefault();
    console.log(searchInput.current.value);
    fetchImages();
};
Now, you will be able to see the API call made in the network tab when we enter a search text and press enter key.
How to Store API Data Using State
Now, let's display the images coming from the API on the screen.
To display them on the screen, we first need to store the data coming from the API.
If you see the structure of the API response, you will see as shown below:
So, declare two states in the App.jsx file: one for storing response images that are coming in the results property, and another for storing total_pages so we can implement the pagination.
const App = () => {
  const searchInput = useRef(null);
  const [images, setImages] = useState([]);
  const [totalPages, setTotalPages] = useState(0);
  ....
}
And update the fetchImages function to store the data.results using setImages and total pages using setTotalPages function:
const fetchImages = async () => {
    try {
      const { data } = await axios.get(
        `${API_URL}?query=${
          searchInput.current.value
        }&page=1&per_page=${IMAGES_PER_PAGE}&client_id=${
          import.meta.env.VITE_API_KEY
        }`
      );
      console.log('data', data);
      setImages(data.results);
      setTotalPages(data.total_pages);
    } catch (error) {
      console.log(error);
    }
  };
How to Display Images On Screen
Now, let's display the images that we have stored in the images state variable.
If you expand the individual image response of the API, you can see the id, alt_description, urls properties which we can use to display individual images.
So, just after the filters div, add another div for displaying images like this:
<div className='filters'>
  ...
</div>
<div className='images'>
  {images.map((image) => {
    return (
      <img
        key={image.id}
        src={image.urls.small}
        alt={image.alt_description}
        className='image'
      />
    );
  })}
</div>
Here, we're displaying the small version of the image from the urls property of the individual image.
We can simplify the above code further. Inside the array map method, instead of using a curly bracket with a return keyword, we can re-write it like this:
<div className='filters'>
  ...
</div>
<div className='images'>
{images.map((image) => (
  <img
    key={image.id}
    src={image.urls.small}
    alt={image.alt_description}
    className='image'
  />
))}
</div>
Here, we're implicitly returning the JSX from the array map method by adding a round bracket around the JSX.
Now, If you search for any text, you will see the images displayed correctly.
How to Implement Pagination
Now, we will add previous and next buttons to see different sets of images.
So, first declare a new state in the App component as shown below:
const [page, setPage] = useState(1);
Inside the fetchImages function, change page=1 to page=${page} so when we change the value of the page, images for the selected page will be loaded.
Add a new div with a class of buttons just below the images div as shown below:
<div className='images'>
  ...
</div>
<div className='buttons'>
  {page > 1 && <Button>Previous</Button>}
  {page < totalPages && <Button>Next</Button>}
</div>
In the above code, we show the Previous button only if the value of page is greater than 1, which means for the first page, we will not see the Previous button.
And If the current value of page is less than the totalPages, then only we show the Next button. This means that for the last page, we will not see the Next button.
If you remember, we have already set the value of totalPages inside the fetchImages function by calling the setTotalPages function, and we're using it above to hide the Next button.
Also, don't forget to add import for Button component from react-bootstrap inside the App component:
import { Button } from 'react-bootstrap';
Now, when we click on the Previous button, we need to decrement the value of the page state variable. And when we click on Next button, we need to increment the value of the page state variable.
So, let's add an onClick handler for both of these buttons as shown below:
<div className='buttons'>
  {page > 1 && (
    <Button onClick={() => setPage(page - 1)}>Previous</Button>
  )}
  {page < totalPages && (
    <Button onClick={() => setPage(page + 1)}>Next</Button>
  )}
</div>
Let's console log the value of the page state variable, so we can see the value getting updated.
After handleSelection method, add console.log like this:
console.log('page', page);
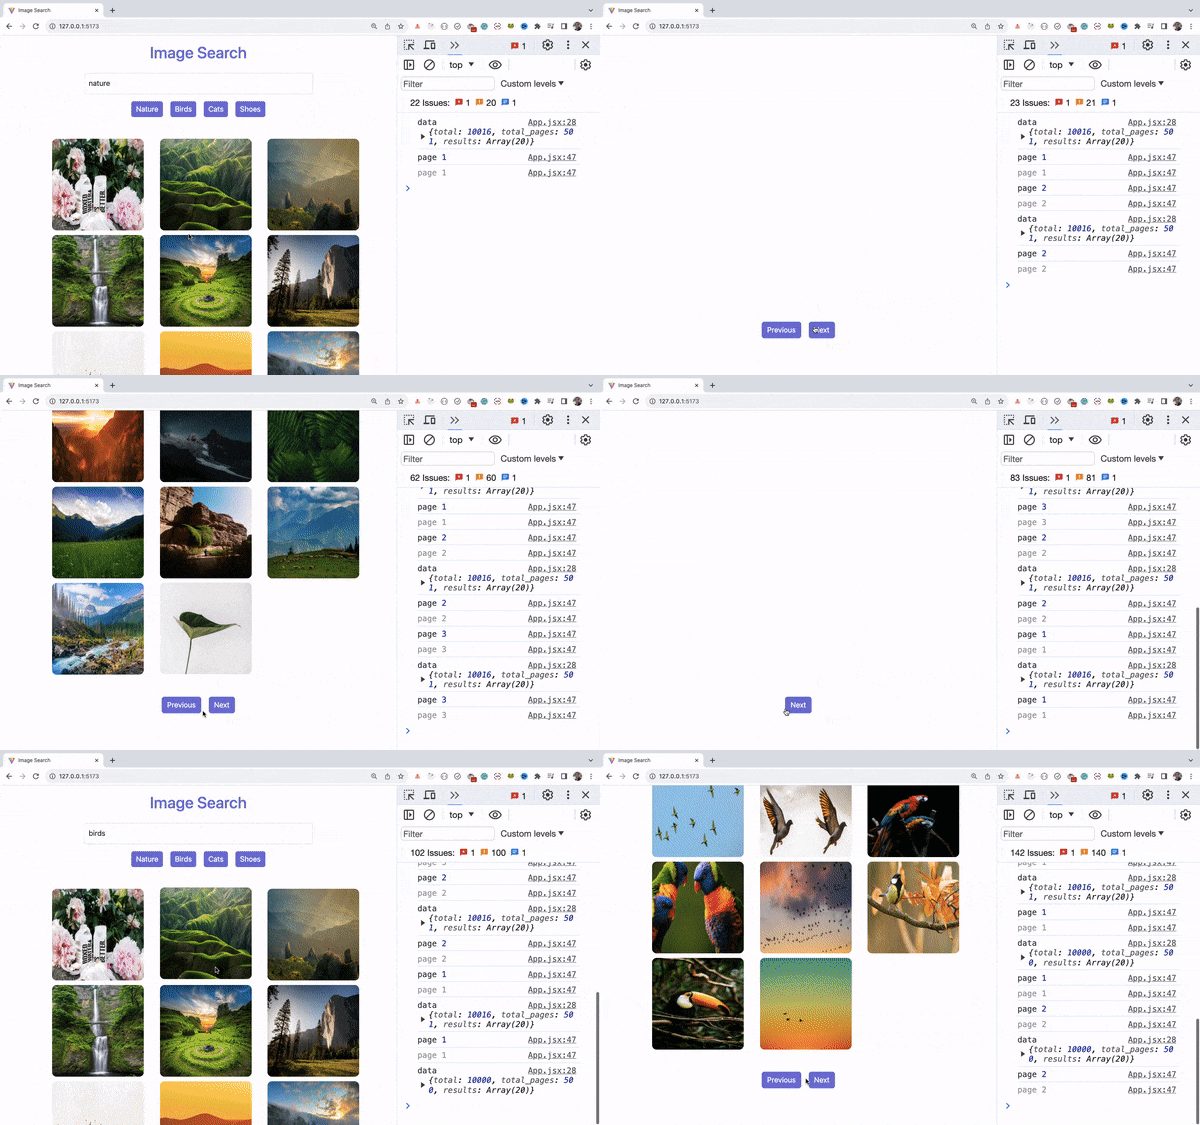
As you can see above, initially for the first page, we don't see a Previous button.
And when we click on the Next button, we see the Previous and Next buttons, and the page value is also incremented by 1 as you can see in the console.
So, on every Next button click, the page value is incremented by 1. And on every Previous button click, the page value is decremented by 1.
And when we come back to the first page, the Previous button is hidden again which is as expected.
As you might have noticed above, the page value changes on click of Previous and Next buttons but a new set of images are not loaded when we click of those buttons.
This is because we're not making the API call again with an updated page value when the page value changes.
So let's do just that.
Add a useEffect hook in the App component like this:
useEffect(() => {
  fetchImages();
}, [page]);
Now, every time we click on Previous or Next button, the page value changes, so the above useEffect hook will be executed, where we're calling the fetchImages function to load the next set of images.
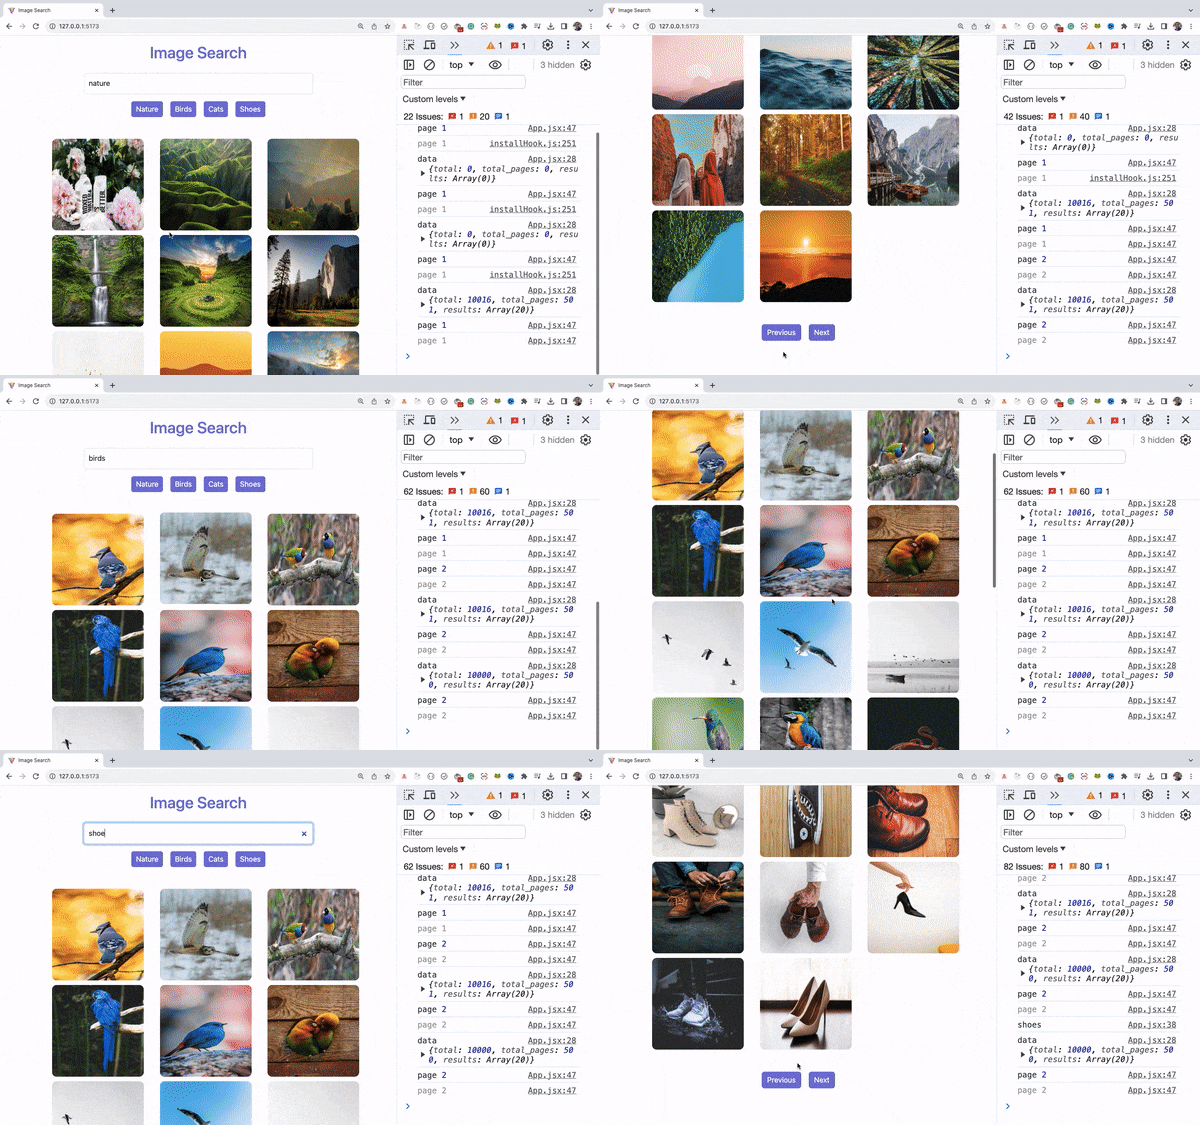
Now, If you check the application, you will see images loaded correctly.
As you can see above, we're correctly loading images when clicked on Previous or Next button.
But there is a small issue.
If we're not on the first or last page, we see the Previous and Next buttons and when we try to search for another term or click on quick search options, we still see the Previous button.
Ideally, when we search for another term or click on another quick search option, we should start from the first page, so only the Next button should be visible. But right now both Previous and Next buttons are visible as you can see below:
To fix this issue, we need to reset the page state value once we search for another term or click on another quick search option.
So inside the handleSearch and handleSelection methods, call setPage function with a value of 1 like this:
const handleSearch = (event) => {
  event.preventDefault();
  console.log(searchInput.current.value);
  fetchImages();
  setPage(1);
};

const handleSelection = (selection) => {
  searchInput.current.value = selection;
  fetchImages();
  setPage(1);
};
As you can see, we're repeating the fetchImages and setPage function calls in both of these methods.
So, let's create another function with a name resetSearch and move the fetchImages and setPage function calls inside it. Let's call that function from handleSearch and handleSelection methods as shown below:
const resetSearch = () => {
  setPage(1);
  fetchImages();
};

const handleSearch = (event) => {
  event.preventDefault();
  console.log(searchInput.current.value);
  resetSearch();
};

const handleSelection = (selection) => {
  searchInput.current.value = selection;
  resetSearch();
};
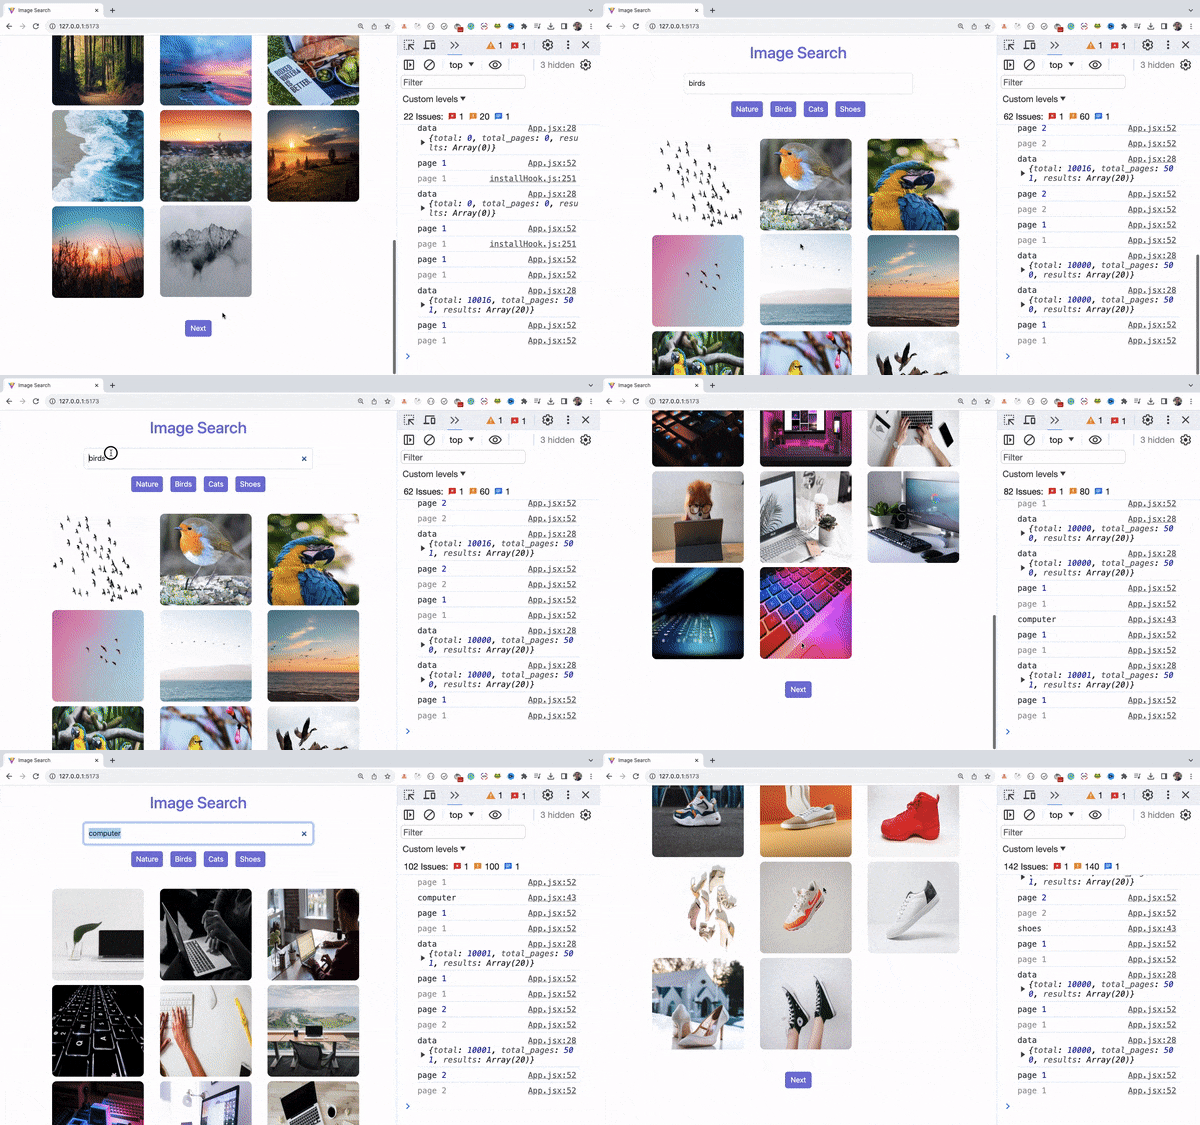
Now, If you check the application, you will see that we always get the correct first page result displayed when clicking on the quick search option or entering any search term which is as expected.
Your entire App.jsx file will look like this:
import axios from 'axios';
import { useEffect, useRef, useState } from 'react';
import { Button, Form } from 'react-bootstrap';
import './index.css';

const API_URL = 'https://api.unsplash.com/search/photos';
const IMAGES_PER_PAGE = 20;

const App = () => {
  const searchInput = useRef(null);
  const [images, setImages] = useState([]);
  const [page, setPage] = useState(1);
  const [totalPages, setTotalPages] = useState(0);

  useEffect(() => {
    fetchImages();
  }, [page]);

  const fetchImages = async () => {
    try {
      const { data } = await axios.get(
        `${API_URL}?query=${
          searchInput.current.value
        }&page=${page}&per_page=${IMAGES_PER_PAGE}&client_id=${
          import.meta.env.VITE_API_KEY
        }`
      );
      console.log('data', data);
      setImages(data.results);
      setTotalPages(data.total_pages);
    } catch (error) {
      console.log(error);
    }
  };

  const resetSearch = () => {
    setPage(1);
    fetchImages();
  };

  const handleSearch = (event) => {
    event.preventDefault();
    console.log(searchInput.current.value);
    resetSearch();
  };

  const handleSelection = (selection) => {
    searchInput.current.value = selection;
    resetSearch();
  };

  console.log('page', page);

  return (
    <div className='container'>
      <h1 className='title'>Image Search</h1>
      <div className='search-section'>
        <Form onSubmit={handleSearch}>
          <Form.Control
            type='search'
            placeholder='Type something to search...'
            className='search-input'
            ref={searchInput}
          />
        </Form>
      </div>
      <div className='filters'>
        <div onClick={() => handleSelection('nature')}>Nature</div>
        <div onClick={() => handleSelection('birds')}>Birds</div>
        <div onClick={() => handleSelection('cats')}>Cats</div>
        <div onClick={() => handleSelection('shoes')}>Shoes</div>
      </div>
      <div className='images'>
        {images.map((image) => (
          <img
            key={image.id}
            src={image.urls.small}
            alt={image.alt_description}
            className='image'
          />
        ))}
      </div>
      <div className='buttons'>
        {page > 1 && (
          <Button onClick={() => setPage(page - 1)}>Previous</Button>
        )}
        {page < totalPages && (
          <Button onClick={() => setPage(page + 1)}>Next</Button>
        )}
      </div>
    </div>
  );
};

export default App;
How to Find Bugs Using ESLint
When working on a React application, you should always have the ESLint VS Code extension enabled.
This will make sure that your code is correct and it will not produce any unexpected results in the future.
Based on the ESLint configuration defined in the .eslientrc file, you will get helpful suggestions to improve your code.
So, open your VS Code Extensions panel and install the ESLint extension as shown below:
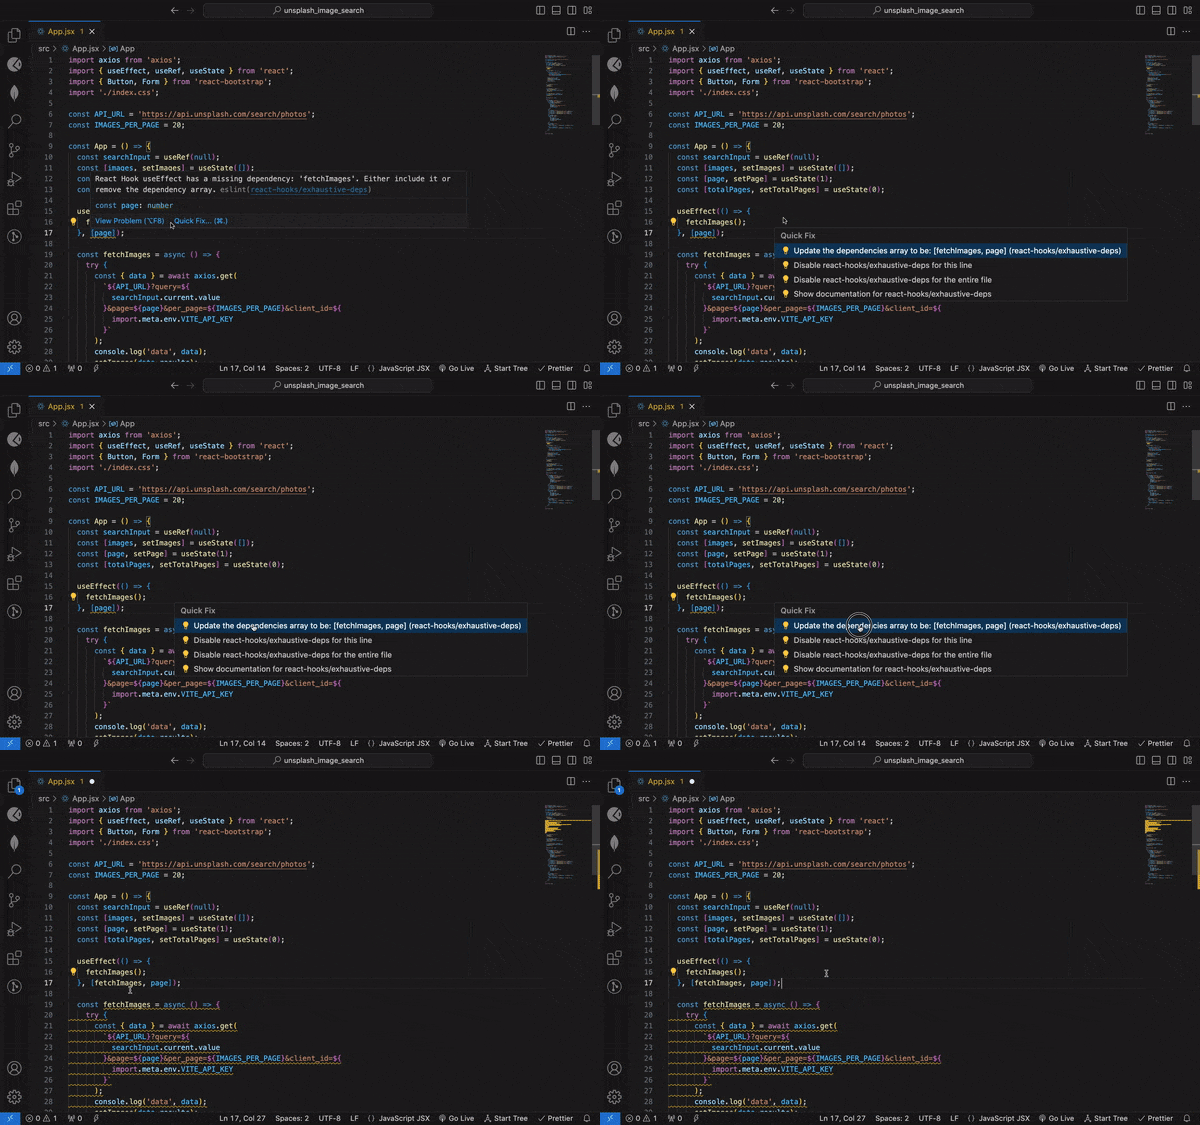
After installing the extension, if you check the App.jsx file, you will immediately see a yellow squiggly line for the page dependency of the useEffect hook. If you mouse hover over it, you will see the warning as shown below:
As the warning indicates, we need to add a fetchImages dependency in the dependency array.
We're getting a warning because, in the functional component, on every re-render of the component, all the declared functions are re-created so their reference changes.
So, if we're using any outside variable or function inside the useEffect hook, we need to mention that in the dependencies, so whenever the dependency changes, the useEffect will be executed again.
To fix this, you can click on the quick fix link and select the "update the dependencies" option as shown below:
All the missing dependencies will be automatically added to the dependency array.
You can also choose to manually add the dependency if you want.
However, with this change, you will see a new yellow warning for the fetchImages function as shown below:
As I said previously, on every re-render of the component, the fetchImages function will be re-created and when it's changed, we again call the fetchImages function as it's added in the dependency.
To avoid that, we need to wrap the fetchImages function inside the useCallback hook as shown below:
const fetchImages = useCallback(async () => {
  try {
    const { data } = await axios.get(
      `${API_URL}?query=${
        searchInput.current.value
      }&page=${page}&per_page=${IMAGES_PER_PAGE}&client_id=${
        import.meta.env.VITE_API_KEY
      }`
    );
    console.log('data', data);
    setImages(data.results);
    setTotalPages(data.total_pages);
  } catch (error) {
    console.log(error);
  }
}, [page]);
In the above code, we're passing page as a dependency because, page is an external variable whose value might change in the future when we click on Previous or Next buttons or search for any new term.
If changing variables are used inside useEffect or useCallback or useMemo hook, we need to add them in the dependencies list.
Now, you will not see any more warnings in the App component.
However, If you check the browser console, you will see an error and nothing is displayed on the UI as the application has crashed.
We're getting errors because we have declared fetchImages function using the function expression syntax, and functions declared using function expression syntax cannot be called before defining them.
Assigning a function to a variable makes it a function expression.
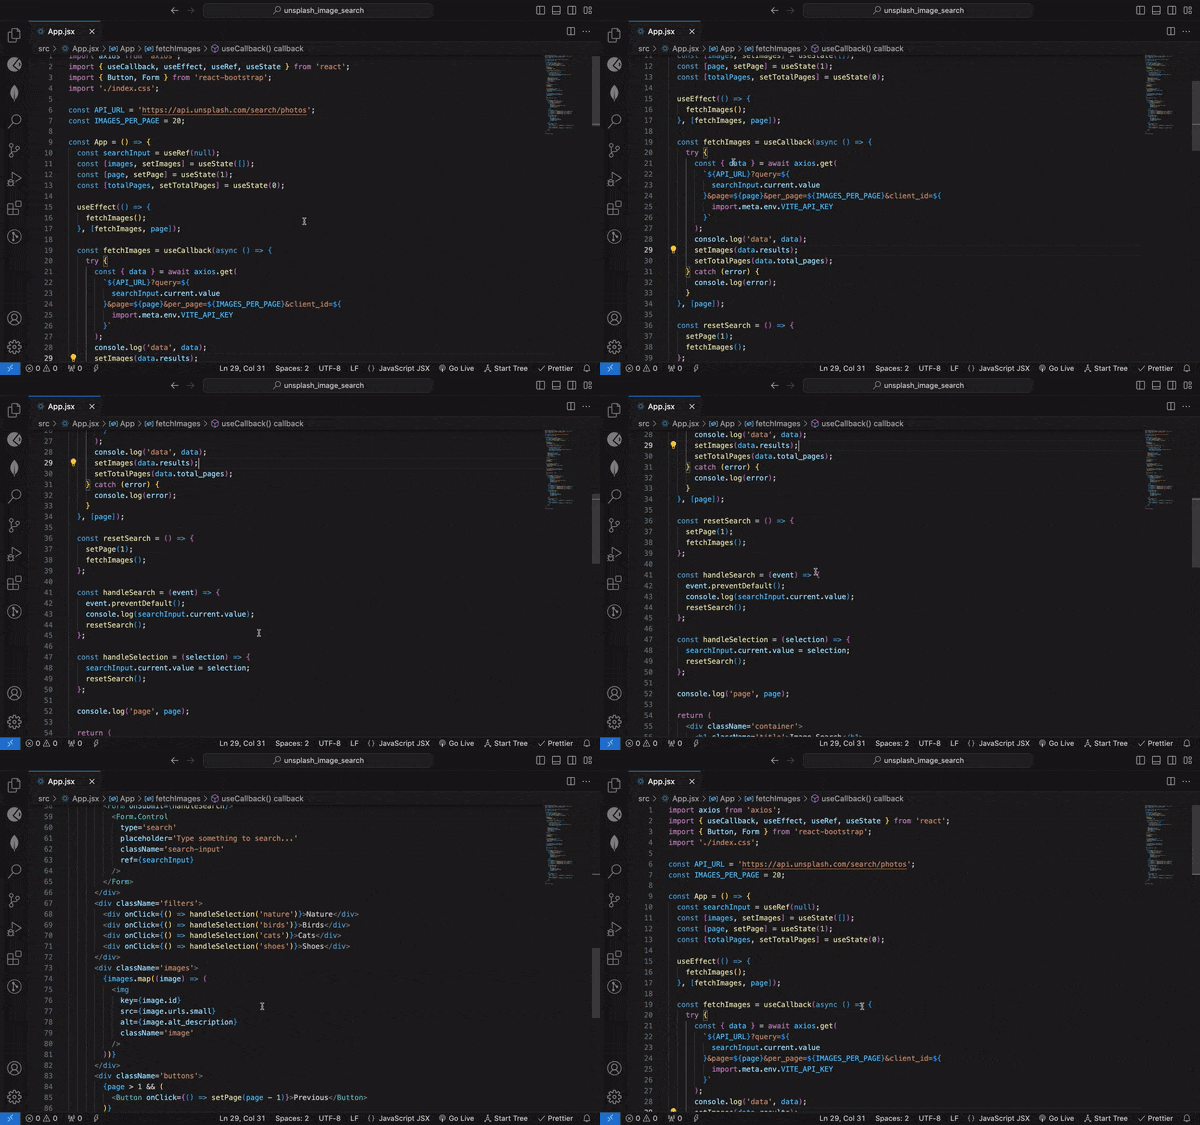
As you can see in the below image, we're calling fetchImages function on line number 16 and we're declaring the function on line number 19 and functions declared using function expression syntax cannot be accessed before the declaration.
To fix this, we need to declare the function before calling it. So, move the fetchImages function before the useEffect hook and it will fix the issue.
Your App component will look like this:
const App = () => {
  const searchInput = useRef(null);
  const [images, setImages] = useState([]);
  const [page, setPage] = useState(1);
  const [totalPages, setTotalPages] = useState(0);

  const fetchImages = useCallback(async () => {
    try {
      const { data } = await axios.get(
        `${API_URL}?query=${
          searchInput.current.value
        }&page=${page}&per_page=${IMAGES_PER_PAGE}&client_id=${
          import.meta.env.VITE_API_KEY
        }`
      );
      console.log('data', data);
      setImages(data.results);
      setTotalPages(data.total_pages);
    } catch (error) {
      console.log(error);
    }
  }, [page]);

  useEffect(() => {
    fetchImages();
  }, [fetchImages, page]);

  const resetSearch = () => {
    setPage(1);
    fetchImages();
  };
  ...
}
Now, If you check the application, there will not be any error and the application will work as expected.
Code Improvements
Right now, we have not added any validation in the current application when the user enters a search term.
When the page is loaded, and when we don't enter any text and directly press the enter key in the input search box, we're making an API call which is not good.
To fix this, before making the API call, we first need to check if the searchInput.current.value is not empty and then only make the API call.
Change the fetchImages function from this code:
const fetchImages = useCallback(async () => {
  try {
    const { data } = await axios.get(
      `${API_URL}?query=${
        searchInput.current.value
      }&page=${page}&per_page=${IMAGES_PER_PAGE}&client_id=${
        import.meta.env.VITE_API_KEY
      }`
    );
    console.log('data', data);
    setImages(data.results);
    setTotalPages(data.total_pages);
  } catch (error) {
    console.log(error);
  }
}, [page]);
to the below code:
const fetchImages = useCallback(async () => {
  try {
    if (searchInput.current.value) {
      const { data } = await axios.get(
        `${API_URL}?query=${
          searchInput.current.value
        }&page=${page}&per_page=${IMAGES_PER_PAGE}&client_id=${
          import.meta.env.VITE_API_KEY
        }`
      );
      console.log('data', data);
      setImages(data.results);
      setTotalPages(data.total_pages);
    }
  } catch (error) {
    console.log(error);
  }
}, [page]);
As you can see above, initially on page load and without entering any value, if we press the enter key, no API call is made.
Only when we type something and press enter, the API call is made, which is a good improvement to the application.
How to Remove an Extra Dependency From useEffect
As we have added a useCallback hook for the fetchImages function which has a page dependency, we no longer need the extra page dependency for the useEffect hook.
So change the below code:
useEffect(() => {
  fetchImages();
}, [fetchImages, page]);
to this code:
useEffect(() => {
  fetchImages();
}, [fetchImages]);
and the application will work as before without any issues.
How to Display Loading Indication
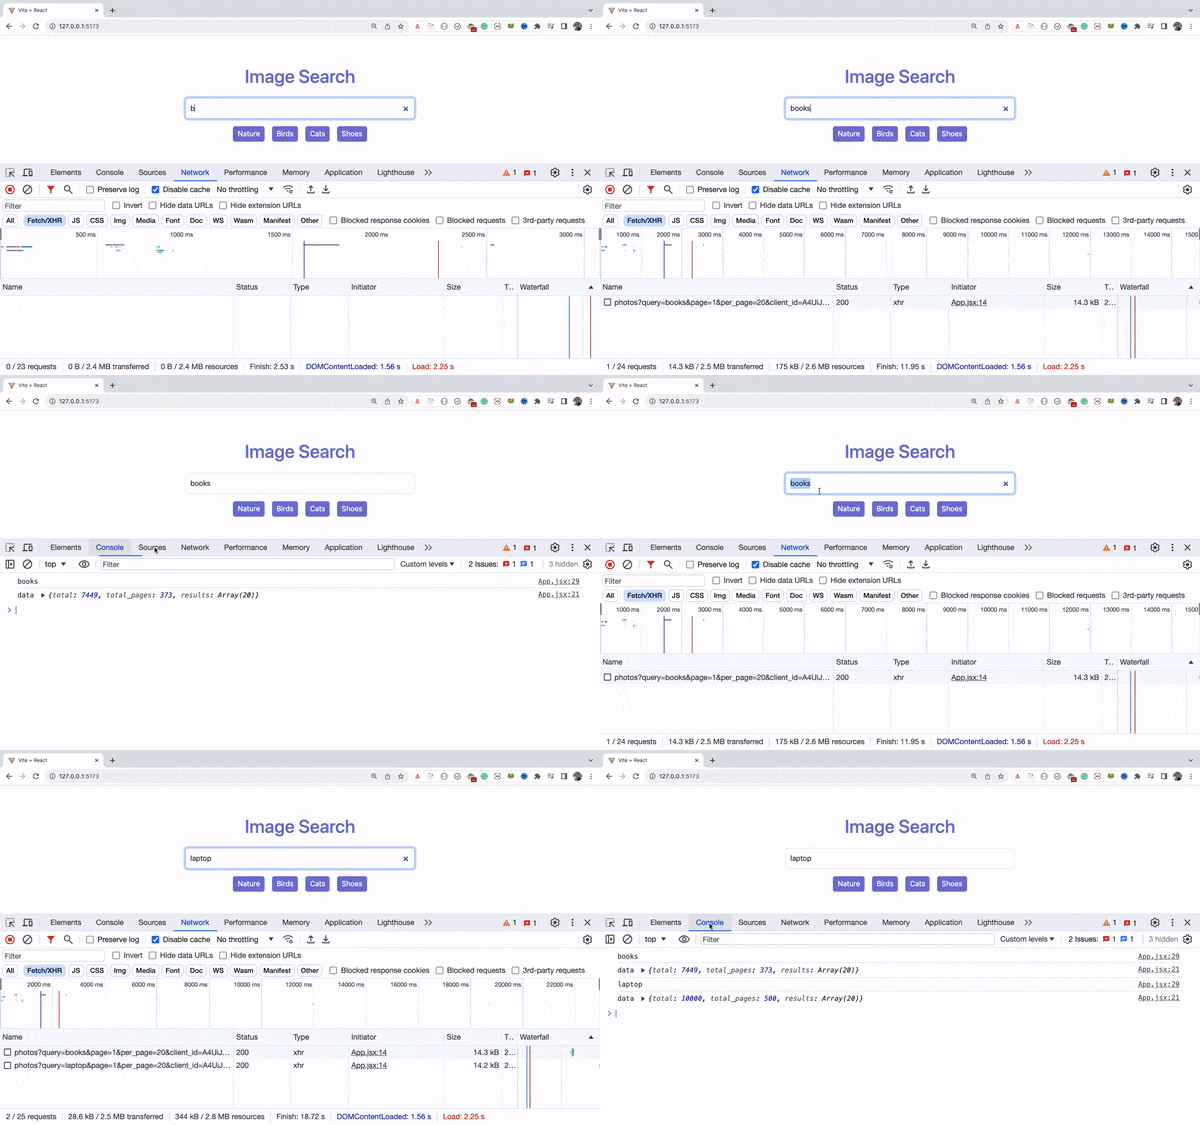
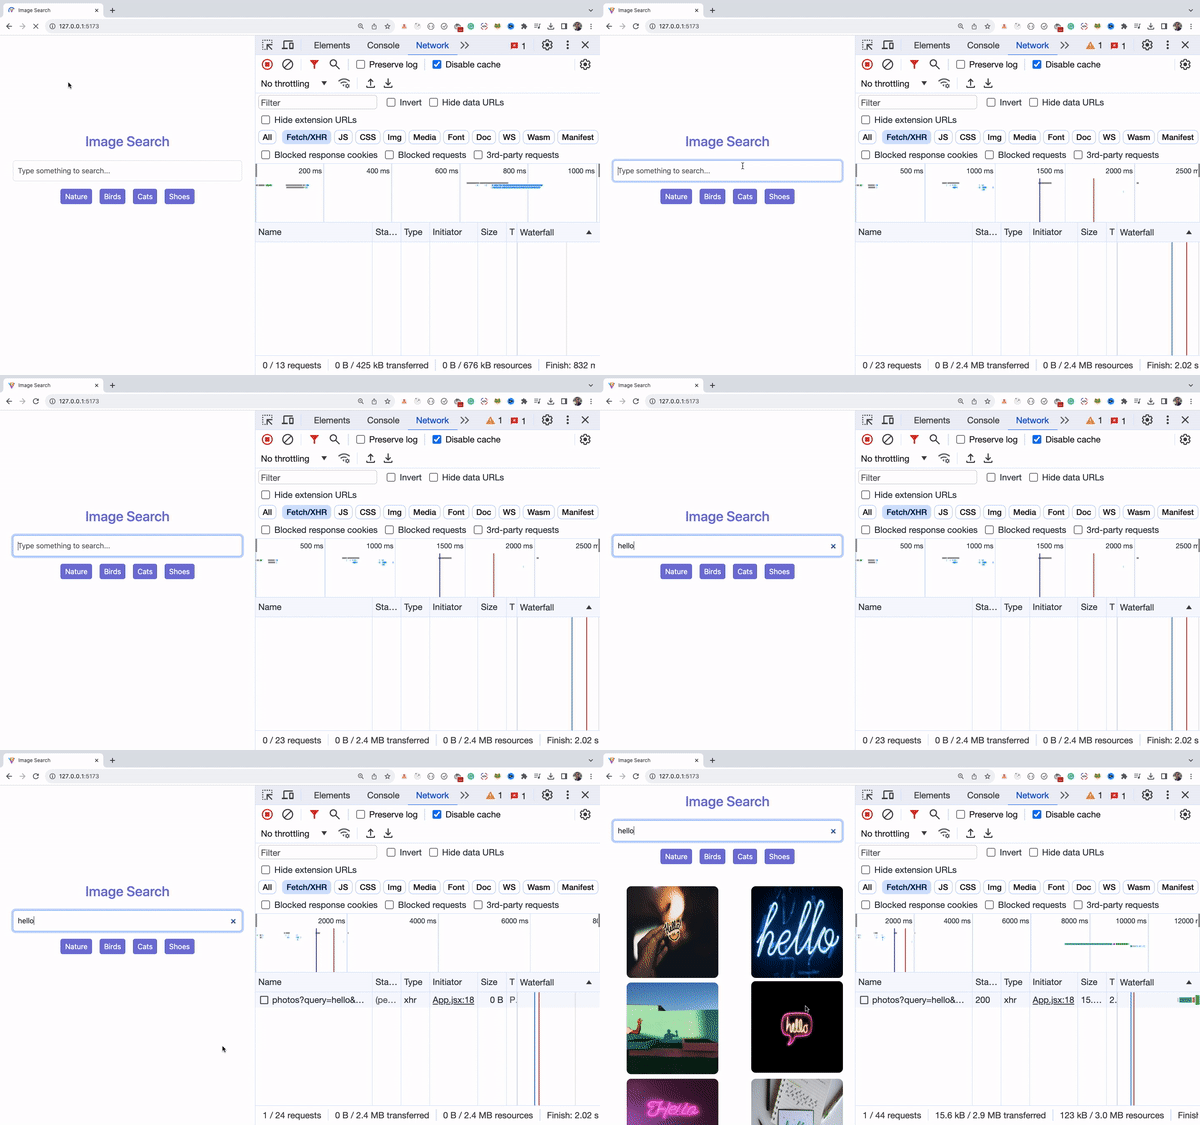
As you might have noticed in the previous image, when we searched for the text hello, the results were not displayed immediately.
As we're making an API call when searching for something, depending on the network speed, it might take some time to get the data from the API.
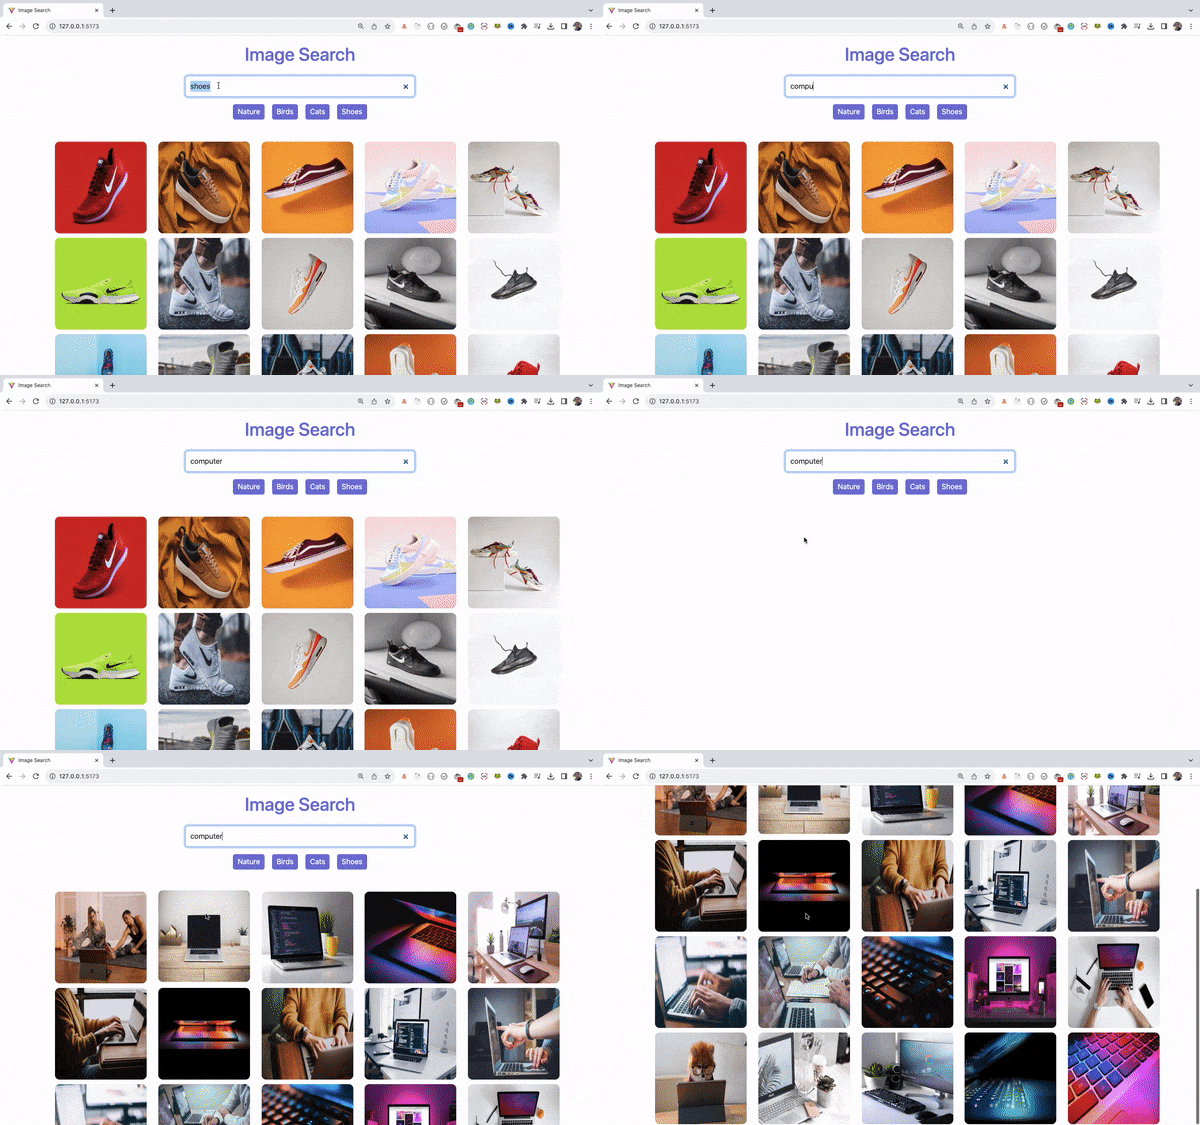
So while the API call is still going on, we can display a loading message, and once we get the response from the API, we will display the images.
To achieve that, declare a new loading state in the App component with an initial value of false:
const [loading, setLoading] = useState(false);
And now change the fetchImages function to the below code:
const fetchImages = useCallback(async () => {
  try {
    if (searchInput.current.value) {
      setErrorMsg('');
      setLoading(true);
      const { data } = await axios.get(
        `${API_URL}?query=${
          searchInput.current.value
        }&page=${page}&per_page=${IMAGES_PER_PAGE}&client_id=${
          import.meta.env.VITE_API_KEY
        }`
      );
      setImages(data.results);
      setTotalPages(data.total_pages);
      setLoading(false);
    }
  } catch (error) {
    setErrorMsg('Error fetching images. Try again later.');
    console.log(error);
    setLoading(false);
  }
}, [page]);
As you can see above, we're calling setLoading(true) before the API call and setLoading(false) after the API call.
Note that, we're also calling `setLoading(false)inside the catch block.
So, even if the API is successful or failed, we're setting loading state to false so we will not see the loading message all the time.
Now, to display the loading message change the below code:
<div className='images'>
  {images.map((image) => (
    <img
      key={image.id}
      src={image.urls.small}
      alt={image.alt_description}
      className='image'
    />
  ))}
</div>
<div className='buttons'>
  {page > 1 && (
    <Button onClick={() => setPage(page - 1)}>Previous</Button>
  )}
  {page < totalPages && (
    <Button onClick={() => setPage(page + 1)}>Next</Button>
  )}
</div>
to this code:
{loading ? (
  <p className='loading'>Loading...</p>
) : (
  <>
    <div className='images'>
      {images.map((image) => (
        <img
          key={image.id}
          src={image.urls.small}
          alt={image.alt_description}
          className='image'
        />
      ))}
    </div>
    <div className='buttons'>
      {page > 1 && (
        <Button onClick={() => setPage(page - 1)}>Previous</Button>
      )}
      {page < totalPages && (
        <Button onClick={() => setPage(page + 1)}>Next</Button>
      )}
    </div>
  </>
)}
In the above code, if loading is true, then we're displaying a loading message. Otherwise, we're displaying the images coming from the API.
If you check the application, you will see that the loading indication is displaying correctly.
Thanks for Reading
That's it for this tutorial. I hope you learned a lot from it.
You can find the complete source code for this application in this repository.
Want to watch the video version of this tutorial? You can check out this video.
If you want to master JavaScript, ES6+, React, and Node.js with easy-to-understand content, check out my YouTube channel. Don't forget to subscribe.
Want to stay up to date with regular content on JavaScript, React, and Node.js? Follow me on LinkedIn.


