For many years Salesforce allowed (though may not have suggested) the auto-filling of fields during object creation using a technique called "URL Hacking". This technique involved creating a Custom List Button on an object, then adding a URL with the ids and values to be filled:
/a03/e?&retURL={!Case.Id}&CF00N2C000001PDmC_lkid={!Case.Account}&CF00N2C000001PDm7={!Case.Contact}
Unfortunately with Lightning Experience this feature has been deprecated as browser tabs were replaced with tabs and sub-tabs housed within a single Salesforce browser window.
All is not lost, though!
Actions are Salesforce's solution to this problem - although they are slightly more time-consuming to set up, they are more robust and provide better functionality than a URL-hacked button. There are currently two kinds of actions available:
- Global actions can be placed and used from any of your org's objects, therefore they cannot access any object-specific information such as record ids. Global actions are best for automatically creating new records, sending emails, or logging calls.
- Object-specific actions can only be added to the selected object's page layout, providing access to fields on the selected object such as record ids and field values. To replace URL-hack buttons we want to use object-specific actions because they most closely resemble this functionality.
For this tutorial we're going to walk through creating an object-specific action since that is the most likely choice for the topic:
Select the parent object in the list (this is the one you're placing the Action on, not the object you're creating).
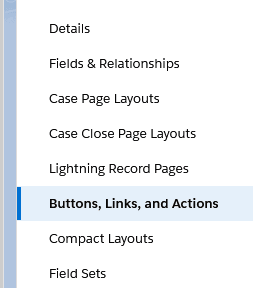
In the left-hand toolbar click "Buttons, Links, and Actions".
On the New Action screen update the Action Type to "Create a Record", set Target Object to the object you want to create, and create or select a Label. The Name field will auto-fill based on your Label selection. My Action is set up to create a new RMA, which is a custom object in my company.
Next you will see the Page Layout screen, which works similarly to any object Page Layout. Choose the fields you'd like the user to fill in (or be auto-filled) on the Create New page dialog by dragging them onto/off of the white workspace. Note: Salesforce suggests keeping the number of fields at a minimum to avoid overwhelming your users!
Saving your page layout will redirect you to the Action details page. To select fields to auto-fill and provide their values, click "New" in the Predefined Field Values related list.
In the New Predefined Field Value screen, select the Field you'd like to have auto-filled from the Field Name drop-down. In the formula editor, either enter a hard-coded value or most commonly a field value from the parent object.
The final step is to add the new Action to the page layout of the parent object. Navigate to the Page Layout and drag your action into the Salesforce Mobile and Lightning Experience Actions from the Mobile & Lightning Actions selection.
Confirm the Action shows up correctly on the object detail page*.
*If your Action isn't showing up correctly on the object read the next tutorial in this series titled "Error: Actions Not Showing Up As Buttons On Lightning Pages" (coming soon)
If you'd like to catch up with me on social media, come find me over on Twitter or LinkedIn and say hello!


