
- Photo by Bill Jelen on Unsplash
Originally published in my blog
In this tutorial, we will briefly go over the process of deploying a Node.js/Express application on AWS EC2 instance. Let’s face it, server configuration and application deployment can be tedious tasks. As a developer, you may not know every knits and bit about network security, or how to reverse proxy and load balancing works. The first time I had to deploy my application I went through a plethora of information on stack overflow and various blog posts. Wouldn’t it be nice to have a step-by-step guide to deploy your application? I asked myself. That question led me to write this blog post.
In this article we will cover:
- Configuration of an EC2 Instance (i.e. network configurations, ports, etc)
- Installing and configuring Nginx for reverse proxy
- Pointing EC2 to a custom domain (optional)
- Securing our site with LetsEncrypt SSL
You can also follow these steps if you are using other cloud providers such as Azure, Google Cloud Platform, IBM, or Digital ocean.
Configuration of an EC2 Instance
First of all, we need to create a VM. To do so, we will go to the AWS console and from services, we will select EC2 as shown in the picture below.
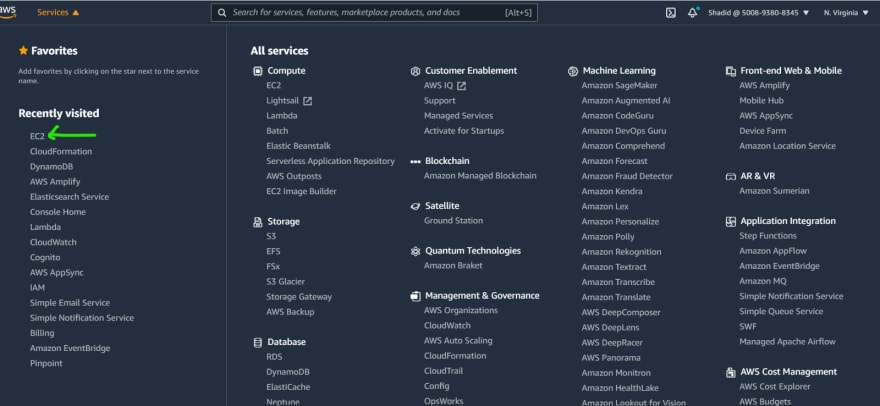
pick EC2 from AWS console
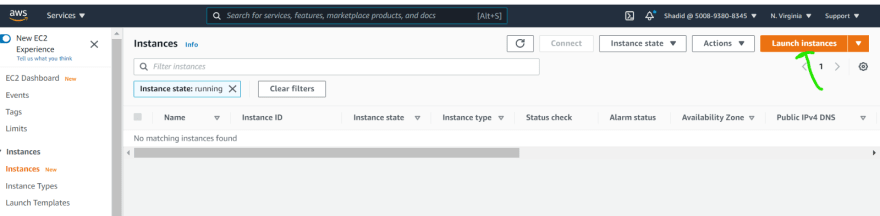
This will take you to the EC2 dashboard. From here you can select to create a new EC2 instance by clicking the ‘launch instance’ button.
You can choose which operating system to run on your instance. I will be using ubuntu 20.04.

Next, you will be prompted to select an instance type. I will go with the free t2 micro instance here.

You can accept the default configuration for steps 3, 4, and 5. In step 6 you are given the options to select security group rules. Here I will be choosing SSH, HTTP, and HTTPS. I also choose a custom TCP port 8000. We will run our Node application on the 8000 port.

We can change these configurations later if we want to, so don’t worry if you mess this up 😅.
Once the instance is created go ahead and ssh into your instance. The first thing we would need to set up is Node.js itself. I am going to run the following command to get Node in my instance.
curl -sL https://deb.nodesource.com/setup_12.x | sudo -E bash -
sudo apt install nodejs

node --version
Once we are done setting up node we can clone our repository and run the code in our cloud instance.
git clone <project_repo>
cd yourproject
npm install
npm start (or whatever your start command)
# stop app
ctrl+C
I am running my app in port 8000. We can test our app by going to the public ip address and port. So for my instance, it is http://54.210.195.17:8000/.
Next, we are going to install a library called pm2 this will keep our node application running in the background. Run the following commands to start your application with pm2.
sudo npm i pm2 -g
pm2 start app
This will start our app. We can visit the ip address with port again and will see the application running.

running in browser
Setting up NGNIX and Reverse Proxy
Next, we will setup NGNIX and create a reverse proxy. This will redirect our application with the default port 80. We will also add SSL through the NGNIX server.
We run the following command to install NGNIX:
sudo apt install nginx
Once NGNIX is installed we can configure it to set up a reverse proxy and redirect our application to port 80. To do so we have to edit the following file
sudo nano /etc/nginx/sites-available/default
server_name yourdomain.com www.yourdomain.com;

    location / {
        proxy_pass http://localhost:8000; # your app's port
        proxy_http_version 1.1;
        proxy_set_header Upgrade $http_upgrade;
        proxy_set_header Connection 'upgrade';
        proxy_set_header Host $host;
        proxy_cache_bypass $http_upgrade;
    }
In the location, the section makes the changes as shown above. If you are using a custom domain name, go to your DNS provider and add an A Record like shown below.
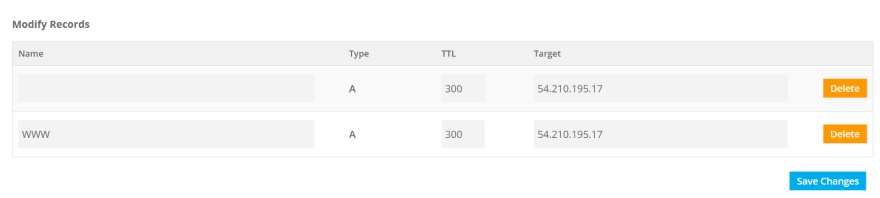
A record
In the target section, we will be adding our instance’s public IP address.
After this is done jump back to your terminal and restart NGNIX.
# Restart NGINX
sudo service nginx restart
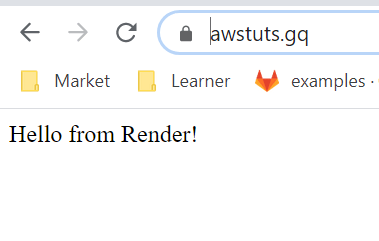
You need to give some time for the custom domain to propagate. After some time you can go to your custom domain and see the application running.

Securing our site with SSL encryption
Finally, the only task left to do here is to secure our web server with SSL encryption. We can do this with the LetsEncrypt library very easily.
First, we install to certbot package by running the following commands
sudo add-apt-repository ppa:certbot/certbot
sudo apt-get update
sudo apt-get install python3-certbot-nginx
Once the installation is done we will be using certbot cli to generate an SSL certificate for us. Run the following command and provide your email information when prompted to generate the SSL cert.
sudo certbot --nginx -d yourdomain.com -d www.yourdomain.com
Once the cert is generated, you should connect to your application via HTTPS.
That’s it. Now you have a secure web application running in your EC2 instance. 👏


