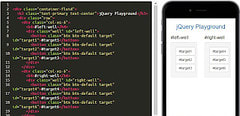
Today's post covers the last three lessons of freeCodeCamp's Bootstrap course. These three lessons will finish the jQuery playground you have been building. During these lessons, you'll be getting a review of some of the concepts you've already such as writing comments and naming elements with an id. Finally, you'll be labeling your Bootstrap buttons so you know what each button is as you move on to the jQuery lessons in freeCodeCamp.
31. Give Each Element a Unique ID.
freeCodeCamp wants the jQuery playground to target each button with an ID. Your mission is to add an ID to each of the buttons. Each button will be named target1 up to target.
Target1 to Target3 will be in the left well while target4 to target6 will be in the right. For each button, add an ID to each opening Button tag. Name the first button ID “target1”. Repeat with the other five buttons.
32. Label Bootstrap Buttons.
Now that we have IDs on our buttons, it is time to label them just like the wells. Inside each button, give the button text the same name as the ID. In my first button, I will have the button say #target1 between the opening and closing tags.
On the freeCodeCamp project, the button will automatically add the text name to the button. Repeat with the other five buttons.
33. Use Comments to Clarify Code.
The last lesson in Bootstrap is creating comments. If you move onto the jQuery lessons in freeCodeCamp, you’ll be changing HTML elements without actually changing them in HTML. To let other developers know they won’t be modifying code directly, you’ll be using comments.
Comments are important for developers since they let others know what is happening in our code. They won’t show on the live website, but if you inspect the website’s code you will see comments throughout the site’s code. To add a comment to a code, you need to start the comment with a < followed by an exclamation mark with two dashes.
This lets the computer know you are commenting. In the freeCodeCamp text editor, the text will automatically change color to gray, preparing you to write your comment. Next, put the text you want to put in the comment.
freeCodeCamp wants the comment to say “Only change code above this line.” The last thing you need to do is close your comment with two dashes and >. When the computer sees this line of code, it knows that your comment is closed, changing the grey color in your text editor back to its original colors.
Conclusion
That's a wrap on freeCodeCamp's Bootstrap course! The jQuery playground is finished. Your buttons should now have IDs with each button's label matching the id. Finally, we added some comments to our code to let developers know what is happening and what shouldn't be changed.
This post was originally published on February 21, 2018 on the blog The Original BritishPandaChick. I made minor changes to the original post to work here on DEV.


