In this tutorial, we will start generating our NFT collection by using a Python library.
This library will take care of stacking the different layers on top of each other in order to generate a complete NFT.
We will also use this library to generate the metadata for our NFT collection, but we will cover that in the next tutorial.
In the previous tutorial, we generated some background layers, aligned all the layers, and downloaded these new layers.
You can check out the following tutorial to have a better idea of the library that we will be using.
https://medium.com/scrappy-squirrels/tutorial-create-generative-nft-art-with-rarities-8ee6ce843133
Python Library - generative-art-nft
The first thing that we want to do is download a code editor, so that we can use the Python library.
I use Visual Studio Code for this tutorial, but any other code editor should work.
You can download Visual Studio Code below.
https://visualstudio.microsoft.com/downloads/

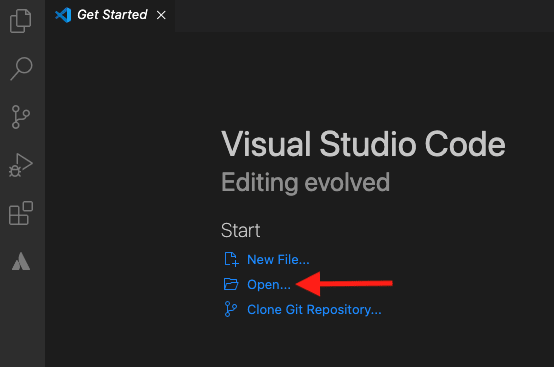
After downloading Visual Studio Code, open it.
Inside Visual Studio Code, click on Open and select the location of the project on your computer.
Once you have a location, click on New Folder at the bottom left of the window and create a folder with the name of your collection, and click Open.
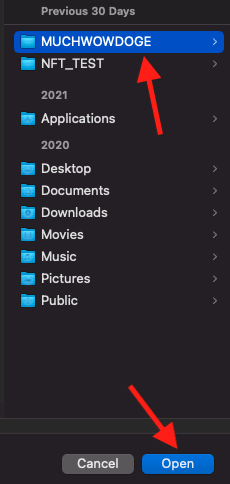
In my case, I have used MUCHWOWDOGE as the name for my collection.
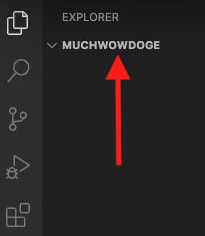
You should see a folder with the name of your collection appear on the left side of the code editor.
Go to Terminal > New Terminal
A new terminal window will appear at the bottom of Visual Studio.
Since we will be using a Python library to generate our NFTs, we need to install Python.
Issue the following command to check if you have Python installed on your machine.
python --version
Python 3.9.5
If you have Python, you should see the version of Python that you have installed on your machine.
In the case that you have multiple versions of Python installed on your machine, go to View > Command Palette > Select Interpreter > Python 3.9.5 (Select Python version you want to use).
If you don't have Python installed, download it now before continuing.
https://www.python.org/downloads/
Once you have Python installed, go to the following repository on GitHub and copy the command to clone the repository.
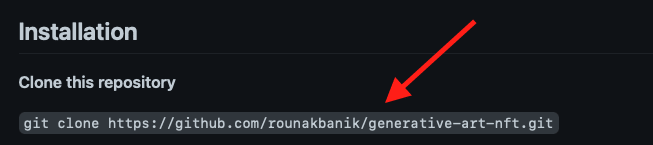
Don't issue the other commands on the page yet.
Paste the command in the terminal window and press enter.
You will see the Python library appear on the left side of the code editor under the main folder. The name of the library is generative-art-nft.
Go to the terminal window and issue the following command to go into the generative-art-nft directory.
cd generative-art-nft
We will be creating a virtual environment for the project in order to install the rest of packages needed to generate our NFTs.
A virtual environment is used in Python to isolate projects. It's a way to install packages locally for projects instead of installing these packages globally on our computer.
Issue the following command to create a virtual environment.
python3 -m venv venv
You will see a new directory pop up on left side of the code editor.

To activate the virtual environment, issue the following command.
source venv/bin/activate
Once you activated the virtual environment, you should see the word (venv) in the terminal window at the beginning of the command line.
Once you have the virtual environment activated, we can proceed to install the rest of packages needed to use the library.
Issue the following command to install the following packages.
pip install Pillow pandas progressbar2
We will be generating our own personal collection, so go to the assets folder and delete all the folders in it. Don't delete the assets folder itself. We will use it later on.
Open the **config.py **file from the folder tree on the left side of the editor.
CONFIG = [
    {
        'id': 1,
        'name': 'background',
        'directory': 'Background',
        'required': True,
        'rarity_weights': None,
    },
    {
        'id': 2,
        'name': 'body',
        'directory': 'Body',
        'required': True,
        'rarity_weights': None,
    },
    {
        'id': 3,
        'name': 'eyes',
        'directory': 'Expressions',
        'required': True,
        'rarity_weights': None,
    },
    {
        'id': 4,
        'name': 'head_gear',
        'directory': 'Head Gear',
        'required': False,
        'rarity_weights': None,
    },
    {
        'id': 5,
        'name': 'clothes',
        'directory': 'Shirt',
        'required': False,
        'rarity_weights': None,
    },
    {
        'id': 6,
        'name': 'held_item',
        'directory': 'Misc',
        'required': True,
        'rarity_weights': None,
    },
    {
        'id': 7,
        'name': 'hands',
        'directory': 'Hands',
        'required': True,
        'rarity_weights': None,
    },
    {
        'id': 8,
        'name': 'wristband',
        'directory': 'Wristband',
        'required': False,
        'rarity_weights': None,
    },
]
This file refers to the folders that were deleted from the assets folder in the previous step, so we will need to update it.
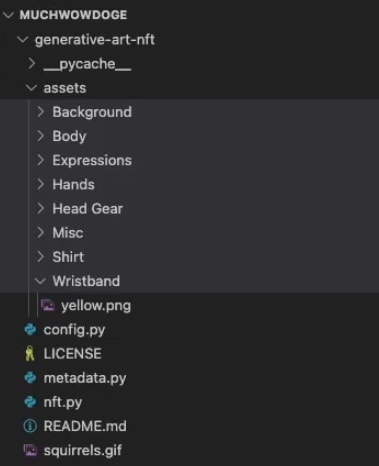
Before we edit the config.py file, find the folders that contain the layers for your project. We created this folder in the previous tutorial.

Move these folders to the assets folder in the code editor.
The folder tree should look something like this.

Now open the config.py file and edit it based on the new folders in the assets folder.
For example, in my case, I have three folders: Background, Base, and Eyes, so the new config.py file will have the following.
CONFIG = [
    {
        'id': 1,
        'name': 'background',
        'directory': 'Background',
        'required': True,
        'rarity_weights': None,
    },
    {
        'id': 2,
        'name': 'base',
        'directory': 'Base',
        'required': True,
        'rarity_weights': None,
    },
    {
        'id': 3,
        'name': 'eyes',
        'directory': 'Eyes',
        'required': True,
        'rarity_weights': None,
    },
]
You want to have the folders arrange in the following order: Background, Base, and Eyes. This order should be the same in the config.py file and in the assets folder.
The order is important because when we generate the NFTs, the Python library will stack the layers on top of each other depending on this order.
We always want the background layers first, then the base/body layers, and then any other layers.
Save the config.py file.
We are finally ready to generate our NFTs, go to the terminal window and issue the following command.
python nft.py
Once you issue the command, you will be shown the following message.
You can create a total of 18 distinct avatars.

How many avatars would you like to create. Enter a number greater than O:

18
Choose a number and press enter. In my case, I entered 18 since that was the maximum number of NFTs I could create.
The number of NFTs that you will be able to create will vary depending on the number of layers you have in the assets folder.
The next message prompts you to choose a name for your collection. Choose a name and press enter.
What would you like to call this editor?
Much Wow Doge Club
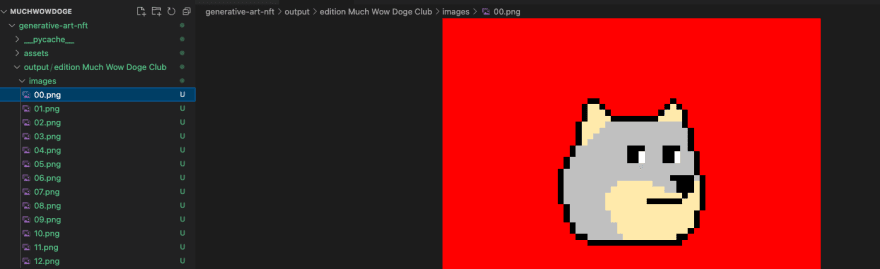
After all the NFTs are generated, you will see a new folder named output on the left side of the code editor.
Go to output/edition (name of edition) > images.
In the images folder, you will see the NFTs that were generated by the library.
You can click on any of them and you will see them on the right side of the editor.
If you followed the process correctly, your NFTs should look similar to the one shown below, if not, please go over the tutorial again and troubleshoot accordingly.
We have generated our NFT collection, but we are not done yet. We still need to generate the metadata for the collection, but we will do that in the next tutorial.
Stay tuned.
If you find this tutorial helpful, please share it with others and don't forget to subscribe to my Youtube Channel.
Twitter:
OpenSea
Youtube:
Twitter:
OpenSea
Youtube:


