In early August, I announced on Twitter that I was looking for my next role. My tweet included a link to my digital CV and ever since I’ve received a lot of questions about how I built it. So here’s a short guide!
This guide is based on a Twitter thread that I saw back in 2017. Unfortunately, I can’t remember who posted it… but if it was you, please know that I really appreciate you!
⚠️ Prerequisites:
- GitHub account
- Comfort with Markdown
✅ Steps:
- Create a new public repository on GitHub
- Enable GitHub Pages for your repository
- Select a theme (design template) for your CV
- Write your CV in Markdown
- Enjoy 💅🏼
- Optional: Set up a custom domain
- Show me your CV 💌
Create a new public repository on GitHub
Everything we need for our digital CV will live in a repository on GitHub.
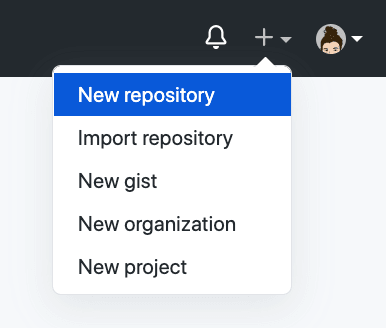
To start, create a new repository without a template.
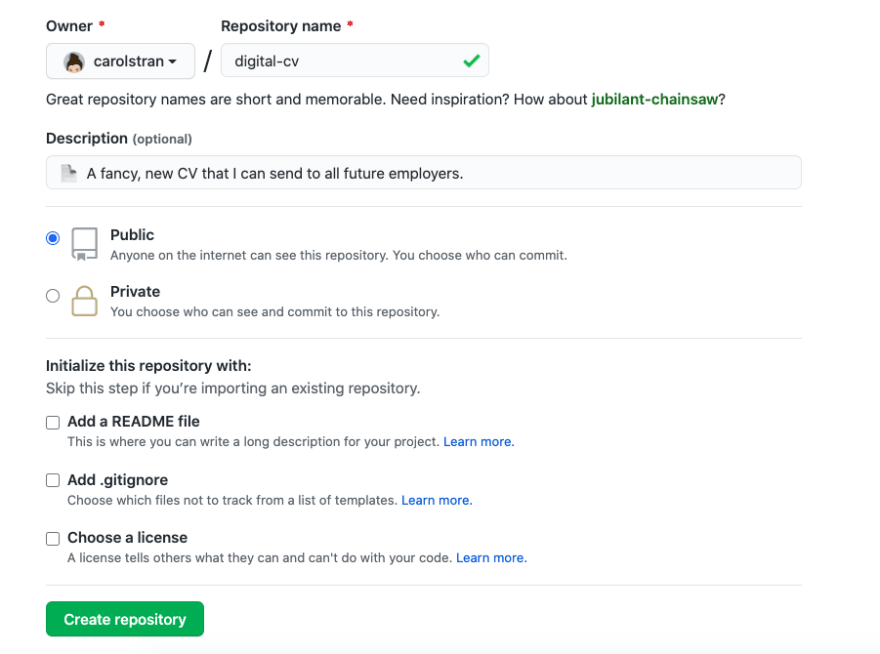
Choose a name (I called my cv) and include a description if you want. Make sure it's public.
This digital CV will be hosted with GitHub Pages, which requires your repository to be public.
And finally, don't initialize it with anything.
While you won't be importing an existing repository, it helps makes the process less complicated to start with a completely blank repository. You'll see why later!
Enable GitHub Pages for your repository
Your digital CV will be hosted with GitHub Pages. GitHub Pages allows you to host personal and project pages directly from a GitHub repository. It’s great because it’s free and the functionality is built-in to GitHub so there’s no need for an additional account or a complex build pipeline.
To enable GitHub Pages for your CV, go to your repository’s Settings page.
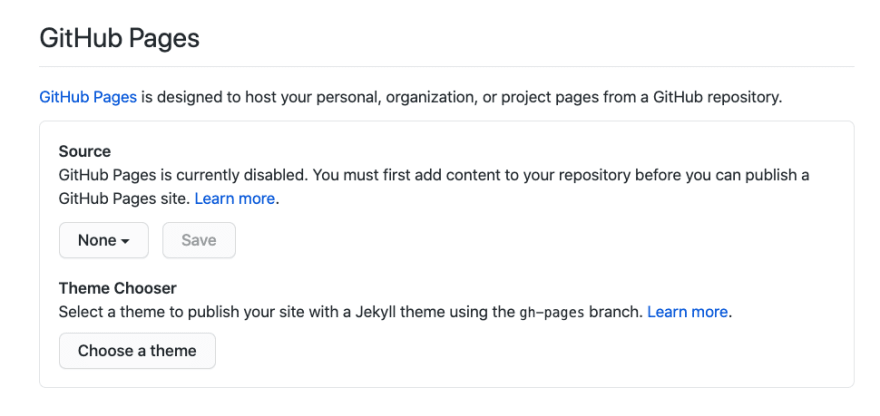
Scroll until you find the GitHub Pages section. There are two subsections here: Source and Theme Chooser.
Under Source, it should say, “GitHub Pages is currently disabled. You must first add content to your repository before you can publish a GitHub Pages site.” Because your repository is empty, you have no branches and you’re unable to select a source. That’s ok! This will be taken care of momentarily.
The subsection you want is Theme Chooser. Here, you’ll select a design template for your site. This will then create a gh-pages branch and publish your site with your selected theme from that branch.
All of the options are Jekyll themes. If you don’t know Jekyll, that’s ok. This guide will walk you through the necessary configuration. Honestly, I have no idea how Jekyll works beyond GitHub Pages templates.
Select a theme (design template) for your CV
CVs are supposed to give future employers an idea of who you are - so choose a theme that speaks to you! For this guide, we’ll continue with the “Minimal” theme as an example because that’s the one I use for my CV.
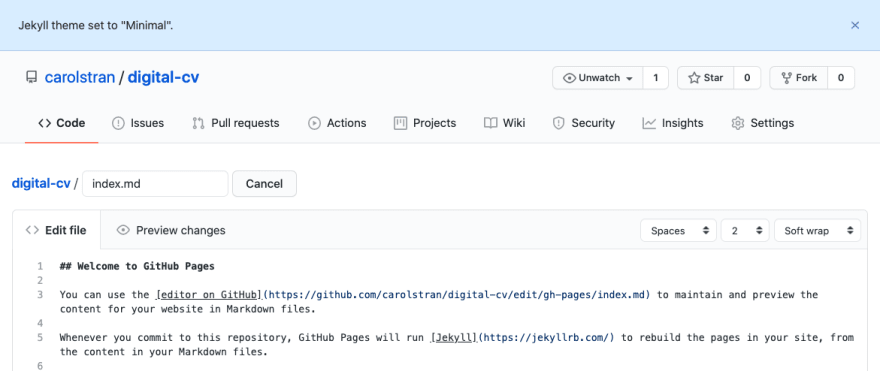
Once you select your theme, you’ll be prompted to edit a new index.md file.
Before you dive into that, there are a few things that happened in the background that you should know about…
- A new
gh-pagesbranch was created (as mentioned earlier). - This
index.mdfile was created. - Jekyll theme was set to “Minimal”.
GitHub Pages confirms your theme selection by creating a file called _config.yml. By default, this file will only contain a theme field with your selection.
Here’s what the _config.yml will look like if you select the "Minimal" theme:
theme: jekyll-theme-minimal
For my CV, I also added title and description fields:
theme: jekyll-theme-minimal
title: 💻✒️📄🌟
description: Carolyn Stransky's CV
You can check out all of the configuration possibilities in the Jekyll documentation.
Write your CV in Markdown
Alright, back to the generated file. This is where all of the content for your CV will be.
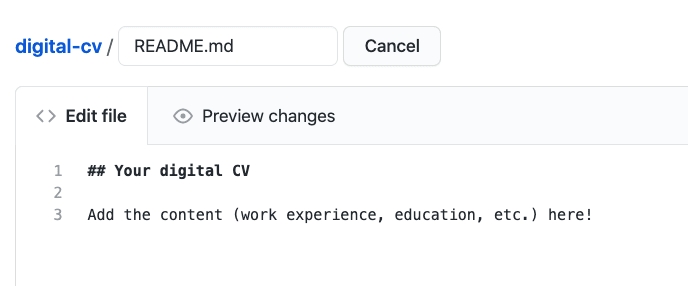
First, you should rename that index.md file to README.md. This is optional, but having it as a README allows people to see your CV’s content immediately when they visit your repository. This is especially useful if you decide to pin your CV repository to your GitHub profile.
If there’s no
index.mdpresent, then your README will work automatically with GitHub Pages - no additional configuration required.
Then, you can write your CV ✍🏻
You’ll write and style your content using Markdown and then it will be rendered according to your selected theme.
For tips on how to showcase your skills effectively, I’d recommend Monica Lent’s article: 7 software developer resume tips to help you stand out. If you’re looking for inspiration on how to style your content in Markdown, you can also check out my digital CV.
Once you’re satisfied, commit your changes to the gh-pages branch.
Enjoy your new digital CV
It might take a few minutes to go live - but your fresh, new, digital CV should now be available on the interweb 🎉
In most cases, your page will be hosted at the following url:
<github-username>.github.io/<repository-name>
You can always confirm that your CV is published and what the url is by navigating back to the GitHub Pages section in your repository’s settings.
If your digital CV isn’t updating after pushing a commit and waiting a few minutes, try doing a hard refresh.
Optional: Set up a custom domain
Custom domains can help your CV stand out - or alternatively, use your digital CV as a personal website.
Admittedly I’ve never set up a custom domain for my CV, but there are step-by-step instructions for how to do this in the GitHub documentation.
If you’re not sure where to get domains, I like Namecheap.
Show me your CV
If you followed this guide and built a digital CV, I’d love to see it! Tweet me a link @carolstran 💖
Did you find this helpful or useful? If yes, please consider buying me a coffee so I can continue to write posts like this ☕️
