Netlify is a hosting provider that you can use for static websites or web applications. The free plan comes with 300 minutes of build time, which should be enough to set up continuous deployment (CD) for a project that doesn’t receive a lot of commits. I’ll show you how to use those resources to add simple continuous integration (CI) to your build.
The example application
To keep it simple, I’ll use an application generated with Create React App (CRA) as the example app. In this way, we get a nontrivial application that:
- is similar to simple, real-world cases,
- has some npm dependencies, and
- most of what we need is already set up for.
The resulting application looks like this:
Verification steps
I’ve previously written about what steps you can run with your CI. Let’s see how you can set it up for our example application.
Building
For building, the code generated by CRA does everything we need:
$ npm run build

> netlify-ci@0.1.0 build
> react-scripts build

Creating an optimized production build...
Compiled successfully.

File sizes after gzip:

  43.71 kB  build/static/js/main.1fb16459.js
  1.78 kB   build/static/js/787.c84d5573.chunk.js
  541 B     build/static/css/main.073c9b0a.css
…
Netlify automatically picks the build script from our CRA-generated repository as a build command, and it’s working perfectly:
Testing
Code generated by CRA comes with a complete setup for unit testing and one example test. The npm test script is made for development; it runs in interactive mode and watches the files by default. For running on CI, we need a single run:
$ npm test -- --watchAll=false

> netlify-ci@0.1.0 test
> react-scripts test "--watchAll=false"

 PASS  src/App.test.js
  ✓ renders learn react link (16 ms)

Test Suites: 1 passed, 1 total
Tests:      1 passed, 1 total
Snapshots:   0 total
Time:       0.644 s, estimated 1 s
Ran all test suites.
To have it readily available, let’s define a new script in package.json:
{
  …
  "scripts": {
    …
    "test": "react-scripts test",
    "test:ci": "react-scripts test --watchAll=false",
    …
  },
Static analysis
One thing we would like to add to the code is static analysis. The basic configuration should be pretty straightforward, but I’ll leave it outside of the scope of this article. If you want to follow up on this, I recommend you give it a try with:
- ESLint – as it warns you against potential issues in code, or
- Prettier – to automatically enforce code style.
New CI script
With the code we have now, we need the following steps for a successful CI/CD run:
-
npm install– gets package dependencies, done by default by Netlify -
npm run test:ci– our modified test command -
npm run build– the original build command - deployment – done by Netlify
Now, we want the build to be conditional based on tests: if they fail, the execution should stop, and this is why I will use ‘&&’. At the same time, the Netlify configuration has only one input for the command to run. We can address those two things by creating a new script dedicated to this use case:
{
  …
  "scripts": {
    …
    "test:ci": "react-scripts test --watchAll=false",
    "ci": "npm run test:ci && npm run build",
    …
  },
  …
}
Example run
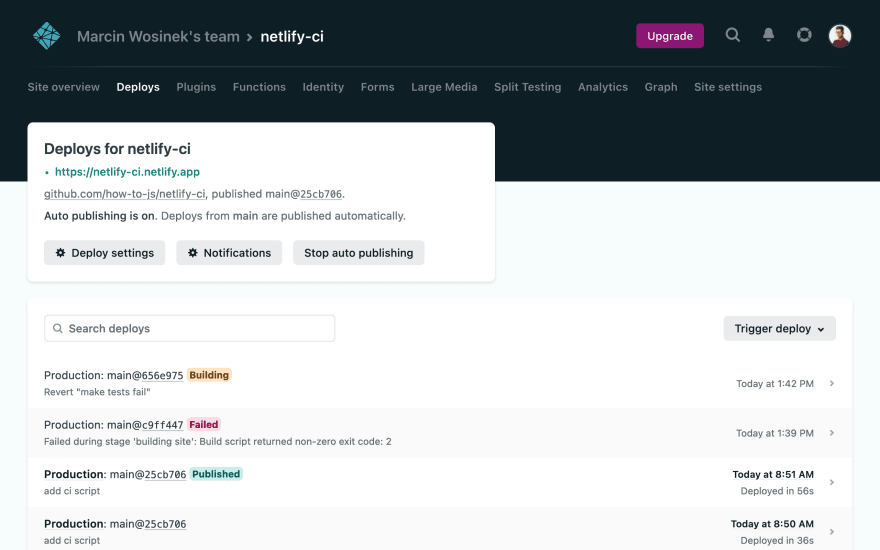
In the end, the scripts behave as expected:
- if build tests fail, then you get a failing run on your Netlify dashboard
- if everything works as expected, then the application gets deployed
Resource usage
In the few runs I did, there was hardly any impact of tests on the build time—the resource that Netlify checks to control the system usage. Of course, this will change when your project grows, and you will add more tests to your project. At some point, it will make more sense to invest in setting up a dedicated CI solution and use Netlify only as hosting.
Links
What would you do next?
Running CI on Netlify is just a temporary solution. I’m interested in hearing from you—what tool would you like to use next? Please let me know in this poll.


