Whether it is web development, writing articles, or achieving personal goals, proper planning has always been crucial. That allows us to split the main task into smaller bits, track progress and set realistic deadlines for each.
I saw DEV x Appwrite hackathon being announced in the middle of April and knew this was a great opportunity to build my own self-hosted project management tool. This was how KanBoard was born.
In this article, we will go through the installation guide, features, and tech stack of my submission.
Submission Category: Web2 Wizards
Project is available on GitHub
Installation
In order to set up your own instance of KanBoard, you must first install Docker, set up Appwrite, create necessary data collections, clone the KanBoard repo, and configure environmental variables.
We will go through everything in more detail below:
1️⃣ To install Docker, check the official installation guidelines here.
2️⃣ Next, you have to install the Appwrite using the commands below, depending on the operating system you use:
- Mac / Linux or Unix compatible:
docker run -it --rm \
    --volume /var/run/docker.sock:/var/run/docker.sock \
    --volume "$(pwd)"/appwrite:/usr/src/code/appwrite:rw \
    --entrypoint="install" \
    appwrite/appwrite:latest
- Windows (command prompt)
docker run -it --rm ^
    --volume //var/run/docker.sock:/var/run/docker.sock ^
    --volume "%cd%"/appwrite:/usr/src/code/appwrite:rw ^
    --entrypoint="install" ^
    appwrite/appwrite:latest
- Windows (powershell)
docker run -it --rm ,
    --volume /var/run/docker.sock:/var/run/docker.sock ,
    --volume ${pwd}/appwrite:/usr/src/code/appwrite:rw ,
    --entrypoint="install" ,
    appwrite/appwrite:latest
3️⃣ Next, open Docker and run the Appwrite app. At this point, you should be able to access the Appwrite console through localhost. Create an account, log in and create a new project.
4️⃣ To init your SDK and interact with Appwrite services, you need to add a Web platform to your project. To do that choose the project you created and click the 'Add Platform' button.
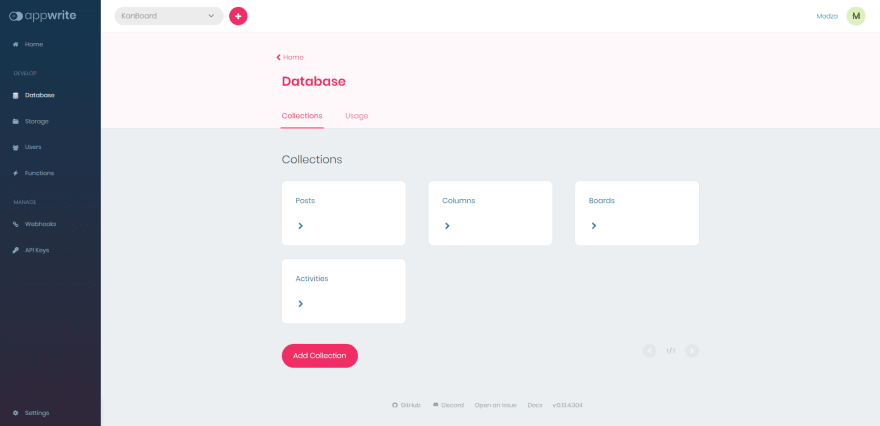
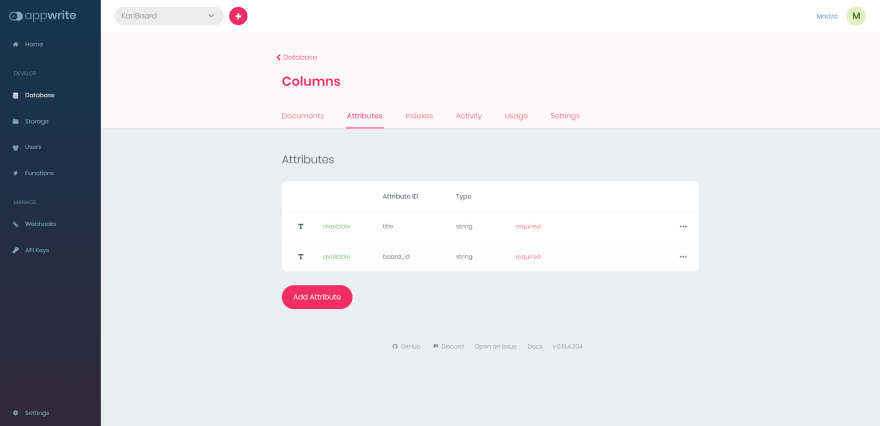
5️⃣ Create four database collections: Posts, Columns, Boards, and Activities.
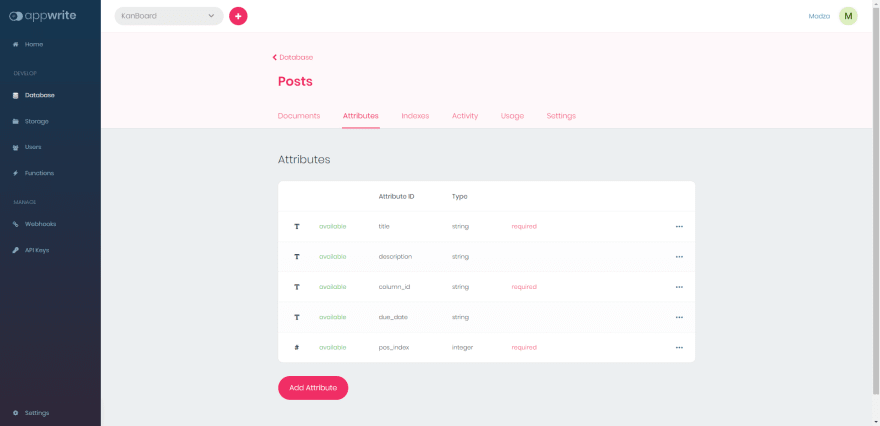
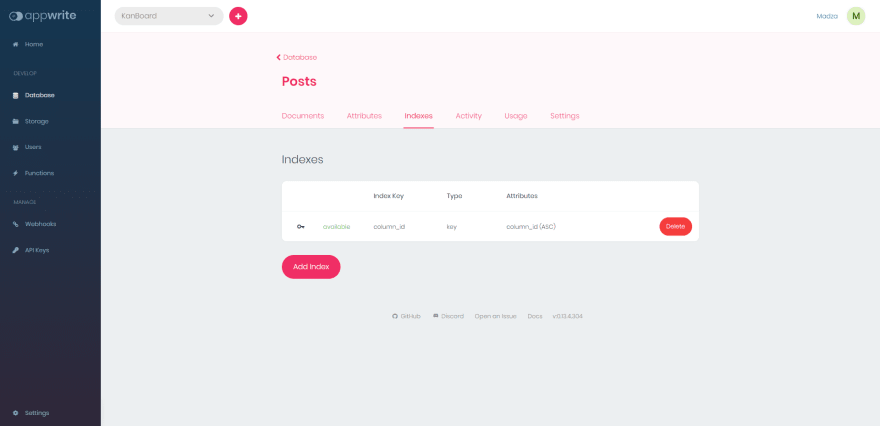
Now set the attributes and indexes for each collection as below:
🔻 Posts attributes and indexes
🔻 Columns attributes and indexes
🔻 Boards attributes
🔻 Activities attributes
6️⃣ Go into the settings for each collection and set the permission to role:member for both read and write access.
7️⃣ Navigate to the Users panel and add a new user you will use to log in to your app and access KanBoard.
8️⃣ Clone the repo to your machine by running git clone https://github.com/madzadev/kanboard.git then change the working directory into it by cd kanboard and install the project packages by npm install.
9️⃣ Clone the env files with the command cp .env.example .env.local. In the newly created .env.local file fill out the keys from your Appwrite console. The first two are available in the Settings of the KanBan project. The other four can be found in the Settings of each Collection.
1️⃣0️⃣ Run the command npm run dev to start the app.
Authentication
Once you have set everything up and your app is running, you should be presented with the login screen on localhost:3000.
The user is asked to provide the email address and the password. Those should match the records you provided when creating the user in the Appwrite console in the installation step.
Stats
Once logged in, the user is presented with the stats page.
Those include total cards, columns, and boards created across the whole app.
The user also sees the last activities performed on the app, like created, edited and deleted cards, columns and boards. Activities are sorted by the most recent ones on the top and each one is given the time ago attribute to see when the action was performed.
There are also upcoming and previous tasks. Again, both types of tasks are being sorted by the most recent ones on the top with the time attribute when the task has been/is planned to be completed.
Action history
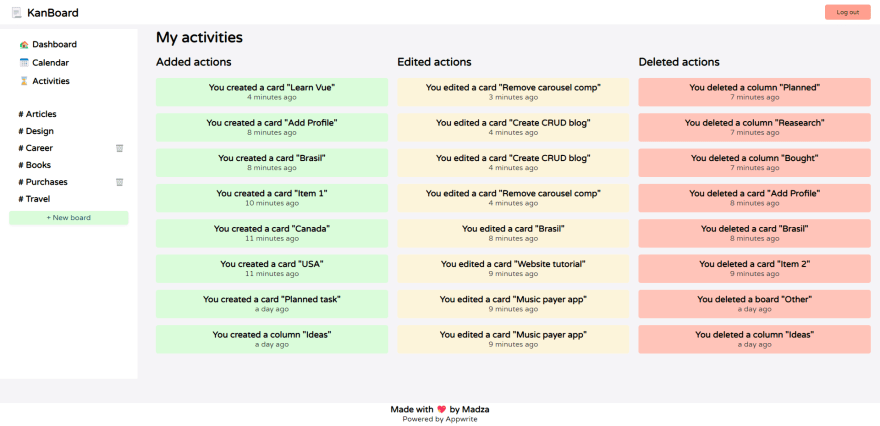
For more detailed action history, there is also an Activities page.
The activities are sorted across the columns. The first column lists all the added actions, the second one is for all the edit actions, and the third one displays all the boards, columns, and cards that have been recently deleted.
Each column is sorted by the most recent activities on top and each card in it includes the timestamp describing when the action was performed.
Calendar
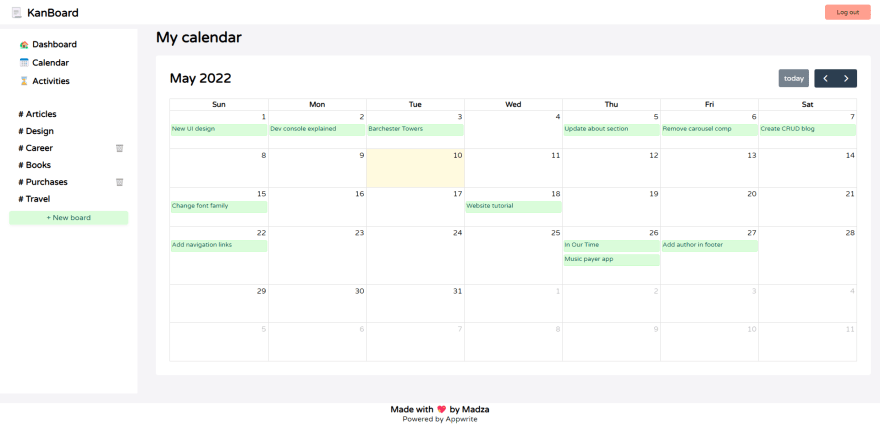
All of the user tasks can also be viewed in the calendar view.
The user is able to navigate between different months to see the past and future tasks. The current day on the calendar is highlighted and the user can access it from any month via the Today button.
If there are multiple tasks for the same day, the tasks will be displayed below each other.
Add/delete boards and columns
To start using the app, the user must create at least one board and column.
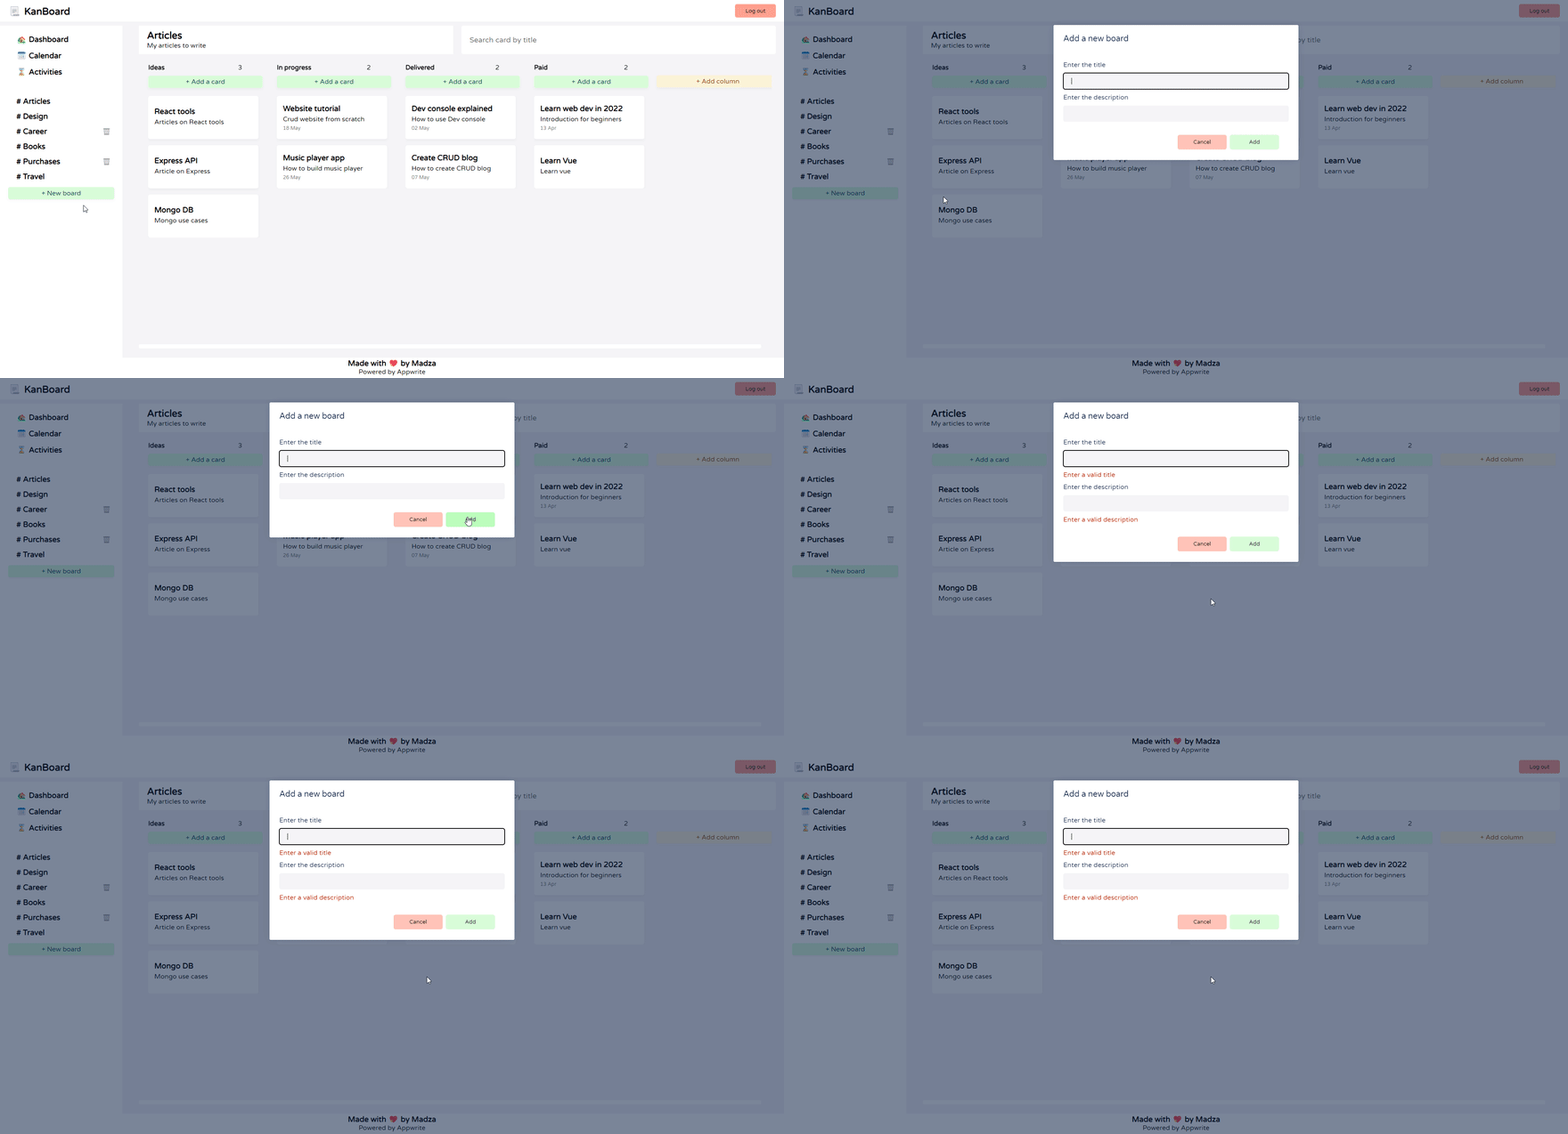
A new board can be added at any time. You need to provide the title of the board and the description of what the board is about.
After the creation, the user will be taken to the newly created board and all the info provided in the creation modal will be displayed in the board header.
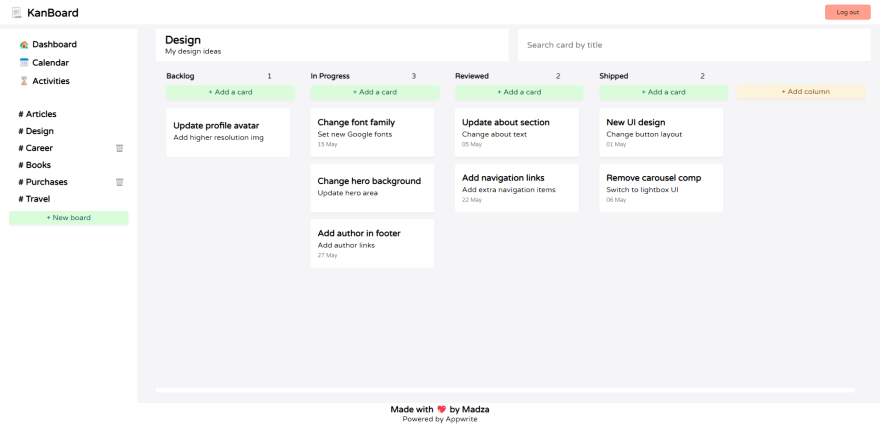
A new column can be added at any time for any board. You need to provide the title of the column. It will be shown at the top of the column, with the number of included cards.
The column can be deleted if there are no cards in it. The board can be deleted if there are no columns in it.
In both cases the warning modal will come up, to make sure the user really meant to delete the board/column.
Add new cards
A new card can be created when there is at least one board and one column inside it.
To create a card user clicks on the Add a card button on the top of the column, fills in the necessary information in the modal, and saves the card.
After that the page will refresh and pull the new data from the server, displaying your new card added to the column.
View/update/delete cards
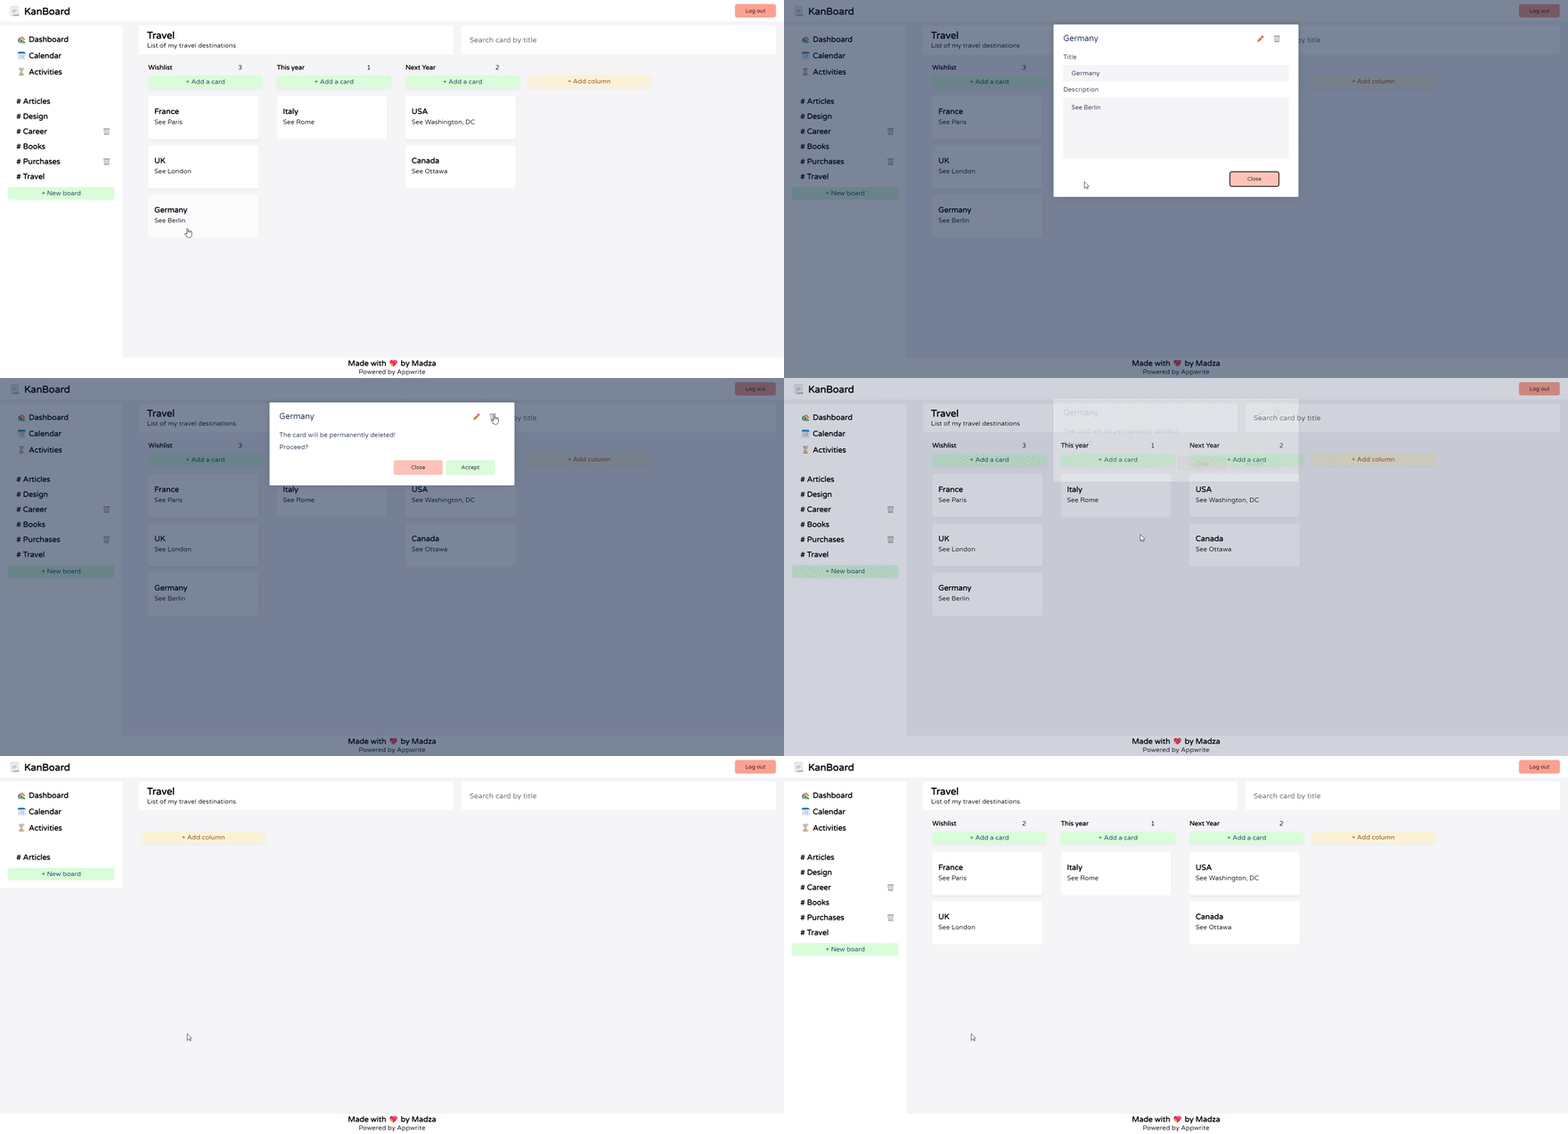
Any card can be opened by clicking on it. The card will be opened on the modal with all the data fetched inside it. This is the read-only mode for viewing the card.
In order to edit the card, the user must click on the edit icon on the top right corner of the card and the fields will become editable with the option to save the changes afterward.
In order to delete the card, the user must click on the delete button on the top right corner of the card. This will bring up the delete warning message to make sure the user accepts the delete action.
Input validation
For each input field in the app, the input validation is provided.
If the user tries to submit the empty value that is required, the warning message will be shown.
Move cards around
The user is allowed to move cards both vertically and horizontally.
Moving cards vertically allows the user to change the order of cards in a particular column, while horizontal drag allows the user to swap cards between the different columns.
The drag and drop functionality comes with modern-looking effects to improve the UX and make your workflow feel more natural.
Vertical/horizontal scroll
If the cards are outside the viewport the scroll feature is available.
If the cards in the column are outside the view, the vertical scrollbar on the right side of the list will appear.
If the columns themselves appear outside of the view, the horizontal scrollbar is provided under the column wrapper.
Search cards by title
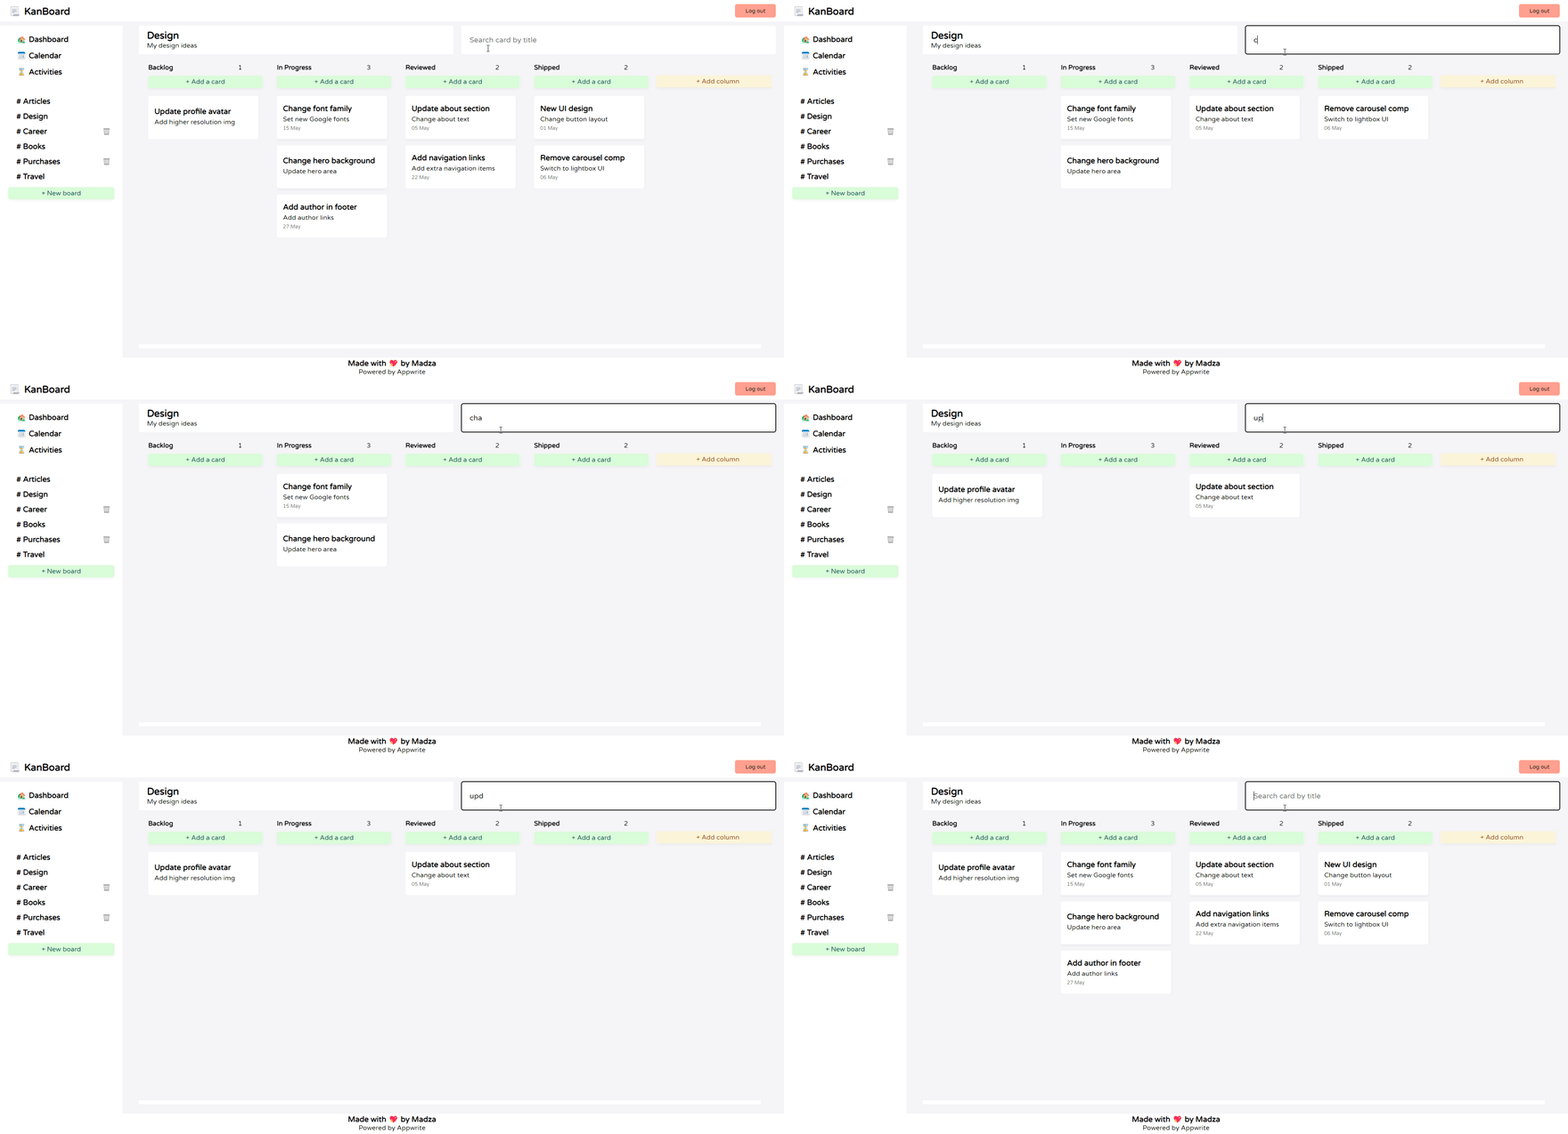
Once you have created a larger amount of cards, the search functionality might come in handy.
The user is able to search the cards by the card titles. The results are displayed in real-time, as the user types in the search query.
Logout
Once you are done, the user can log out.
This will take the user back to the login screen.
Tech stack I used
NextJS - React application framework
Appwrite - open-source end-to-end backend server
react-beautiful-dnd - for drag and drop functionality
react-hook-form - to track input states and provide validation
modal-dialog - to provide modal dialogs for user interaction
fullcalendar - to display the user tasks on the monthly basis
recoil - a set of utilities for state management
url-slug, dayjs - helper libraries for slug creation and date formatting
Future plans
I might consider adding extra auth methods. Most of us use platforms like Twitter and GitHub, so an OAuth solution would be great, which is already supported by Account API.
If I will ever come across to expand the app to collaborate with someone, I would consider adding the member system for app, where there is an invite system and an option to set the roles for each member via Users API.
Currently, the user is able to store the text and dates. I might consider extending it to the file uploads as well since Appwrite comes with a useful Storage API.
Conclusion
First of all, I want to say thanks to Forem for creating and actively maintaining such an awesome platform, where we can learn, and share our findings. I discovered this hackathon cause of DEV!
I'm glad I discovered Appwrite! I learned a new approach to creating a backend system and storing data. The docs are well written, and the UI in the console is very straightforward.
Also, KanBoard is an open-source project with MIT licence. The pull requests are welcome.
Connect me on Twitter, LinkedIn and GitHub!
Visit my Portfolio for more projects like this.

