
TL;DR: Learn to bind SQLite data to the Syncfusion WinUI DataGrid, perform CRUD operations, and reflect these changes within the Grid. Key steps include setting up the SQLite connection, defining data models, and implementing UI components for performing CRUD actions.
The Syncfusion WinUI DataGrid displays and manipulates tabular data. Its rich feature set includes functionalities like data binding, editing, sorting, filtering, and grouping. It has also been optimized to work with millions of records and handle high-frequency, real-time updates.
SQLite is a lightweight, open-source, self-contained relational database management system (RDBMS). Its simplicity and efficiency stand out, making it a popular choice for embedded and mobile apps and desktop software.
In this blog, we’ll see how to bind and populate SQLite data in the Syncfusion WinUI DataGrid, perform CRUD (create, read, update, and delete) actions on the database, and update the changes in the DataGrid.
Note: Before proceeding, refer to the WinUI DataGrid getting started documentation.
Binding SQLite data to the WinUI DataGrid
Let’s bind and populate data regarding contact details from an SQLite database in the Syncfusion WinUI DataGrid control by following these steps:
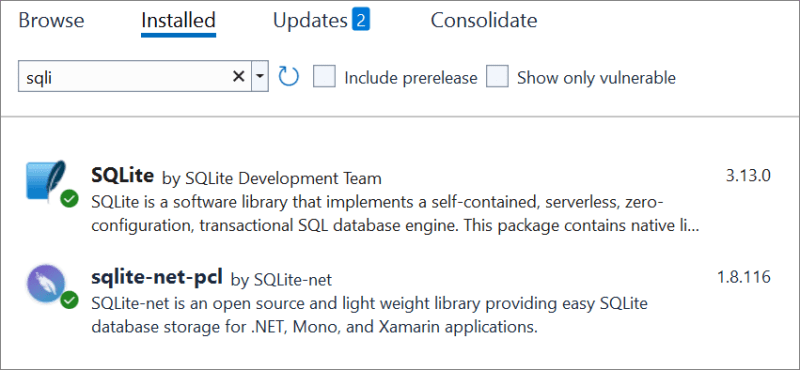
Step 1: Install the required packages
Ensure you have installed the necessary packages for the SQLite DB connection in your project. Refer to the following image.
Step 2: Define the class to access the database
Let’s define the SQLiteDatabase class that handles the SQLite connection and table creation. This class utilizes the SQLiteAsyncConnection API to manage the database operations.
Now, create a table named Employee in that SQLite database. Refer to the following code example.
public class SQLiteDatabase
{
    readonly SQLiteAsyncConnection _database;

    public const string DatabaseFilename = "SQLiteDBActive.db";

    public const SQLite.SQLiteOpenFlags Flags =
        // Open the database in read/write mode.
        SQLite.SQLiteOpenFlags.ReadWrite |
        // Create the database if it doesn't exist.
        SQLite.SQLiteOpenFlags.Create |
        // Enable multi-threaded database access.
        SQLite.SQLiteOpenFlags.SharedCache;

    public static string DatabasePath =>
        Path.Combine(Environment.GetFolderPath(Environment.SpecialFolder.LocalApplicationData), DatabaseFilename);

    public SQLiteDatabase()
    {
        _database = new SQLiteAsyncConnection(DatabasePath, Flags);
        _database.CreateTableAsync<Employee>();
    }
}
Step 3: Create an instance for the SQLite connection
Create a singleton instance for the SQLite connection and initialize it in the App.Xaml.cs file to use the database in our business class ViewModel.
Refer to the following code example.
public partial class App : Application
{
    /// <summary>
    /// Initializes the singleton app object. This is the first line of authored code
    /// executed, which is the logical equivalent of main() or WinMain().
    /// </summary>
    public App()
    {
        this.InitializeComponent();
    }

    static SQLiteDatabase database;

    // Create the database connection as a singleton.
    public static SQLiteDatabase Database
    {
        get
        {
            if (database == null)
            {
                database = new SQLiteDatabase();
            }
            return database;
        }
    }
}
Step 4: Create the Employee class
Next, we define the Employee class as a Model to hold the property values from the database table columns.
Refer to the following code example.
public class Employee : NotificationObject, INotifyDataErrorInfo
{
    private double _EmployeeID;
    private string _Name;
    private string _location;
    private string _Title;
    private DateTimeOffset? _BirthDate;
    private string _Gender;
    private bool employeeStatus;
    private string _email;
    Regex emailRegex = new Regex(@"^([\w\.\-]+)@([\w\-]+)((\.(\w){2,3})+)$");

    /// <summary>
    /// Gets or sets the employee ID.
    /// </summary>
    /// <value>The employee ID.</value>

    [PrimaryKey]
    public double EmployeeID
    {
        get
        {
            return this._EmployeeID;
        }
        set
        {
            this._EmployeeID = value;
            this.RaisePropertyChanged(nameof(EmployeeID));
        }
    }

    /// <summary>
    /// Gets or sets the last name.
    /// </summary>
    /// <value>The last name.</value>
    public string Name
    {
        get
        {
            return this._Name;
        }
        set
        {
            this._Name = value;
            this.RaisePropertyChanged(nameof(Name));
        }
    }

    /// <summary>
    /// Gets or sets the Location.
    /// </summary>
    /// <value>The location.</value>
    public string Location
    {
        get
        {
            return this._location;
        }
        set
        {
            this._location = value;
            this.RaisePropertyChanged(nameof(Location));
        }
    }

    /// <summary>
    /// Gets or sets the title.
    /// </summary>
    /// <value>The title.</value>
    public string Title
    {
        get
        {
            return this._Title;
        }
        set
        {
            this._Title = value;
            this.RaisePropertyChanged(nameof(Title));
        }
    }

    /// <summary>
    /// Gets or sets the Birth Date.
    /// </summary>
    /// <value>The BirthDate.</value>
    public DateTimeOffset? BirthDate
    {
        get
        {
            return this._BirthDate;
        }
        set
        {
            this._BirthDate = value;
            this.RaisePropertyChanged(nameof(BirthDate));
        }
    }

    /// <summary>
    /// Gets or sets the Gender.
    /// </summary>
    /// <value>The Gender.</value>
    public string Gender
    {
        get
        {
            return this._Gender;
        }
        set
        {
            this._Gender = value;
            this.RaisePropertyChanged(nameof(Gender));
        }
    }

    /// <summary>
    /// Gets or sets the Employee Status.
    /// </summary>
    /// <value>The EmployeeStatus.</value>
    public bool EmployeeStatus
    {
        get
        {
            return employeeStatus;
        }
        set
        {
            employeeStatus = value;
            this.RaisePropertyChanged(nameof(EmployeeStatus));
        }
    }

    /// <summary>
    /// Gets or sets the E-Mail.
    /// </summary>
    /// <value>The EMail.</value>
    public string EMail
    {
        get { return _email; }
        set
        {
            _email = value;
            this.RaisePropertyChanged(nameof(EMail));
        }
    }

    #region INotifyDataErrorInfo

    public event EventHandler<DataErrorsChangedEventArgs> ErrorsChanged;
    public IEnumerable GetErrors(string propertyName)
    {
        if (propertyName == "EMail")
        {
            if (!emailRegex.IsMatch(this.EMail))
            {
                List<string> errorList = new List<string>();
                errorList.Add("Email ID is invalid!");
                NotifyErrorsChanged(propertyName);
                return errorList;
            }
        }
        return null;
    }

    private void NotifyErrorsChanged(string propertyName)
    {
        if (ErrorsChanged != null)
            ErrorsChanged(this, new DataErrorsChangedEventArgs(propertyName));
    }

    [DisplayAttribute(AutoGenerateField =false)]
    public bool HasErrors
    {
        get { return this.EMail == null || !emailRegex.IsMatch(this.EMail); }
    }
    #endregion
}
Step 5: Populating database data in the ViewModel
Then, populate the data from the SQLite database in the EmployeeViewModel class, as shown in the following code example.
public class EmployeeViewModel : INotifyPropertyChanged, IDisposable
{
    public EmployeeViewModel()
    {
        PopulateData();
        employees = this.GetEmployeeDetails(30);
        PopulateDB();
    }

    private async void PopulateDB()
    {
        foreach (Employee contact in Employees)
        {
            var item = await App.Database.GetEmployeeAsync(contact);
            if (item == null)
                await App.Database.AddEmployeeAsync(contact);
        }
    }

    private ObservableCollection<Employee> employees;

    /// <summary>
    /// Get or set the Employee Details.
    /// </summary>
    public ObservableCollection<Employee> Employees
    {
        get
        {
            return employees;
        }

    }

    Random r = new Random();
    Dictionary<string, string> gender = new Dictionary<string, string>();

    /// <summary>
    /// Get the Employee Details.
    /// </summary>
    /// <param name="count"></param>
    /// <returns></returns>
    public ObservableCollection<Employee> GetEmployeeDetails(int count)
    {
        ObservableCollection<Employee> employees = new ObservableCollection<Employee>();

        for (int i = 1; i <= count; i++)
        {
            var name = employeeName[r.Next(employeeName.Length - 1)];
            var emp = new Employee()
            {
                EmployeeID = 1000 + i,
                Name = name,
                Location = location[r.Next(1, 8)],
                Gender = gender[name],
                Title = title[r.Next(title.Length - 1)],
                BirthDate = new DateTimeOffset(new DateTime(r.Next(1975, 1985), r.Next(1, 12), r.Next(1, 28))),
                EMail = name + "@" + mail[r.Next(0, mail.Count() - 1)],
                EmployeeStatus = r.Next() % 2 == 0 ? true : false,
            };
            employees.Add(emp);
        }

        return employees;
    }

    /// <summary>
    /// Populate the data for Gender.
    /// </summary>
    private void PopulateData()
    {
        gender.Add("Sean Jacobson", "Male");
        gender.Add("Phyllis Allen", "Male");
        gender.Add("Marvin Allen", "Male");
        gender.Add("Michael Allen", "Male");
        gender.Add("Cecil Allison", "Male");
        gender.Add("Oscar Alpuerto", "Male");
        gender.Add("Sandra Altamirano", "Female");
        gender.Add("Selena Alvarad", "Female");
        gender.Add("Emilio Alvaro", "Female");
        gender.Add("Maxwell Amland", "Male");
        gender.Add("Mae Anderson", "Male");
        gender.Add("Ramona Antrim", "Female");
        gender.Add("Sabria Appelbaum", "Male");
        gender.Add("Hannah Arakawa", "Male");
        gender.Add("Kyley Arbelaez", "Male");
        gender.Add("Tom Johnston", "Female");
        gender.Add("Thomas Armstrong", "Female");
        gender.Add("John Arthur", "Male");
        gender.Add("Chris Ashton", "Female");
        gender.Add("Teresa Atkinson", "Male");
        gender.Add("John Ault", "Male");
        gender.Add("Robert Avalos", "Male");
        gender.Add("Stephen Ayers", "Male");
        gender.Add("Phillip Bacalzo", "Male");
        gender.Add("Gustavo Achong", "Male");
        gender.Add("Catherine Abel", "Male");
        gender.Add("Kim Abercrombie", "Male");
        gender.Add("Humberto Acevedo", "Male");
        gender.Add("Pilar Ackerman", "Male");
        gender.Add("Frances Adams", "Female");
        gender.Add("Margar Smith", "Male");
        gender.Add("Carla Adams", "Male");
        gender.Add("Jay Adams", "Male");
        gender.Add("Ronald Adina", "Female");
        gender.Add("Samuel Agcaoili", "Male");
        gender.Add("James Aguilar", "Female");
        gender.Add("Robert Ahlering", "Male");
        gender.Add("Francois Ferrier", "Male");
        gender.Add("Kim Akers", "Male");
        gender.Add("Lili Alameda", "Female");
        gender.Add("Amy Alberts", "Male");
        gender.Add("Anna Albright", "Female");
        gender.Add("Milton Albury", "Male");
        gender.Add("Paul Alcorn", "Male");
        gender.Add("Gregory Alderson", "Male");
        gender.Add("J. Phillip Alexander", "Male");
        gender.Add("Michelle Alexander", "Male");
        gender.Add("Daniel Blanco", "Male");
        gender.Add("Cory Booth", "Male");
        gender.Add("James Bailey", "Female");
    }

    string[] title = new string[]
    {
        "Marketing Assistant", "Engineering Manager", "Senior Tool Designer", "Tool Designer",
        "Marketing Manager", "Production Supervisor", "Production Technician", "Design Engineer",
        "Vice President", "Product Manager", "Network Administrator", "HR Manager", "Stocker",
        "Clerk", "QA Supervisor", "Services Manager", "Master Scheduler",
        "Marketing Specialist", "Recruiter", "Maintenance Supervisor",
    };

    string[] employeeName = new string[]
    {
        "Sean Jacobson", "Phyllis Allen", "Marvin Allen", "Michael Allen", "Cecil Allison",
        "Oscar Alpuerto", "Sandra Altamirano", "Selena Alvarad", "Emilio Alvaro", "Maxwell Amland",
        "Mae Anderson", "Ramona Antrim", "Sabria Appelbaum", "Hannah Arakawa", "Kyley Arbelaez",
        "Tom Johnston", "Thomas Armstrong", "John Arthur", "Chris Ashton", "Teresa Atkinson",
        "John Ault", "Robert Avalos", "Stephen Ayers", "Phillip Bacalzo", "Gustavo Achong",
        "Catherine Abel", "Kim Abercrombie", "Humberto Acevedo", "Pilar Ackerman", "Frances Adams",
        "Margar Smith", "Carla Adams", "Jay Adams", "Ronald Adina", "Samuel Agcaoili",
        "James Aguilar", "Robert Ahlering", "Francois Ferrier", "Kim Akers", "Lili Alameda",
        "Amy Alberts", "Anna Albright", "Milton Albury", "Paul Alcorn", "Gregory Alderson",
        "J. Phillip Alexander", "Michelle Alexander", "Daniel Blanco", "Cory Booth",
        "James Bailey"
    };

    string[] location = new string[] { "UK", "USA", "Sweden", "France", "Canada", "Argentina", "Austria", "Germany", "Mexico" };

    string[] mail = new string[] { "arpy.com", "sample.com", "rpy.com", "jourrapide.com" };

    public event PropertyChangedEventHandler PropertyChanged;

    public void OnPropertyChanged(string propertyName)
    {
        PropertyChangedEventHandler handler = PropertyChanged;
        if (handler != null)
        {
            var e = new PropertyChangedEventArgs(propertyName);
            handler(this, e);
        }
    }

    public void Dispose()
    {
        Dispose(true);
        GC.SuppressFinalize(this);
    }

    protected virtual void Dispose(bool isDisposable)
    {
        if (Employees != null)
            Employees.Clear();
    }
}
Step 6: Define the WinUI DataGrid
In this step, we will define the WinUI DataGrid control to display data from the Employee table in our database. We’ll use the properties and structure of the Employee table to set up the DataGrid.
Refer to the following code example.
<?xml version="1.0" encoding="utf-8"?>
<Window
    x:Class="SQLiteWithWinUIDataGrid.MainWindow"
    xmlns="http://schemas.microsoft.com/winfx/2006/xaml/presentation"
    xmlns:x="http://schemas.microsoft.com/winfx/2006/xaml"
    xmlns:local="using:SQLiteWithWinUIDataGrid"
    xmlns:d="http://schemas.microsoft.com/expression/blend/2008"
    xmlns:mc="http://schemas.openxmlformats.org/markup-compatibility/2006"
    xmlns:dataGrid="using:Syncfusion.UI.Xaml.DataGrid"
    mc:Ignorable="d">

    <Grid>
        <Grid.Resources>
            <local:EmployeeViewModel x:Key="employeeViewModel"/>
        </Grid.Resources>
        <dataGrid:SfDataGrid DataContext="{StaticResource employeeViewModel}"
                             x:Name="sfDataGrid"
                             AllowEditing="True"
                             AutoGenerateColumns="True">
        </dataGrid:SfDataGrid>
    </Grid>
</Window>
Step 7: Bind SQLite data to WinUI DataGrid
Then, bind the data from the SQLite database to the WinUI DataGrid control.
public sealed partial class MainWindow : Window
{
    public MainWindow()
    {
        this.InitializeComponent();

        this.Activated += OnActivated;
    }

    private async void OnActivated(object sender, WindowActivatedEventArgs args)
    {
        sfDataGrid.ItemsSource = await App.Database.GetEmployeesAsync();
    }
}
After executing the previous code examples, we’ll get the following output.

Perform CRUD actions with SQLite database and update in WinUI DataGrid
Let’s see how to perform CRUD actions on the SQLite database and update the changes in the WinUI DataGrid control.
Here, we have the AddWindow, EditWindow, and DeleteWindow, enabling us to add, save, and delete employee details, respectively. To perform such actions on this page, we must implement the code to perform CRUD operations on the SQLite database, and respective windows, as mentioned in the following steps.
Step 1: Database implementation for CRUD actions
The SQLite-net-pcl assembly has pre-defined methods for performing CRUD operations. For database updates, refer to the following code example.
public class SQLiteDatabase
{
    readonly SQLiteAsyncConnection _database;

    public async Task<List<Employee>> GetEmployeesAsync()
    {
        return await _database.Table<Employee>().ToListAsync();
    }

    public async Task<Employee> GetEmployeeAsync(Employee employee)
    {
        return await _database.Table<Employee>().Where(i => i.EmployeeID == employee.EmployeeID).FirstOrDefaultAsync();
    }

    public async Task<int> AddEmployeeAsync(Employee employee)
    {
        return await _database.InsertAsync(employee);
    }

    public Task<int> DeleteEmployeeAsync(Employee employee)
    {
        return _database.DeleteAsync(employee);
    }

    public Task<int> UpdateEmployeeAsync(Employee employee)
    {
        if (employee.EmployeeID != 0)
            return _database.UpdateAsync(employee);
        else
            return _database.InsertAsync(employee);
    }
}
Step 2: Implement CRUD actions
The codes to add a new item, edit an item, or delete a selected item have been implemented through the AddWindow, EditWindow, and DeleteWindow, respectively. Also, these windows are integrated through a menu flyout support for record rows of DataGrid.
Refer to the following code example.
<dataGrid:SfDataGrid DataContext="{StaticResource employeeViewModel}"
                     x:Name="sfDataGrid"
                     AllowEditing="True"
                     ColumnWidthMode="Auto"
                     AutoGenerateColumns="True">
    <dataGrid:SfDataGrid.RecordContextFlyout>
        <MenuFlyout>
            <MenuFlyoutItem Text="Add" Icon="Add" Click="OnAddMenuClick"/>
            <MenuFlyoutItem Text="Edit" Icon="Edit" Click="OnEditMenuClick"/>
            <MenuFlyoutItem Text="Delete" Icon="Delete" Click="OnDeleteMenuClick" />
        </MenuFlyout>
    </dataGrid:SfDataGrid.RecordContextFlyout>
</dataGrid:SfDataGrid>
Refer to the following image.

Clicking on a menu flyout item will activate the corresponding window for CRUD operations, which is implemented as shown below.
private void OnAddMenuClick(object sender, RoutedEventArgs e)
{
    AddOrEditWindow addWindow = new AddOrEditWindow();
    addWindow.Title = "Add Record";
    App.ShowWindowAtCenter(addWindow.AppWindow, 550, 650);
    addWindow.Activate();
}

private void OnEditMenuClick(object sender, RoutedEventArgs e)
{
    AddOrEditWindow editWindow = new AddOrEditWindow();
    editWindow.Title = "Edit Record";
    editWindow.SelectedRecord = sfDataGrid.SelectedItem as Employee;
    App.ShowWindowAtCenter(editWindow.AppWindow, 550, 650);
    editWindow.Activate();
}

private void OnDeleteMenuClick(object sender, RoutedEventArgs e)
{
    DeleteWindow deleteWindow = new DeleteWindow();
    App.ShowWindowAtCenter(deleteWindow.AppWindow, 200, 500);
    deleteWindow.SelectedRecord = sfDataGrid.SelectedItem as Employee;
    deleteWindow.Activate();
}
Step 3: Preparing a window to add a new record or to edit a selected record
The AddOrEditWindow class implements the UI to add new records with all necessary Employee class information and edit the selected record. The window binds controls with information on the selected record to retrieve data for the new or edit an existing record.
Information for creating a new record or editing an existing record can be retrieved with controls available in the window bound with details of the selected record. For edit operations, controls will be populated based on the SelectedRecord, which is bound, and for add operations, controls will be loaded with default values since the SelectedRecord will be null.
Refer to the following code example.
AddOrEditWindow.xaml
<?xml version="1.0" encoding="utf-8"?>
<Window
    x:Class="SQLiteWithWinUIDataGrid.AddOrEditWindow"
    xmlns="http://schemas.microsoft.com/winfx/2006/xaml/presentation"
    xmlns:x="http://schemas.microsoft.com/winfx/2006/xaml"
    xmlns:local="using:SQLiteWithWinUIDataGrid"
    xmlns:d="http://schemas.microsoft.com/expression/blend/2008"
    xmlns:mc="http://schemas.openxmlformats.org/markup-compatibility/2006"
    mc:Ignorable="d">

    <Grid Margin="5" x:Name="AddEditGrid">
        <StackPanel Orientation="Horizontal" HorizontalAlignment="Center" VerticalAlignment="Center">
            <Grid >
                <Grid.ColumnDefinitions>
                    <ColumnDefinition Width="150"/>
                    <ColumnDefinition Width="250"/>
                </Grid.ColumnDefinitions>
                <Grid.RowDefinitions>
                    <RowDefinition />
                    <RowDefinition />
                    <RowDefinition />
                    <RowDefinition />
                    <RowDefinition />
                    <RowDefinition />
                    <RowDefinition />
                </Grid.RowDefinitions>

                <TextBlock Grid.Column="0" Grid.Row="0" Text="Employee ID:" HorizontalAlignment="Right" VerticalAlignment="Center" />
                <NumberBox Grid.Column="1" Grid.Row="0" x:Name="employeeIDTextBox" Text="{Binding EmployeeID}" Margin="5" />

                <TextBlock Grid.Column="0" Grid.Row="1" Text="Employee Name:" HorizontalAlignment="Right" VerticalAlignment="Center" />
                <TextBox Grid.Column="1" Grid.Row="1" x:Name="employeeNameTextBox" Text="{Binding Name}" Margin="5" />

                <TextBlock Grid.Column="0" Grid.Row="2" Text="Employee Mail:" HorizontalAlignment="Right" VerticalAlignment="Center" />
                <TextBox Grid.Column="1" Grid.Row="2" x:Name="EmployeeMailTextBox" Text="{Binding EMail}" Margin="5"/>

                <TextBlock Grid.Column="0" Grid.Row="3" Text="Employee Birth Date:" HorizontalAlignment="Right" VerticalAlignment="Center" />
                <CalendarDatePicker Grid.Column="1" Grid.Row="3" x:Name="EmployeeBirthDatePicker" Date="{Binding BirthDate}" Margin="5" />

                <TextBlock Grid.Column="0" Grid.Row="4" Text="Employee Gender:" HorizontalAlignment="Right" VerticalAlignment="Center" />
                <ComboBox Grid.Column="1" Grid.Row="4" x:Name="GenderComboBox" SelectedItem="{Binding Gender}" Margin="5">
                    <x:String>Male</x:String>
                    <x:String>Female</x:String>
                </ComboBox>
                <TextBlock Grid.Column="0" Grid.Row="5" Text="Employee Location:" HorizontalAlignment="Right" VerticalAlignment="Center" />
                <TextBox Grid.Column="1" Grid.Row="5" x:Name="EmployeeLocationTextBox" Text="{Binding Location}" Margin="5"/>
                <StackPanel Grid.Column="1" Grid.Row="6" Orientation="Horizontal">
                    <Button Content="Save" Click="OnSaveClick" Margin="2" />
                    <Button Content="Cancel" Click="OnCancelClick" Margin="2"/>
                </StackPanel>
            </Grid>
        </StackPanel>
    </Grid>
</Window>
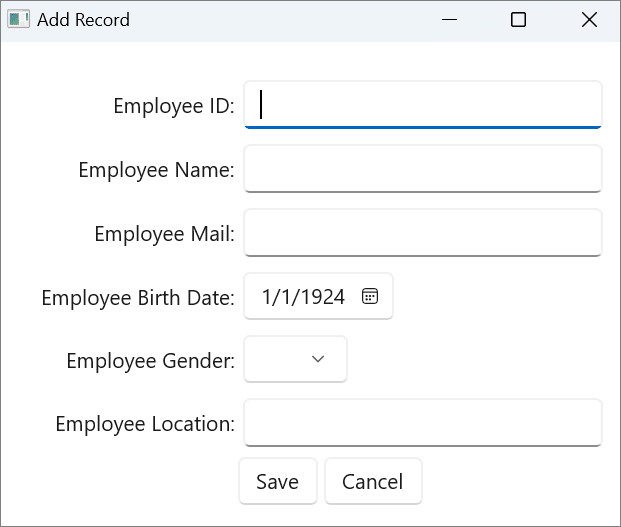
Refer to the following image. Here, you can see the UI representation of the window for adding a new record. It loads controls with default values.
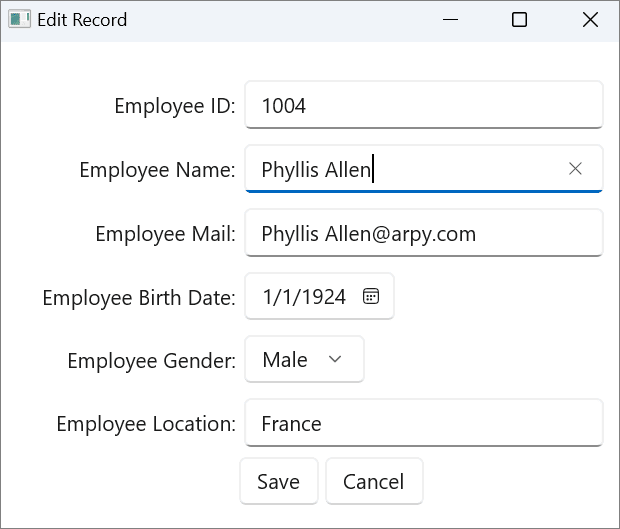
The UI representation of the window to edit a selected record will load controls with values from the SelectedRecord, as shown below.
Clicking on the Save button in the add or edit window will add a new employee record in the underlying employee record collection if the SelectedRecord is empty and will modify the selected employee record with the modified data when the SelectedRecord is available.
The implementation for adding a new employee record or editing a selected record through the click operation of the Save button in the AddOrEditWindow.xaml.cs file is shown below.
private async void OnSaveClick(object sender, RoutedEventArgs e)
{
    bool isEdit = true;
    if (SelectedRecord == null)
    {
        isEdit = false;
        SelectedRecord = new Employee();
    }

    SelectedRecord.EmployeeID = this.employeeIDTextBox.Value;
    SelectedRecord.Name = this.employeeNameTextBox.Text;
    SelectedRecord.EMail = this.EmployeeMailTextBox.Text;
    SelectedRecord.Gender = this.GenderComboBox.SelectedItem.ToString();
    SelectedRecord.BirthDate = this.EmployeeBirthDatePicker.Date;
    SelectedRecord.Location = this.EmployeeLocationTextBox.Text;

    if (isEdit)
        await App.Database.UpdateEmployeeAsync(SelectedRecord);
    else
        await App.Database.AddEmployeeAsync(SelectedRecord);

    this.Close();
}
Step 4: Preparing a window to delete a selected record
The UI for deleting a selected record from the collection is implemented in the DeleteWindow class.
Refer to the following code example.
DeleteWindow.xaml
<?xml version="1.0" encoding="utf-8"?>
<Window
    x:Class="SQLiteWithWinUIDataGrid.DeleteWindow"
    xmlns="http://schemas.microsoft.com/winfx/2006/xaml/presentation"
    xmlns:x="http://schemas.microsoft.com/winfx/2006/xaml"
    xmlns:local="using:SQLiteWithWinUIDataGrid"
    xmlns:d="http://schemas.microsoft.com/expression/blend/2008"
    xmlns:mc="http://schemas.openxmlformats.org/markup-compatibility/2006"
    mc:Ignorable="d" Title="Delete Record">

    <Grid>
        <StackPanel VerticalAlignment="Center" HorizontalAlignment="Center">
            <TextBlock Text="Do you want to Delete the Selected Record?"/>
            <StackPanel Orientation="Horizontal" HorizontalAlignment="Center" VerticalAlignment="Center">
                <Button Content="Yes" Margin="5" Click="OnYesClick" />
                <Button Content="Cancel" Margin="5" Click="OnCancelClick"/>
            </StackPanel>
        </StackPanel>
    </Grid>
</Window>
The UI representation of the window to delete a selected record is shown below.

Clicking the Yes button in the delete window deletes the selected record and updates the underlying employee record collection to the DataGrid.
Implementation for deleting a selected employee record through the click operation of the Yes button in the DeleteWindow.xaml.cs file is shown below.
private async void OnYesClick(object sender, RoutedEventArgs e)
{
    await App.Database.DeleteEmployeeAsync(this.SelectedItem);
    this.Close();
}
You will get the following output after executing all the previous code examples. On tapping the Add menu item, you can provide information and add a new record.
On tapping the Edit menu item, you can edit the selected record’s information; on tapping the Delete menu item, you can delete the selected record.
Refer to the following GIF image.

GitHub reference
For more details, refer to the Binding SQLite data in WinUI DataGrid and perform CRUD actions GitHub demo.
Conclusion
Thanks for reading! In this blog, we’ve seen how to integrate and populate data from an SQLite database in the Syncfusion WinUI DataGrid and perform CRUD actions. We encourage you to try these steps and share your feedback in the comments below.
Our customers can access the latest version of Essential Studio for WinUI from the License and Downloads page. If you are not a Syncfusion customer, you can download our free evaluation to explore all our controls.
For questions, you can contact us through our support forum, support portal, or feedback portal. We are always happy to assist you!


