In the “Leveraging Salesforce Using Spring Boot” article, I navigated the course for introducing a Spring Boot service that would leverage the well-established Salesforce RESTful API. The goal of this service is to act as a middleware layer to allow clients not written in Salesforce to retrieve and update contact data stored in Salesforce. This backend service implements its own caching layer to provide a faster response time and also cut down on the number of times Salesforce needed to be called.
In the “Leveraging Salesforce Using a Client Written In Svelte” article, I introduced a simple client written in Svelte, which provided the ability to make updates to the Salesforce data using an inline editor. Again, without actually using the Salesforce client.
In this article, I will introduce a client application using the Vue.js framework to further interact with the Spring Boot service to not only read data from Salesforce but to process and display updates made to the Salesforce data via a server-sent events (SSE) implementation.
Why Vue.js?
Aside from continuing to be one of the top three JavaScript client frameworks, Vue.js offers the following benefits:
- Dedicated corporations (Alibaba and Baidu) and a large adoption rate in China, which have helped fuel continued development and adoption, despite not being funded by any major corporations.
- The architecture of Vue.js fosters a minor learning curve while also providing the ability to create flexible components.
- Because of a small runtime (~20 KB), Vue.js is certainly a framework that performs quite faster than most competing frameworks.
Revisiting the Example Use Case
To recap our example use case, the Business Call Center is about to launch a major marketing campaign. However, they recently discovered that the title noted for the list of contacts was incorrect approximately 90% of the time.
In the “Leveraging Salesforce Using a Client Written In Svelte” article, I introduced a simple client to allow a team of interns to make inline updates to a view of contacts. While it would be easy to reintroduce this logic in Vue.js, let’s consider the additional use case where a centralized team needs to know when title changes are being applied.
As a result, the Vue.js client application will require the following functionality:
- Retrieve a list of all contacts in Salesforce.
- Listen to broadcasted server-sent events (SSEs) every time a title changes in the RESTful API (and the Svelte client).
- Automatically update the list of contacts when a title changes.
- Display a simple toast message to summarize the title change event.
- The toast message will remain on the screen until acknowledged by the client.
For the purposes of this article, here is an example of the toast message content:
Title updated for John Doe from Sales Manager to Director of Sales
Getting Started with Vue.js
Similar to the Svelte framework, getting started with Vue.js is quite simple. In this case, I installed the Vue.js command-line interface (CLI) via npm, but could have used yarn as well:
npm install -g @vue/cli
The Vue.js CLI provided the following options:
Vue CLI v4.5.13
? Please pick a preset:
❯ Default ([Vue 2] babel, eslint)
  Default (Vue 3) ([Vue 3] babel, eslint)
  Manually select features
I decided to stay with version 2 for this example since I am less familiar with version 3 at this time.
Once completed, I simply needed to change to the newly created folder and start the client:
cd salesforce-integration-vue
npm run serve
Within a few seconds, the following output was displayed in my terminal session:
DONE  Compiled successfully in 2288ms                                                                                                    1:43:50 PM

 App running at:
 - Local:   http://localhost:8080/
 - Network: http://192.168.1.212:8080/

 Note that the development build is not optimized.
 To create a production build, run npm run build.
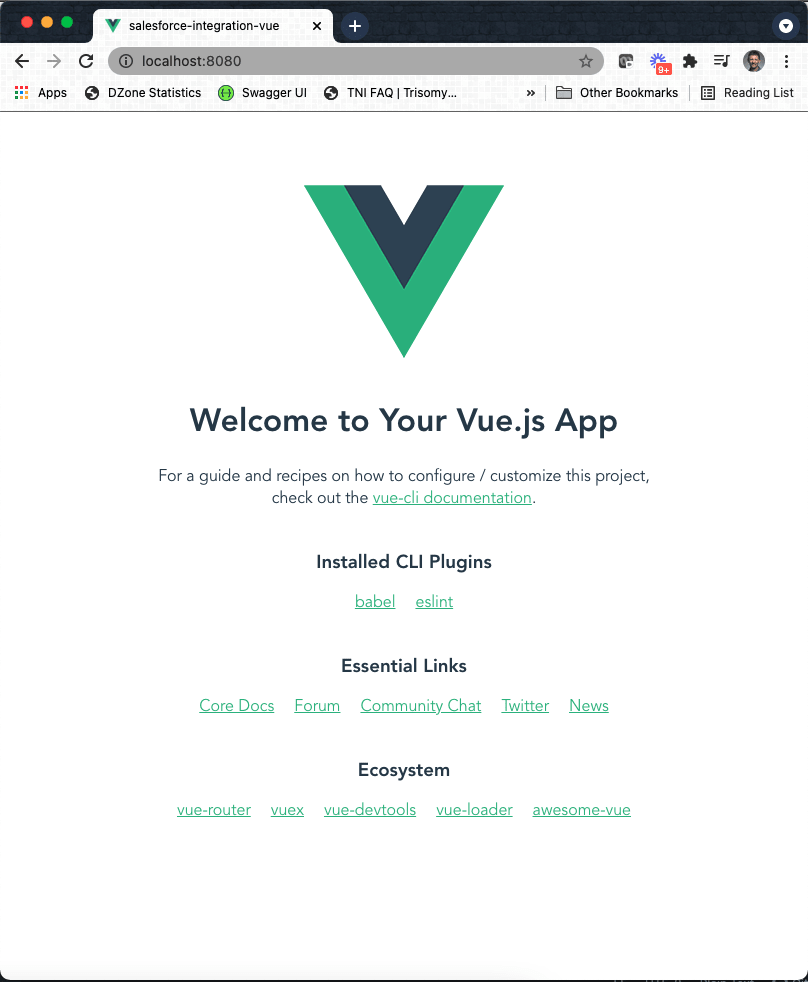
Navigating to localhost:8080 presented the Vue.js application:
Adding Some Dependencies
To make the Vue.js client meet the needs of the example use case, I wanted to locate existing plug-ins to make my job easier. I wanted to find assistance with the following aspects:
- Bootstrap-like styling (because I am not a UI/UX expert)
- HTTP client functionality
- SSE handing
- Toast message handling
bootstrap-vue
Within a few minutes, I located the bootstrap-vue dependency, then added it to my project using the following command:
npm install vue bootstrap bootstrap-vue
Next, I updated the main.js file to include the following items:
import BootstrapVue from 'bootstrap-vue'

import 'bootstrap/dist/css/bootstrap.css'
import 'bootstrap-vue/dist/bootstrap-vue.css'

Vue.use(BootstrapVue)
Now, standard bootstrap classes, like shown below, will make my application look far better:
<table class="table">
      <thead class="thead-dark">
axios
Finding a solid HTTP client was also quick and easy. I simply added the axios dependency:
npm install --save axios
Once installed, I created a simple contact service in the ./src folder as defined below to retrieve a list of contacts from the Spring Boot RESTful service:
import axios from 'axios'

const SERVER_URL = 'http://localhost:9999';

const instance = axios.create({
    baseURL: SERVER_URL,
    timeout: 1000
});

export default {
    getContacts: () => instance.get('/contacts', {
        transformResponse: [function (data) {
            return data ? JSON.parse(data) : data;
        }]
    })
}
vue-sse
The vue-sse dependency will handle the processing of SSEs and was added to the application using the following CLI command:
npm install --save vue-sse
Next, the main.js file was updated to include the following items:
import VueSSE from 'vue-sse';

Vue.use(VueSSE)
The vue-sse dependency is now ready for use and will be further documented later in this article.
vue-toast-notification
The vue-toast-notification dependency will be used for the required toast messages noted in the example use case. Adding toast notification functionality to the application required the following CLI command:
npm install vue-toast-notification
Next, the main.js file was updated to include the following items:
import VueToast from 'vue-toast-notification';

import 'vue-toast-notification/dist/theme-sugar.css';

Vue.use(VueToast);
At this point, the toast notifications logic is in place and ready for use.
Updating the Spring Boot RESTful Service
The Spring Boot RESTful service, originally created in the “Leveraging Salesforce Without Using Salesforce” article, needed to be modified in order to provide the Vue.js client a URI to connect to for SSE processing. Of course, the Spring Boot RESTful service also needed to be updated to actually create and broadcast the title changes of the contacts being stored in Salesforce.
This section talks about the Java updates required to the Spring Boot repository. If you are not interested in the required service-tier updates and plan to simply pull down the latest service-tier code, simply scroll down to the “Creating the Contacts Component” section.
As a reminder, the service-tier code can be found in the following repository on GitLab:
https://gitlab.com/johnjvester/salesforce-integration-service
Introducing the Contact Event Publisher
Since the SSE message will contain the updated information from a Contact instance, I created a simple ContactEvent for the example use case:
@NoArgsConstructor
@AllArgsConstructor
@Data
public class ContactEvent {
    private Contact contact;
}
Leveraging the application event publisher which already exists in Spring Boot, a simple ContactEventPublisher was added to the service:
@RequiredArgsConstructor
@Component
public class ContactEventPublisher {
    private final ApplicationEventPublisher applicationEventPublisher;

    public void publishContactEvent(Contact contact) {
        applicationEventPublisher.publishEvent(new ContactEvent(contact));
    }
}
Finally, the updateContact() method for the PATCH event, was updated to publish the contact changes:
Contact contact = getContact(id);
contactEventPublisher.publishContactEvent(contact);
return contact;
Providing a Stream Controller
With the Spring Boot service updated to publish events, the next step is to provide a controller that the Vue.js client can connect to in order to listen for the contact changes.
In order to differentiate between different client sessions, I decided it would be best to include a session identifier to keep track of each listener. As a result, I create the following class to track each client listening for contact changes:
@Data
@RequiredArgsConstructor
static class WebClient {
   private final String sessionId;
   private final SseEmitter emitter;
}
With such a design in place, it would be possible to direct an SSE message to a given client session. However, we won’t be performing that functionality at this part of the series.
Next, the /stream/{sessionId} was created to provide a URI for the Vue.js client to subscribe to for contact-based updates:
@GetMapping(value = "/stream/{sessionId}", produces = MediaType.TEXT_EVENT_STREAM_VALUE)
public SseEmitter contactEvents(@PathVariable("sessionId") String sessionId, HttpServletResponse response) {
    response.setHeader("Cache-Control", "no-store");
    log.info("Creating emitter for sessionId={}", sessionId);

    WebClient webClient = new WebClient(sessionId, new SseEmitter(ONE_HOUR));

    Set<WebClient> webClientsForDocument = EMITTERS.computeIfAbsent(sessionId,
            key -> Collections.newSetFromMap(new ConcurrentReferenceHashMap<>()));
    webClientsForDocument.add(webClient);

    webClient.getEmitter().onCompletion(() -> {
        log.info("Removing completed emitter for sessionId={}", sessionId);
        removeWebClientEmitter(sessionId, webClient);
    });

    webClient.getEmitter().onTimeout(() -> {
        log.warn("Removing timed out emitter for sessionId={}", sessionId);
        removeWebClientEmitter(sessionId, webClient);
    });

    return webClient.getEmitter();
}
At a very high level, the contactEvents() method accomplishes the following tasks:
- Establishes a new WebClient for the provided sessionId
- Adds to the list of emitters to broadcast to when contact events arrive
- Removes emitters on timeout or completion
Finally, the event handling needs to be introduced. In Spring Boot, the @EventListener annotation can be added to a simple method:
@EventListener
public void onDocumentEvent(ContactEvent contactEvent) {
    processEvent(contactEvent);
}
When ContactEvents are published the processEvent() method simply broadcasts the changes to every listening client:
protected void processEvent(ContactEvent contactEvent) {
    Collection<WebClient> matchingEmitters = EMITTERS.values().stream()
            .flatMap(Collection::stream)
            .collect(toCollection(HashSet::new));

        matchingEmitters.parallelStream().forEach(webClient -> {
            if (webClient != null) {
                try {
                    log.debug("Sending contact={} to WebClient sessionId={}", contactEvent.getContact(), webClient.getSessionId());
                    webClient.emitter.send(contactEvent.getContact());
                } catch (IOException e) {
                    e.printStackTrace();
                }
            }
        });
}
With the Spring Boot service updated and restarted, we can resume focus on the Vue.js client updates.
Creating the Contacts Component
Like Svelte, Vue.js allows for single-file components to exist. Using IntelliJ IDEA and the Vue.js plugin, I created the Contacts.vue component file and added a simple section for the view data—complete with standardized Bootstrap tags:
<template>
  <div v-if="loading">
    <p class="loading">loading ...</p>
  </div>
  <div v-else>
    <table class="table">
      <thead class="thead-dark">
      <tr>
        <th scope="col">Name</th>
        <th scope="col">Department</th>
        <th scope="col">Title</th>
      </tr>
      </thead>
      <tbody>
      <tr v-for="contact in contacts" :key="contact.id">
        <td>{{contact.Name}}</td>
        <td>{{contact.Department ? contact.Department : "(not set)"}}</td>
        <td>{{contact.Title}}</td>
      </tr>
      </tbody>
    </table>
  </div>
</template>
The core of the script portion of the contacts component is quite simple: establishing the SSE client, an array of contacts, and a loading boolean:
import contactService from '../contact-service';

let sseClient;

export default {
  name: "Contacts",

  data() {
    return {
      loading: true,
      contacts: []
    };
  },
The mounted() functionality was added to retrieve a list of contacts from the Spring Boot RESTful API and establish a listener for SSE functionality:
mounted() {
    contactService.getContacts()
        .then(response => {
          console.log('contacts', response.data);
          this.contacts = response.data;
        })
        .catch(error => {
          console.error(error)
        })
        .finally(() => this.loading = false);

    sseClient = this.$sse.create({
      url: 'http://localhost:9999/stream/' + uuidv4(),
      format: 'json',
      withCredentials: false,
      polyfill: true,
    });

    sseClient.on('message', this.handleMessage);

    sseClient.connect()
        .then(sse => {
          console.log('Listening for SSEs on sse', sse);

          setTimeout(() => {
            sseClient.off('message', this.handleMessage);
            console.log('Stopped listening');
          }, 60000);
        })
        .catch((err) => {
          console.error('Failed to connect to server', err);
        });
  }
In order to generate a unique ID for every listener on the SSE URI, a simple function was added to the contacts component:
function uuidv4() {
  return 'xxxxxxxx-xxxx-4xxx-yxxx-xxxxxxxxxxxx'.replace(/[xy]/g, function(c) {
    let r = Math.random() * 16 | 0, v = c === 'x' ? r : (r & 0x3 | 0x8);
    return v.toString(16);
  });
}
Finally, methods were added to the component to handle creating the toast message and SSE client disconnecting:
handleMessage(message) {
      console.info('Received message', message);

      if (message.id && this.contacts) {
        let foundIndex = this.contacts.findIndex(x => x.id === message.id);

        if (foundIndex >= 0) {
          let contact = this.contacts[foundIndex];

          let toastMessage = 'Title updated for ' + contact.Name + ' from ' + contact.Title + ' to ' + message.Title;

          console.info(toastMessage);

          this.$toast.info(toastMessage, {
            position : "bottom",
            duration : 0
          });

          contact.Title = message.Title;
        }
      }
    }
  },
  beforeDestroy() {
    sseClient.disconnect();
  }
To see the final version of the Contacts component, which includes an empty style section, check out the following URL:
https://gitlab.com/johnjvester/salesforce-integration-vue/-/blob/master/src/components/Contacts.vue
Using the Vue.js Client
The App.vue component was updated to remove the hello world aspects to yield the following design:
<template>
  <div id="app">
    <h1>Contact List (from Salesforce)</h1>
    <Contacts />
  </div>
</template>

<script>
import Contacts from "./components/Contacts";

export default {
  name: 'App',
  components: {
    Contacts
  },
  data: () => {
    return {
    }
  }
}
</script>
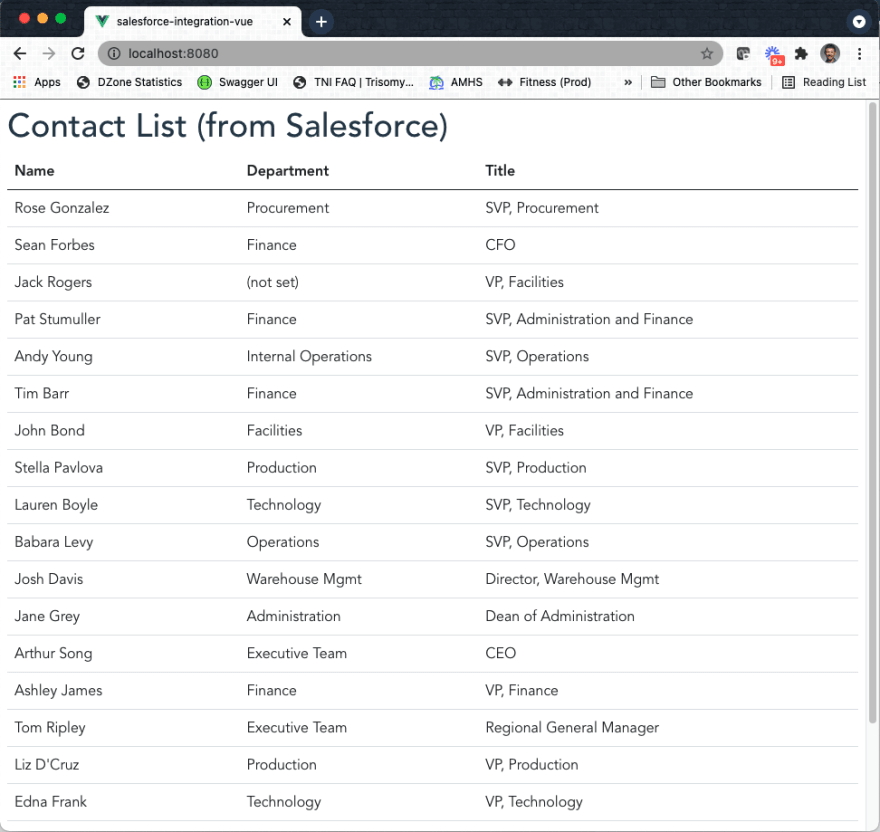
With these changes in place, navigation to the localhost:8080 presented the updated Vue.js application:
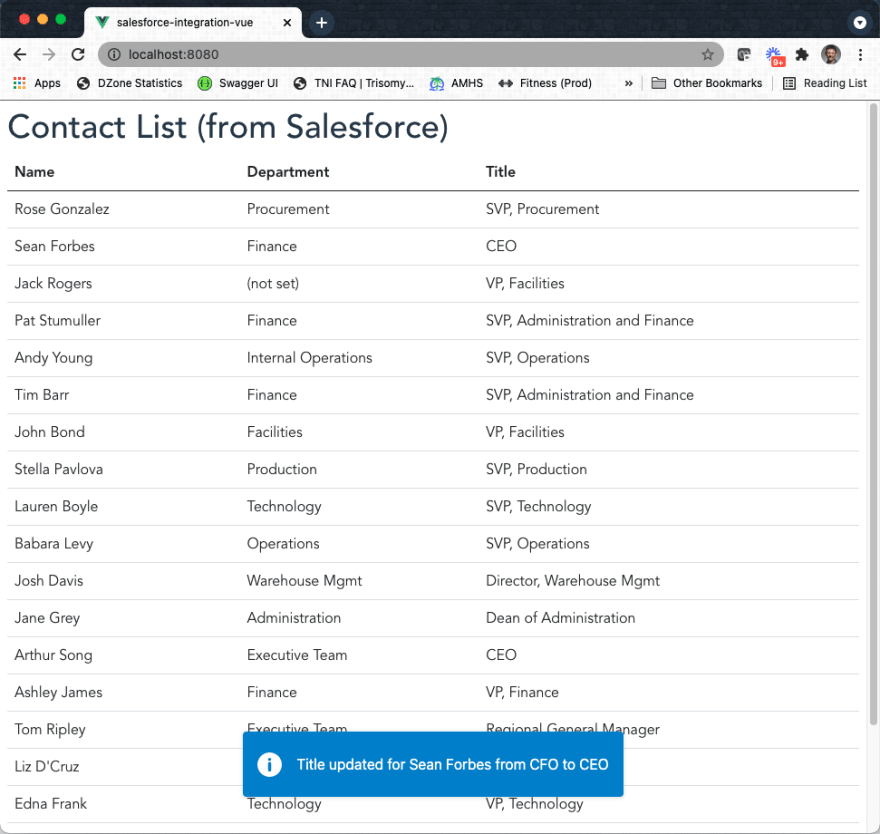
Next, using a simple cURL command, I updated the title of Sean Forbes from being the CFO to the CEO. This event updated the Vue.js application as shown below:
Notice the title change in the list above and the toast message.
Side-by-Side Demonstration
Using everything created in this series so far, I created an animated GIF that shows the Svelte client on the left and the Vue.js client on the right.
In the animated demonstration, a title is updated using the inline edit capabilities in Svelte. Shortly after the title is updated in the Svelte client, the Vue.js client receives the SSE with the updated contact information and dynamically updates the data for the updated contact. At the same time, the toast message is displayed, remaining on the screen until acknowledged by the end-user.
Conclusion
Starting in 2021, I have been trying to live the following mission statement, which I feel can apply to any IT professional:
“Focus your time on delivering features/functionality which extends the value of your intellectual property. Leverage frameworks, products, and services for everything else.”
- J. Vester
In this article, I leveraged an existing client framework and laser-focused dependencies to allow the creation of a component that meets the business needs provided in the example use case. Like my exercise using the Svelte client, the end-to-end time to complete this work was truly measured in minutes over hours.
Of course, a production-ready scenario would require some additional work to prepare this application for “prime time” use.
If you are interested in the source code used for the Vue.js client, simply navigate to the following repository on GitLab:
https://gitlab.com/johnjvester/salesforce-integration-vue
Future articles are also planned for the following other JavaScript-based clients:
- React (React Native)
- Angular
- Lightning Web Components (outside the Salesforce ecosystem)
Have a really great day!


