TL;DR
In this tutorial, you'll learn how to create an Instagram web app utilizing Supabase.js and Next.js.
Intro
You may be familiar with an app called Instagram 🤪.
Instagram has exploded in popularity in recent years and currently boasts about 2 billion monthly active users worldwide.
From an end-user perspective, Instagram is the go-to place to share images and communicate with friends, family and the world at large.
But from a developer's POV, it's even more than that. Experimenting with building an Instagram-like web application is a proven, solid context for creating a fast, scalable web app with real-time data synchronization.
And so, in this tutorial, we'll create a basic Instagram web app utilizing both Supabase.js and Next.js. Hopefully, you'll find this to be a good way to work with these technologies and integrate them together.
Why do we care about this stuff??
Now, just some quick context on who we are, and why we love talking about this stuff.
Our team at Livecycle is obsessed with developer experience and developer happiness.
Our SDK enables frontend teams to build products faster, together by enabling on-site, Figma-like comments on any PR deploy preview environment. With a contextual, async reviews you save yourself tons of time, money and headaches.
So it's no surprise that our teams loves DevX, devtools, and all-things frontend development. So let's dive right into it.
So... What exactly is Next.js?
Before we roll up our sleeves, let's quickly review some basics. Next.js is a JavaScript framework that allows you to create server-side rendered and statically exported React apps. It offers a simple setup, automated code splitting, optimal speed, and a variety of other features that enable developers to create quick and scalable web applications.
It also supports a variety of CSS and styling alternatives, such as styled-jsx, CSS-in-JS libraries, and standard CSS.
And What is Supabase.js?
Supabase.js is an open-source toolkit that enables developers to add real-time functionality to online applications that use PostgreSQL databases. It includes a query builder, real-time data synchronisation, and a JavaScript API for incorporating real-time features into web applications for dealing with a PostgreSQL database.
The great thing about Supabase.js is that it works with any front-end framework, such as React, Angular, and Vue. It seeks to simplify the development of real-time applications by abstracting away some of the complexities of real-time database synchronization.
With the intros out of the way...
Setting up Supabase.js online & adding data to the database
Step 1: Creating a Supabase account
The first thing that you will need to do is create an account on the Supabase website.
Step 2: Creating a Supabase project
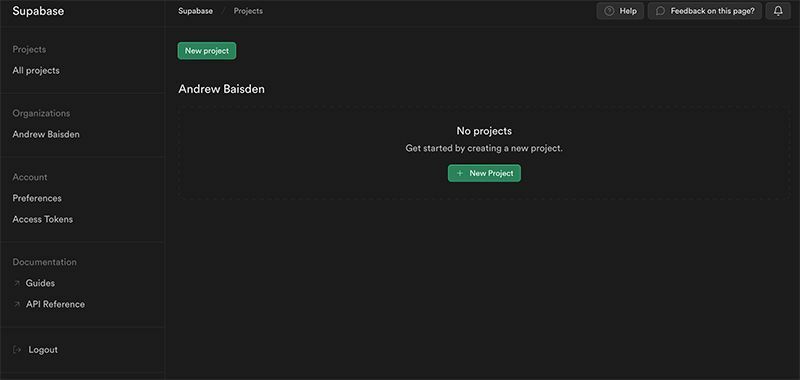
Next, create a new project from the example screen shown here.
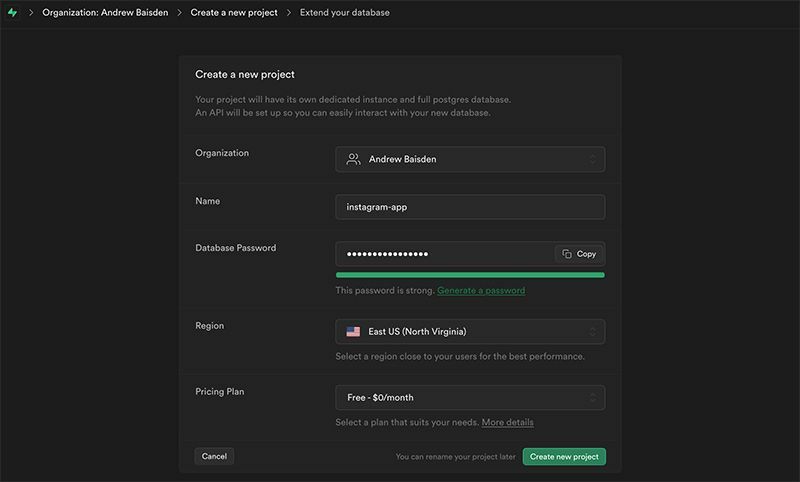
Next, give your project a name. In this example, I called mine instagram-app (very original, I know...) and generate a password. Obviously, be sure to save the password somewhere safe so you can retrieve it when needed.
Choose a region and then keep it selected on the Free plan. Now click the Create new project button and wait for it to complete the setup.
Step 3: Creating a database and a table
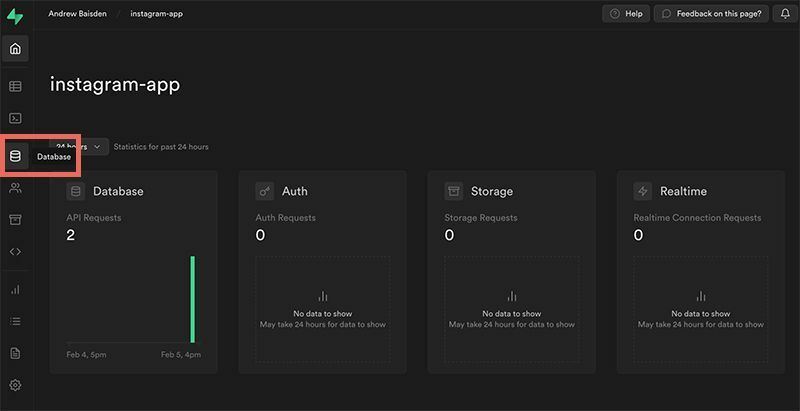
Now it's time for us to create a database with a table and some data for our Instagram app. Click on the Database button as highlighted here:
Follow up by clicking on the New table button on the next page.
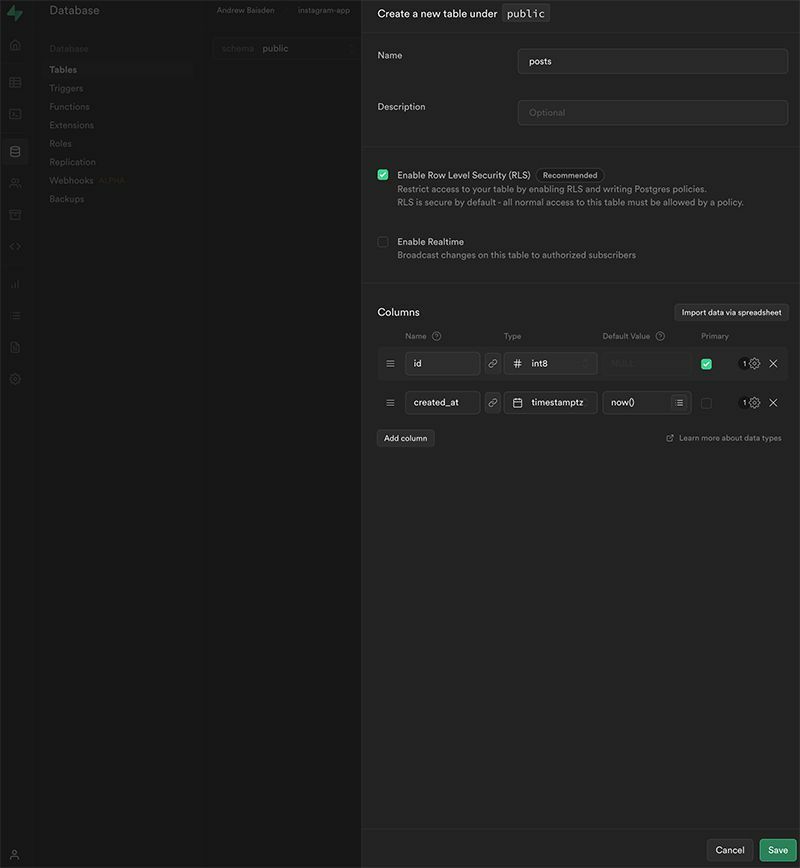
On the next screen, give the table a name. In this example, we called it posts.
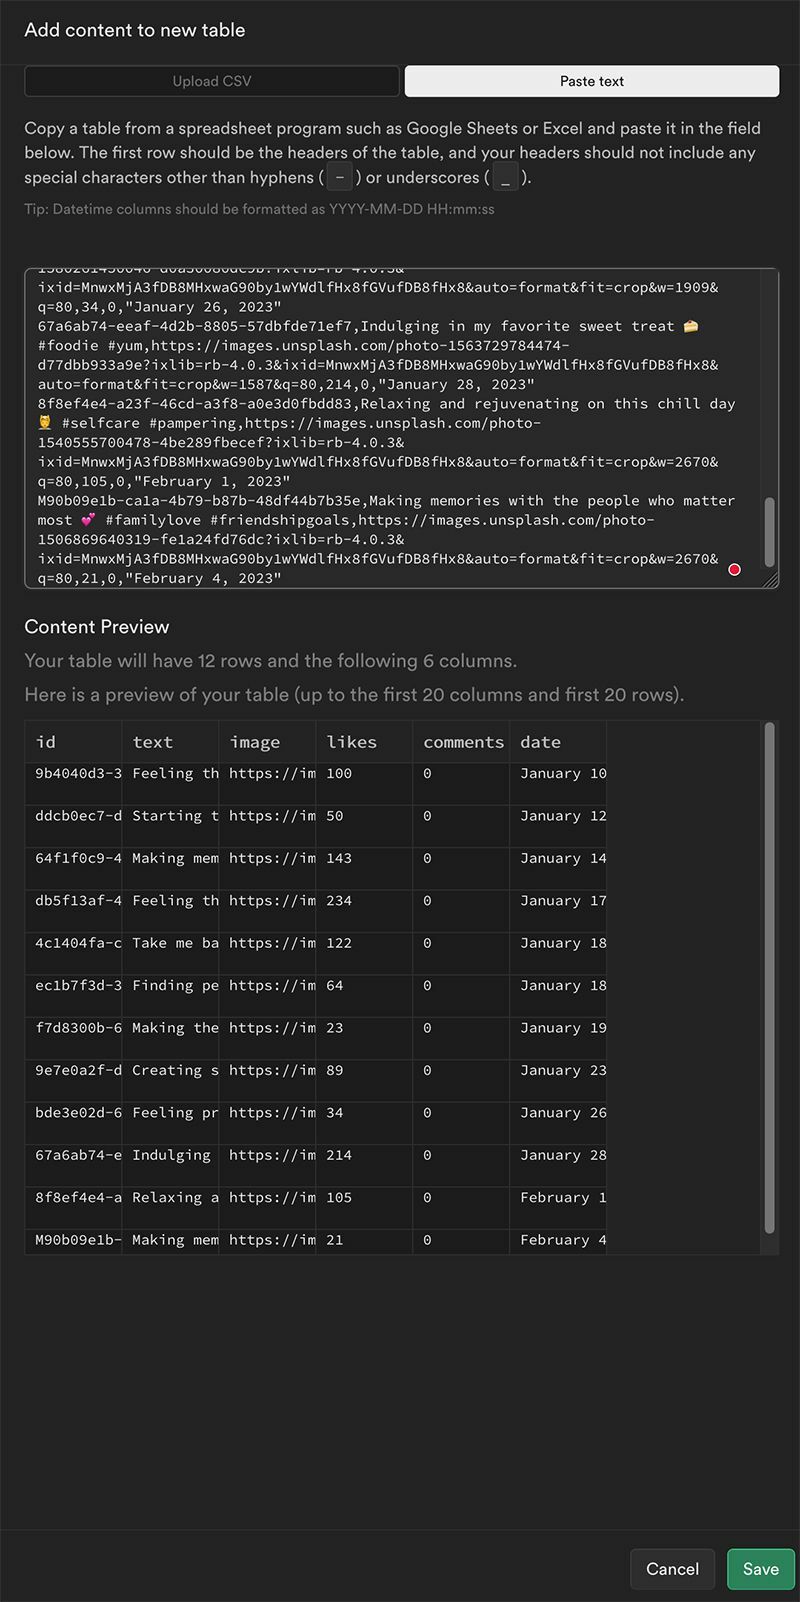
You now need to click on the Import data via spreadsheet button so that we can import some .csv data for the Instagram app.
Copy and paste the text below into the input and it should look like the image under this code block.
id,text,image,likes,comments,date

9b4040d3-3b06-4701-bcc1-7eb1dbb33a14,Feeling thankful for this beautiful view 🌅 #blessed #sunsetlover,https://images.unsplash.com/photo-1557456170-0cf4f4d0d362?ixlib=rb-4.0.3&ixid=MnwxMjA3fDB8MHxzZWFyY2h8Mnx8bGFrZXxlbnwwfHwwfHw%3D&auto=format&fit=crop&w=900&q=60,100,0,"January 10, 2023"

ddcb0ec7-d33a-4e7b-84c9-0a2e0b3a3d91,Starting the day off right with a healthy breakfast 🍓 #fitfoodie #wellness,https://images.unsplash.com/photo-1484723091739-30a097e8f929?ixlib=rb-4.0.3&ixid=MnwxMjA3fDB8MHxwaG90by1wYWdlfHx8fGVufDB8fHx8&auto=format&fit=crop&w=1547&q=80,50,0,"January 12, 2023"

64f1f0c9-4a4a-475e-941c-b45c5ab5ed5b,Making memories on this adventure 🌲 #wanderlust #neverstoplearning,https://images.unsplash.com/photo-1583384990896-96eec15d6160?ixlib=rb-4.0.3&ixid=MnwxMjA3fDB8MHxwaG90by1wYWdlfHx8fGVufDB8fHx8&auto=format&fit=crop&w=1587&q=80,143,0,"January 14, 2023"

db5f13af-4ba4-4ed7-9c5f-b7c45ab69f5b,Feeling the love with my furry friend 🐶 #dogsofinstagram #bestfriend,https://images.unsplash.com/photo-1585373683920-671438c82bfa?ixlib=rb-4.0.3&ixid=MnwxMjA3fDB8MHxzZWFyY2h8ODh8fGNhdHxlbnwwfHwwfHw%3D&auto=format&fit=crop&w=900&q=60,234,0,"January 17, 2023"

4c1404fa-c1d0-4b7c-9c0f-7e3f3d9563d8,Take me back to this tropical paradise 🏝️ #beachlife #islandvibes,https://images.unsplash.com/photo-1545579133-99bb5ab189bd?ixlib=rb-4.0.3&ixid=MnwxMjA3fDB8MHxzZWFyY2h8MTB8fGlzbGFuZHxlbnwwfHwwfHw%3D&auto=format&fit=crop&w=900&q=60,122,0,"January 18, 2023"

ec1b7f3d-3fc3-4901-b1a0-1c0b85a7d8a2,Finding peace and tranquility in nature 🌳 #mindfulmoments #greenery,https://images.unsplash.com/photo-1519331379826-f10be5486c6f?ixlib=rb-4.0.3&ixid=MnwxMjA3fDB8MHxzZWFyY2h8Mnx8cGFya3xlbnwwfHwwfHw%3D&auto=format&fit=crop&w=900&q=60,64,0,"January 18, 2023"

f7d8300b-6f2f-4e74-b19c-10c53f0ccdc6,Making the most of this beautiful day ☀️ #outdooradventures #sunnydays,https://images.unsplash.com/photo-1517480448885-d5c53555ba8c?ixlib=rb-4.0.3&ixid=MnwxMjA3fDB8MHxzZWFyY2h8MTA1fHxiZWFjaHxlbnwwfHwwfHw%3D&auto=format&fit=crop&w=900&q=60,23,0,"January 19, 2023"

9e7e0a2f-d6f3-440c-a50b-bb30dde03f77,Creating something new and beautiful 🎨 #artsy #diyfun,https://images.unsplash.com/photo-1579762715118-a6f1d4b934f1?ixlib=rb-4.0.3&ixid=MnwxMjA3fDB8MHxwaG90by1wYWdlfHx8fGVufDB8fHx8&auto=format&fit=crop&w=1584&q=80,89,0,"January 23, 2023"

bde3e02d-6d77-43a1-8e7f-a17a6c7f6b10,Feeling proud and inspired by this new accomplishment 💪 #personalbest #nevergiveup,https://images.unsplash.com/photo-1580261450046-d0a30080dc9b?ixlib=rb-4.0.3&ixid=MnwxMjA3fDB8MHxwaG90by1wYWdlfHx8fGVufDB8fHx8&auto=format&fit=crop&w=1909&q=80,34,0,"January 26, 2023"

67a6ab74-eeaf-4d2b-8805-57dbfde71ef7,Indulging in my favorite sweet treat 🍰 #foodie #yum,https://images.unsplash.com/photo-1563729784474-d77dbb933a9e?ixlib=rb-4.0.3&ixid=MnwxMjA3fDB8MHxwaG90by1wYWdlfHx8fGVufDB8fHx8&auto=format&fit=crop&w=1587&q=80,214,0,"January 28, 2023"

8f8ef4e4-a23f-46cd-a3f8-a0e3d0fbdd83,Relaxing and rejuvenating on this chill day 💆 #selfcare #pampering,https://images.unsplash.com/photo-1540555700478-4be289fbecef?ixlib=rb-4.0.3&ixid=MnwxMjA3fDB8MHxwaG90by1wYWdlfHx8fGVufDB8fHx8&auto=format&fit=crop&w=2670&q=80,105,0,"February 1, 2023"

M90b09e1b-ca1a-4b79-b87b-48df44b7b35e,Making memories with the people who matter most 💕 #familylove #friendshipgoals,https://images.unsplash.com/photo-1506869640319-fe1a24fd76dc?ixlib=rb-4.0.3&ixid=MnwxMjA3fDB8MHxwaG90by1wYWdlfHx8fGVufDB8fHx8&auto=format&fit=crop&w=2670&q=80,21,0,"February 4, 2023"
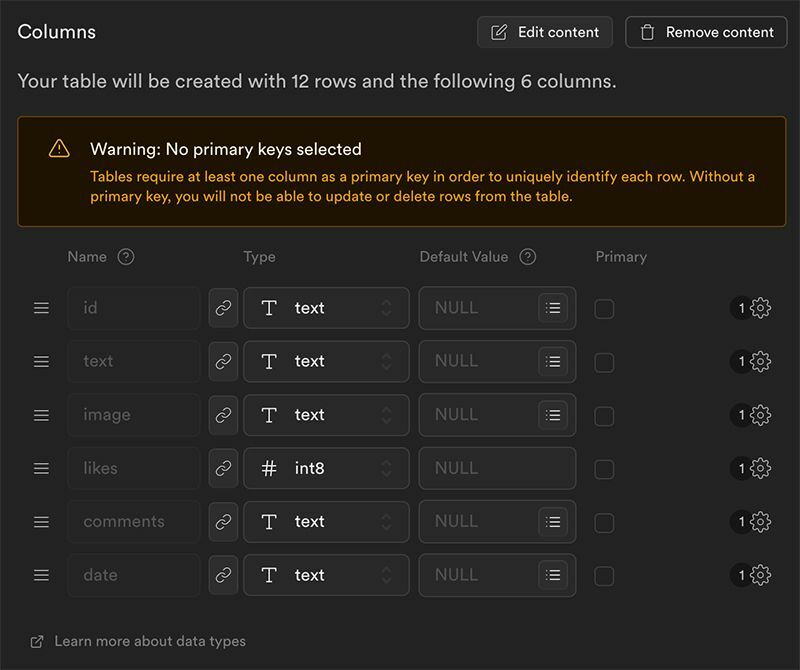
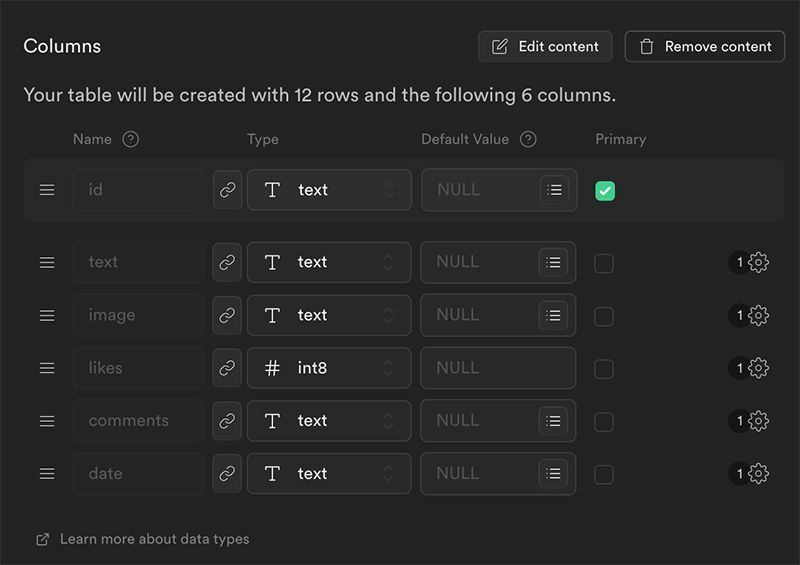
Click the Save button and on the next screen, you will see a primary key warning message. Make the id the primary key, and the warning will go away. See the images below for reference:
Great job! The database and table are now setup. However you are likely to encounter a 'Supabase returns empty array' problem when we try to build the UI. This is because Supabase requires us to set up a Row Level Security (RLS). Follow the steps below to create one for your database:
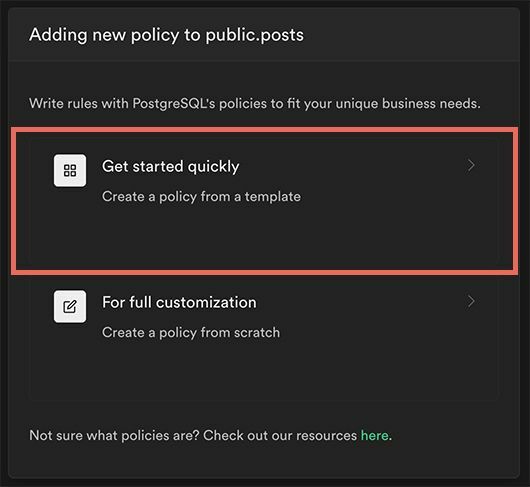
First, create a new policy.
After that step select the Get started quickly option.
Choose a policy and use the template. Here I am enabling read access for everyone which will allow the data from the API to be fetched and rendered on the page.
Creating an Instagram web app with Next.js
Connecting Supabase.js to the Next.js app
Step 1: Setting up a Next.js project
Navigate to your desktop or a directory of your choice and run the command below in your terminal to scaffold a project using Next.js. Go through the setup with the preferences of your choice and then cd into the supabase-instagram-app folder and install the Supabase package.
npx create-next-app@latest supabase-instagram-app
cd supabase-instagram-app
npm i @supabase/supabase-js
If you're using Visual Studio Code then you can just use the code below to open the project in your code editor. Otherwise, just open the project however you usually would.
code .
Step 2: Connecting to Supabase.js
Create a file called client.js and put it inside the api folder. Use the code below for the file.
import { createClient } from '@supabase/supabase-js';

export const supabase = createClient();
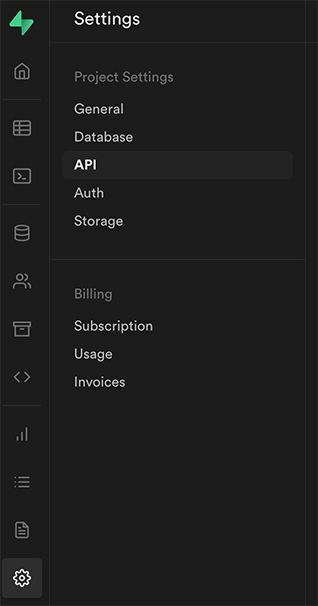
We will need the connection settings to connect our Next.js app to Supabase.js. To access this, go to your Supabase dashboard:
Project Settings > API
Copy the Project URL string and Project API keys string:
Now update the client.js file with the code here and add your own details:
import { createClient } from '@supabase/supabase-js';

export const supabase = createClient(
  // Project URL

  'your project url',

  // Project API keys

  'your api key'
);
Step 3: Creating the Instagram app
Open the index.js file inside of the pages folder and then replace all of the code inside with the code below:
import { useState, useEffect } from 'react';

import { supabase } from '../pages/api/client';

export default function Home() {
  useEffect(() => {
    fetchPosts();
  }, []);

  const [posts, setPosts] = useState([]);

  const [loading, setLoading] = useState(true);

  async function fetchPosts() {
    const { data } = await supabase.from('posts').select('*');

    try {
      setLoading(false);

      setPosts(data);

      console.log('Data:', data);
    } catch (error) {
      console.log(error);
    }
  }

  return (
    <>
      <div>
        {loading ? (
          <div>
            <p>Loading...</p>
          </div>
        ) : (
          <div className="instagram-container">
            <aside></aside>

            <section>
              <header>
                <div className="instagram-profile-picture-container">
                  <div className="instagram-profile-picture"></div>
                </div>

                <div className="instagram-profile">
                  <div className="instagram-name">
                    <h2>johnjoe</h2>

                    <button>Edit Profile</button>

                    <div>⚙️</div>
                  </div>

                  <div className="instagram-stats">
                    <p>12 posts</p>

                    <p>145 folowers</p>

                    <p>356 following</p>
                  </div>

                  <div className="instagram-bio">
                    <p>
                      John Doe | Blogger
                      <br /> <span>Personal blog</span> <br /> London, UK <br />{' '}
                      🇬🇧 💫 @johndoe.codes - documenting my tech journey! <br />
                      <a
                        href="https://linktr.ee/"
                        target="_blank"
                        rel="noopener noreferrer"
                      >
                        https://linktr.ee/
                      </a>
                    </p>
                  </div>
                </div>
              </header>

              <nav>
                <button>POSTS</button>

                <button>REELS</button>

                <button>SAVED</button>

                <button>TAGGED</button>
              </nav>

              <div className="instagram-container-gallery">
                {posts.map((post) => {
                  return (
                    <div key={post.id} className="instagram-post">
                      <img src={post.image} alt={post.text} />
                    </div>
                  );
                })}
              </div>
            </section>
          </div>
        )}
      </div>
    </>
  );
}
Do the same for the globals.css and Home.module.css files.
The globals.css style file:
@import url('../styles/Home.module.css');

@import url('https://fonts.googleapis.com/css2?family=Roboto&display=swap');

*,
*::before,
*::after {
  margin: 0;

  padding: 0;

  box-sizing: border-box;
}

:root {
  --main-font-family: 'Roboto', sans-serif;

  --main-font-color: #ffffff;

  --main-font-size: 16px;
}

html {
  font-size: var(--main-font-size);
}

body {
  background: #000000;

  color: #ffffff;
}
The Home.module.css style file:
.instagram-container {
  display: flex;

  flex-flow: row nowrap;
}

header {
  display: flex;

  flex-flow: row nowrap;

  margin: 2rem;

  border-bottom: 0.1rem solid #262626;

  justify-content: space-evenly;
}

header span {
  color: #a8a8a8;
}

.instagram-profile-picture {
  border-radius: 100%;

  height: 9rem;

  width: 9rem;

  background: #d4cbba;
}

.instagram-name {
  display: flex;

  flex-flow: row nowrap;
}

.instagram-name button {
  border-radius: 0.3rem;

  padding: 0.4rem;

  border: none;

  font-weight: bold;

  margin-left: 1rem;

  margin-right: 1rem;
}

.instagram-stats {
  display: flex;

  flex-flow: row nowrap;

  justify-content: space-between;

  margin: 1rem 0 1rem 0;

  font-weight: bold;
}

.instagram-bio {
  margin-bottom: 2rem;
}

.instagram-bio a {
  color: #e0f1ff;

  text-decoration: none;

  font-weight: bold;
}

aside {
  background: 000000;

  height: 100vh;

  width: 19.4375rem;

  border-right: 0.1rem solid #262626;
}

section {
  margin: 0 auto;
}

nav {
  display: flex;

  flex-flow: row nowrap;

  justify-content: space-around;

  width: 40rem;

  margin: 0 auto;
}

nav button {
  border: none;

  background: none;

  color: #ffffff;

  font-weight: bold;
}

.instagram-container-gallery {
  margin: 0 auto;

  width: 58.4375rem;

  display: flex;

  flex-flow: row wrap;
}

.instagram-post img {
  width: 18.3125rem;

  height: 18.3125rem;

  margin: 0.5rem 0.5rem 0.5rem 0.5rem;
}
Now run the command npm run dev to run the supabase-instagram-app and... Voilà!
You should see your shiny new Instagram clone app on http://localhost:3000/ which is connected to your supabase database. The data we input into the table earlier should be rendered on the page as a gallery.
Great job! 👏👏👏
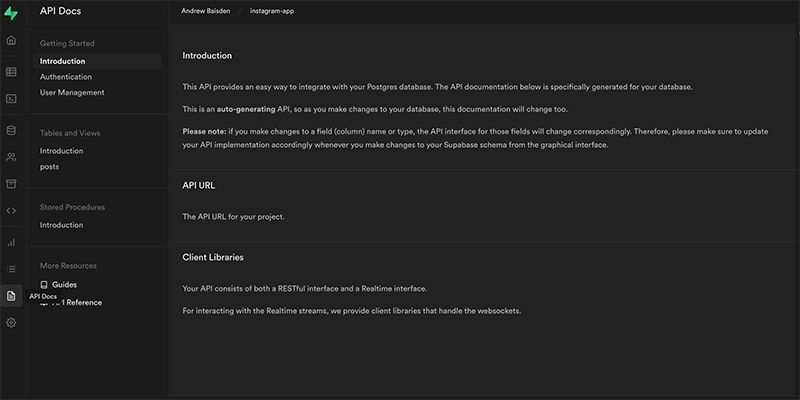
You can learn more about your Supabase API for the project from the API documents section as shown in the image below. If you click on the posts table it will give you the JavaScript CRUD code for all of your endpoints!
Final thoughts
To summarize, creating a basic Instagram web app is a great context for working with Supabase and Next.js. Supabase makes it simple to create a scalable backend, and Next.js provides a straightforward framework for creating quick and efficient frontend apps. Developers can quickly and easily construct an Instagram-style app that is both practical and aesthetically beautiful by using these two technologies.
Cloud-based databases and frontend frameworks have made it simpler than ever to design and launch online apps, and Supabase and Next.js provide the ideal balance of power and simplicity to make this process as simple as possible.
So whether you're an experienced developer or just starting out, this mix of technologies is well worth considering for your next web development project.
Thanks for reading!
If you found this article useful, then you're probably the kind of human who would appreciate the value Livecycle can bring to front end teams. I'd be thrilled if you tried our SDK on one of your own projects and gave it a spin with your team. 🙏


