TL;DR
In this tutorial we’ll show you how to use add authentication to your full stack application using Clerk.
We have zero affiliation with Clerk (they don’t even know we wrote this 🙂) but we like their tool and we thought this walk-through would be helpful to other developers who have asked us about authentication in the context of Next.js.
Introduction
Authentication has always been one of the major pain points while building full-stack applications. Especially in the Node.js environment, where the major libraries and frameworks don’t come with auth-primitives built-in. So developers had to step up and built their own authentication solution.
But building secure authentication from scratch is a tall order. You have to hash and salt passwords, issue signed tokens to create a session and prevent various kind of malicious attack vectors. Then you also have to make sure your front and back-end can communicate with each other and share the session.
Luckily, there are libraries such as Passport.js for Express and NextAuth for Next.js to help you achieve this. But they’re far from perfect. There are still a few steps involved for setting them up. And while they work great for Social Authentication with services like Google or GitHub, getting password login going is more difficult. And while these libraries are undoubtedly a big help, at the end of the day, passwords are still stored in your database. Where you bear the full responsibility.
Nowadays, email verification upon sign in, password less login and 2 factor authentication have become very popular. And while certainly possible with the previously discussed libraries, setting up these features requires additional work.
Enter Clerk, a hosted authentication provider. They take all of the pain away from authentication and make it super easy to properly secure your full-stack application. And compared to other hosted authentication providers, we think that Clerk offers a MUCH better developer experience.
Along with Clerk, we’ll be using Next.js 13 to build a very simple full-stack application with their new App Router.
Can you star our GitHub repo? 🤩
We create content like this because, like open source code, we believe quality developer content should be open and accessible to everyone who can benefit from it.
Would you be willing to support our open source efforts in general by starring our GitHub repository? We’d be thrilled, and it would also help us to keep creating content like this. Thank you!! 🙏 💖 https://github.com/livecycle/preevy
And now, with the introductions are out of the way…
Setup
In your terminal in a folder of choice run the command npx create-next-app@latest to provision a new Next app. Observe the settings we picked below. Especially important is that you say both Yes to Tailwind CSS and App Router.
➜  Desktop npx create-next-app@latest
✔ What is your project named? ... clerk-auth
✔ Would you like to use TypeScript with this project? ... No / Yes
✔ Would you like to use ESLint with this project? ... No / Yes
✔ Would you like to use Tailwind CSS with this project? ... No / Yes
✔ Would you like to use `src/` directory with this project? ... No / Yes
✔ Use App Router (recommended)? ... No / Yes
✔ Would you like to customize the default import alias? ... No / Yes
Now we change into the clerk-auth folder that was just created and install the single depdenency that we need: Clerk.
npm install @clerk/nextjs
Now we need to create a Clerk account and new project in order to obtain our API keys. So go to clerk.com, create an account and once in the dashboard click “Add application”.
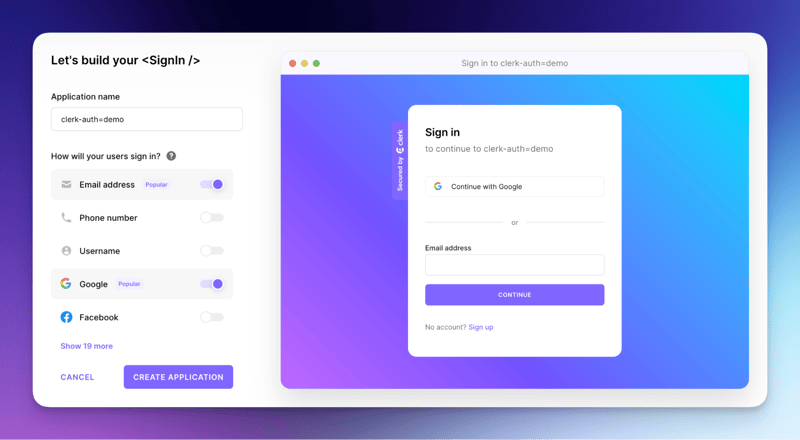
Name the application clerk-auth-demo and select Email + Google as sign in methods. If you like, you can also add other sign in methods. It won’t make any difference during development since Clerk does it all for you.
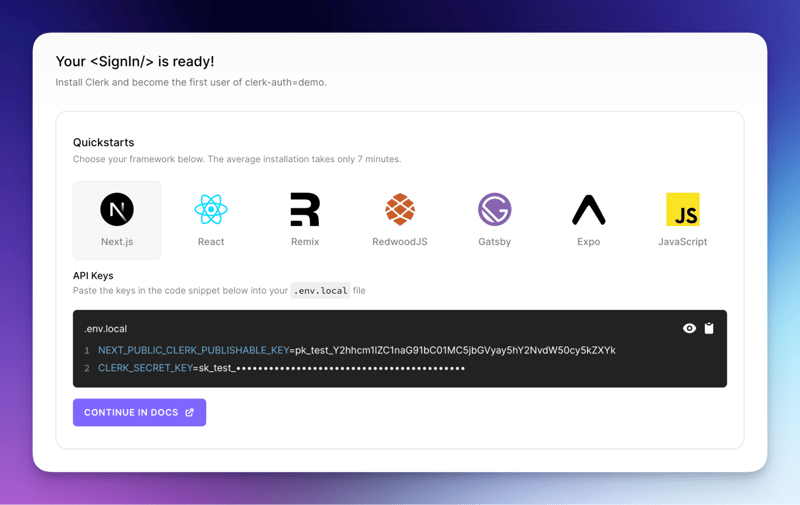
Now Clerk automatically presents you with the API keys we need to add to our Next app.
So create a .env.local file with this content copied over from Clerk.
NEXT_PUBLIC_CLERK_PUBLISHABLE_KEY=pk_test_****
CLERK_SECRET_KEY=sk_test_******
One last thing to we need to do to fully configure Clerk auth is adding the authentication provider to the /src/app/layout.tsx file. If you’re used to the old Next.js pages paradigm, this is like the /src/_app.tsx file.
import { ClerkProvider } from '@clerk/nextjs';
import './globals.css';
import { Inter } from 'next/font/google';

const inter = Inter({ subsets: ['latin'] });

export const metadata = {
  title: 'Create Next App',
  description: 'Generated by create next app',
};

export default function RootLayout({ children }: { children: React.ReactNode }) {
  return (
    <ClerkProvider
      appearance={{
        variables: {
          colorPrimary: 'red',
        },
      }}
    >
      <html lang="en">
        <body className={inter.className}>{children}</body>
      </html>
    </ClerkProvider>
  );
}
The ClerkProvider has an appearance prop where we can customize the Clerk components to fit our design language. Each Clerk component can also be styled individually in more detail. And with this, we’re now ready to use Clerk in our app.
Adding authentication to the app
Sign in and sign up pages
First we need to create the pages to sign up and sign in. Clerk already provides us with complete components for the forms. So all that’s left to do is build a very simple page around these components.
We start off with the sign-in page. So create a new component at /src/app/sign-in/[[..sign-in]]/page.tsx with this content:
import { SignIn } from '@clerk/nextjs';
export default function SignInPage() {
  return (
    <div className="flex items-center justify-center h-screen">
      <SignIn />
    </div>
  );
}
The file path is different than what you might be used to from older Next.js applications. The page URL is defined by the /src/app/sign-in folder. So the page will live at /sign-in. The quare brackets are for capturing anythign after /sign-in/... which Clerk uses internally. And with the new App Router, the page itsself always lives in a page.tsx file.
We do the same thing for the sign up page at /src/app/sign-up/[[..sign-up]]/page.tsx
import { SignUp } from '@clerk/nextjs';

export default function SignUpPage() {
  return (
    <div className="flex items-center justify-center h-screen">
      <SignUp />
    </div>
  );
}
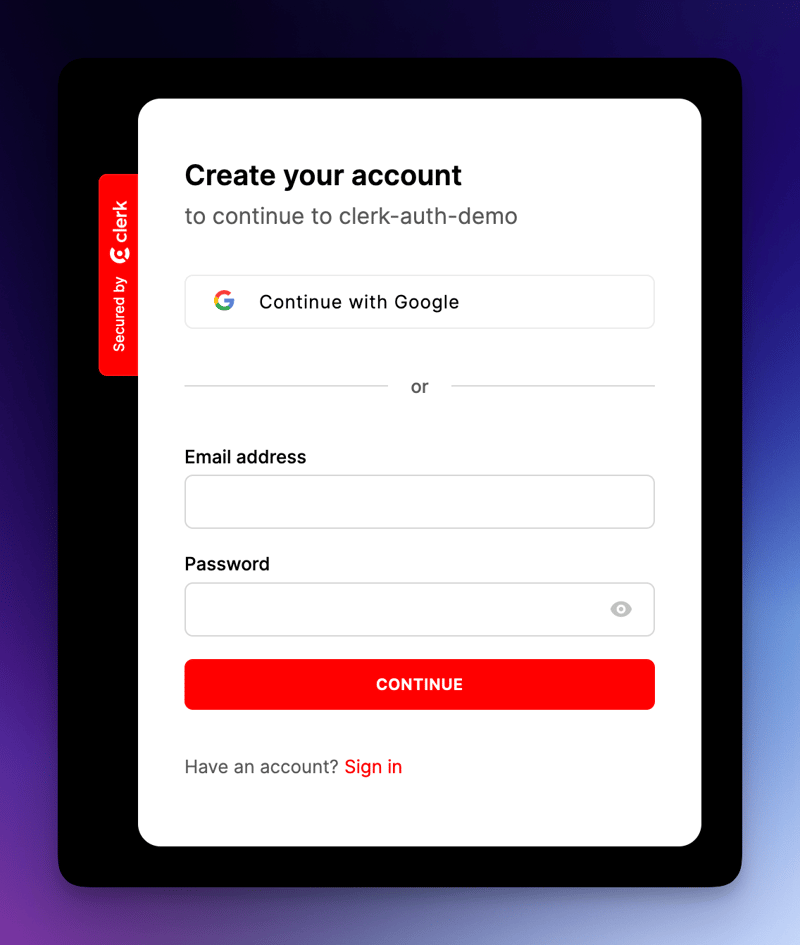
If you now go to http://localhost:3000/sign-in you’ll see this premade Sign Up component that works with both Email & Password and whichever social auth providers you selected.
Account page
Create an account or log in through Google. Just like that, you’re signed in to the app. But we can’t do much with it for now. So let us create the account page. For this, change the file at /src/app/page.tsx to this:
import { UserButton } from '@clerk/nextjs';

export default function Home() {
  return (
    <div className="flex justify-center items-center h-screen">
      <div className="bg-white p-4 rounded-md flex items-center gap-4 text-gray-600">
        <p>Hello, User!</p>
        <UserButton afterSignOutUrl="/" />
      </div>
    </div>
  );
}
Here we are using the Clerk UserButton component. When signed in, this acts as a drop down to open the integrated User Setting modal where users can change their password, email addresses and various other settings. That all comes for fee. When self-rolling auth, this would take ours of development time.
Protecting pages
Secret page
We now want to create a new page at /protectet that is only accessible by authenticated users. So for this, we’ll create a new middleware at /src/middleware.ts with this content:
import { authMiddleware } from "@clerk/nextjs";
export default authMiddleware({
  publicRoutes: ["/"]
});

export const config = {
  matcher: ["/((?!.*\\..*|_next).*)", "/", "/(api|trpc)(.*)"],
};
Also, add these new variables to your .env.local file in order to tell Clerk how to behave when having to redirect you.
// other settings

NEXT_PUBLIC_CLERK_SIGN_IN_URL=/sign-in
NEXT_PUBLIC_CLERK_SIGN_UP_URL=/sign-up
NEXT_PUBLIC_CLERK_AFTER_SIGN_IN_URL=/
NEXT_PUBLIC_CLERK_AFTER_SIGN_UP_URL=/
This middleware provided by Clerk ensures that only the root page and the sign up and sign in pages are visible bto unauthenticated users. So, let us now create the page at /src/app/protected/page.tsx
export default function Protected() {
  return (
    <div className="flex justify-center items-center h-screen">
      <div className="bg-white p-4 rounded-md flex items-center gap-4 text-gray-600">
        <p>This is a protected page</p>
      </div>
    </div>
  );
}
Try to access this page when signed in and when signed out. Notice how you’ll be redirected to /sign-in when not authenticated.
Sign in link on home page
On the root page we currently do not show any information when the user is not logged in. Now that we have the middleware set up, we can change this. So modify the /src/app/page.tsx file:
import { UserButton, currentUser } from '@clerk/nextjs';
import Link from 'next/link';

export default async function Home() {
  const user = await currentUser();

  return (
    <div className="flex justify-center items-center h-screen">
      <div className="bg-white p-4 rounded-md flex items-center gap-4 text-gray-600">
        {user ? (
          <>
            <p>Hello, User: {user.emailAddresses[0]?.emailAddress}</p>
            <UserButton afterSignOutUrl="/" />
          </>
        ) : (
          <Link href="/sign-in" className="text-blue-500">
            Sign in
          </Link>
        )}
      </div>
    </div>
  );
}
This is a react server component that asynchronously fetches the current user session from Clerk using await. Based on wether or not the session is present, it then renders either the UserButton along with the user’s email address or a link to the sign in page.
Protecting API routes
So far we have looked at how to protect the front end of your application. But a full-stack app also needs a backend. For this, we’ll create a backend endpoint at GET /api with this file /src/app/api/route.ts in the new App Router pattern:
import { auth } from '@clerk/nextjs';
import { NextResponse } from 'next/server';

export async function GET() {
  const { userId } = auth();

  if (!userId) {
    return new Response('Unauthorized', { status: 401 });
  }

  const data = { message: 'Hello User', id: userId };

  return NextResponse.json({ data });
}
The auth() function checks if there is a Clerk session present. If not, we throw a 401 unauthorized error. After that, we can do whatever we want in the endpoint knowing that the user is authenticated. And we have access to the userId, which is important when referencing data in the database to a user.
Wrapping up
With this we have completed the full implementation of Clerk Authentication in a full-stack Next.js 13 application. As you can see, we barely have to write any authentication-specific code for this to work! That’s the beauty of using an external provider such as Clerk. And even better, our small demo application comes with a lot of user-management features built-in that we didn’t have to do any work for. Such as verifying and changing email addresses, password change and social login.
Clerk works best in frameworks such as Next.js when you have the front- and back-end in the same application. If you have a detatched backend the setup takes a bit more work. Clerk can issue JWT tokens that you can send along with API requests to your backend and then verify the user through that. But the process won’t be as seamless as what we showed here.


