Collaborating on localhost sounds unusual, doesn't it?
Yes, it's not conventional because it's nearly impossible to collaborate with others when you're running something locally on localhost and they are not sitting next to you. By "collaborate" here, I mean that the other person may be able to check your work, visualize your changes, check the logs of the running app, access the terminal, execute commands, debug together, etc.
And yes, we have tools and other methods, which do some of the things I mentioned above, like test environments, branching strategies, etc., for sharing our work with other teammates, but it takes time to go through these typical processes and can be a blocker when you need instant help and feedback. Also, many times replication of errors and bugs becomes quite difficult. Of course, it leads to a slower SDLC and review cycle. Also, it costs both time and money (the cost of running CI and deployment).
We at Livecycle are trying to solve this broken "Review Cycle". Every company and team face this issue, but no one is solving it and providing an end-to-end solution without creating any friction in the existing development cycle. This is why we built the Livecycle Docker Extension to achieve all the collaboration (and more) mentioned in the opening paragraph. The only thing you need before starting to use the extension is to have your application Dockerized and make your application compose-ready. Almost every team uses compose to dev, and in case you don't have it already, you can use docker init. The reason for using Docker Compose under the hood for all these tunnelling and sharing is to ensure replication and, most importantly, not impact your actual application code or dependencies. This way, there's no need to modify your application to leverage this tool.
Let's see how you use this:
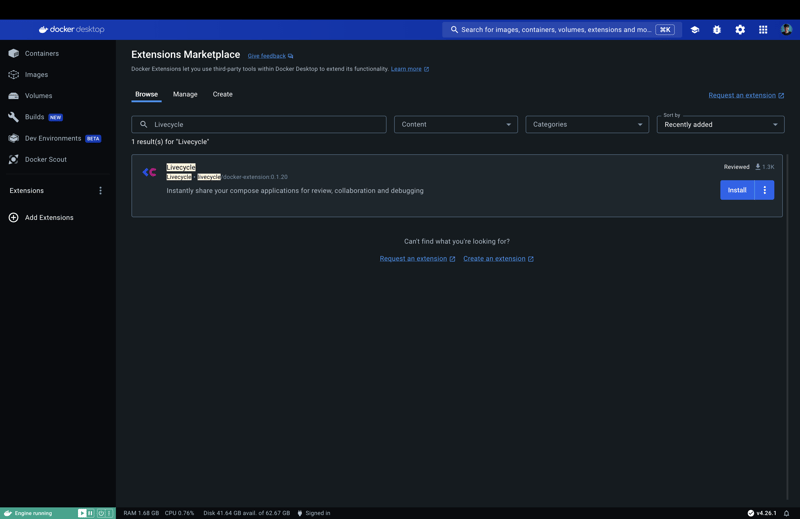
Installing the extension: Navigate to this link or search for "Livecycle" in the Docker Desktop Extensions Marketplace. Click the "Install" button to install the extension.
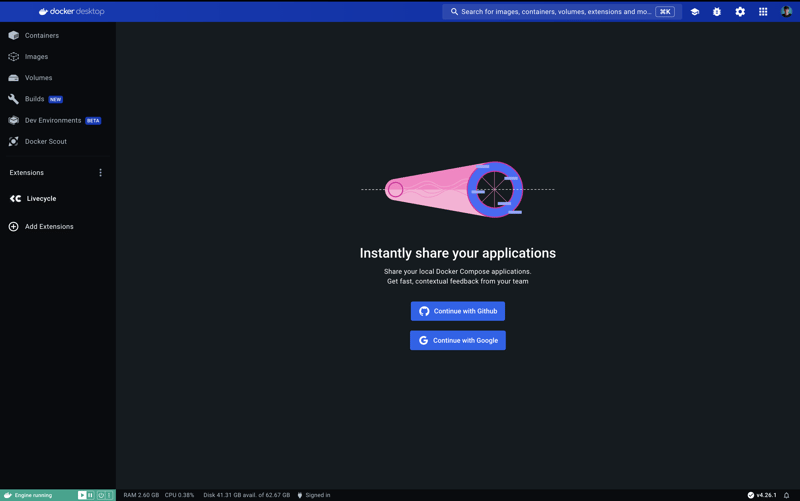
Setting up a Livecycle account: Once you have installed the extension and opened it, you will be greeted with a login screen. You can choose to log in with your GitHub account or Google account. If you previously used Livecycle and created an organization, you can log in with your Livecycle account.
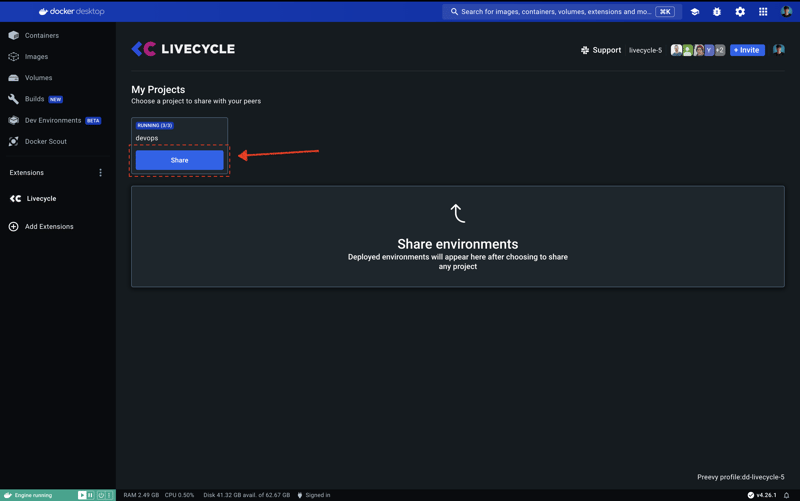
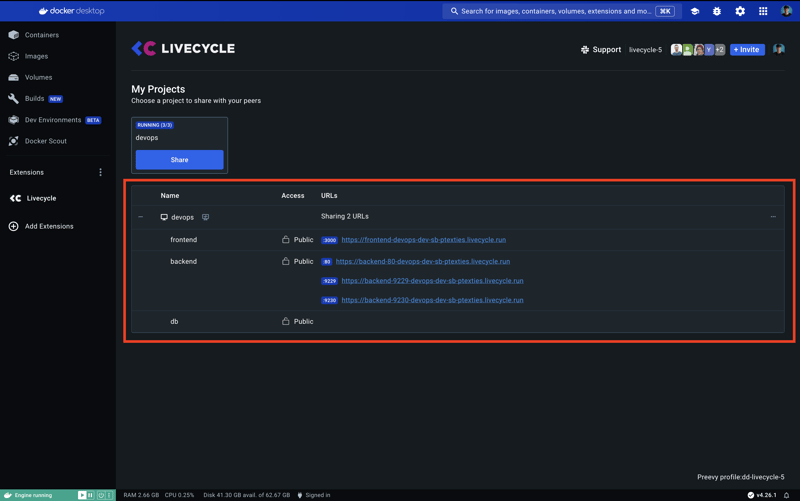
Getting shareable URLs As soon as you log in, you will be able to see a list of running docker compose applications and all the services that are running in them. To get a public shareable URL for every service, click on the "Share" button below the service name.
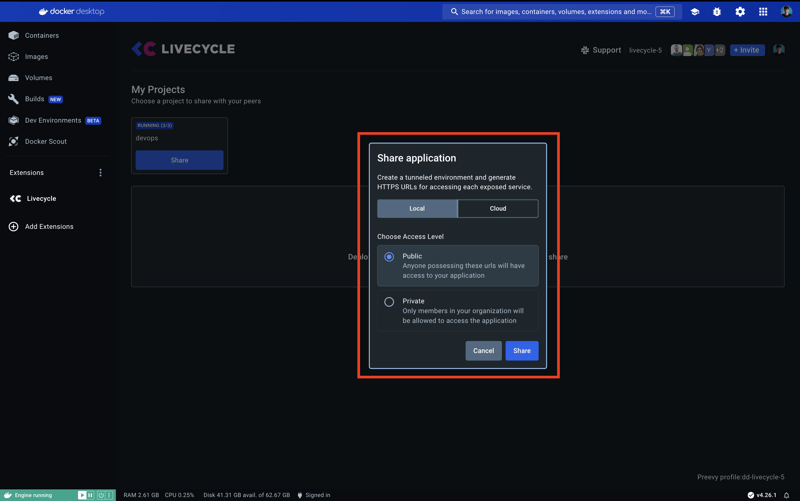
You can choose between Local and Cloud. The local option will create a tunnel to your local machine, and the cloud option will put your application into the cloud and create a tunnel to it. You can choose depending on your use case. For example, if you want the environment to stay for a small amount of time (this one is a good option for quick feedback), you can choose the local option. If you want the environment to stay for a longer time, and the team can access it over a few days, you can choose the cloud option.
After that, you can choose public access, you will get a public URL that you can share with anyone. If you choose private access, you will get a private URL that requires authentication and can only be used by your organization members. Then click on the "Share" button to get the shareable URL.
Accessing the shared URL: URLs created by the extension are consistent, shareable, and can be used by a browser or any other HTTP client. Using these URLs, your team members will be able to see and interact with your local version of the app as long as the tunnel is open and your workstation is running. Private environments require adding team members to your organization, and upon access, your team members will be prompted to authenticate.
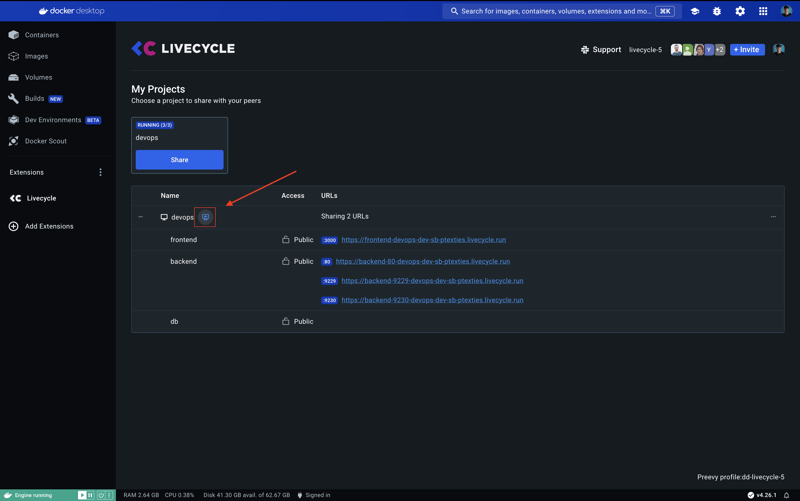
Accessing Livecycle dashboard: You can also access the Livecycle dashboard to see the logs and debug your application. Click on the "Open Link" button to open the Livecycle dashboard. On the dashboard, you can see all the running applications and services. The Livecycle dashboard requires authentication and organization membership, similar to private environments/services
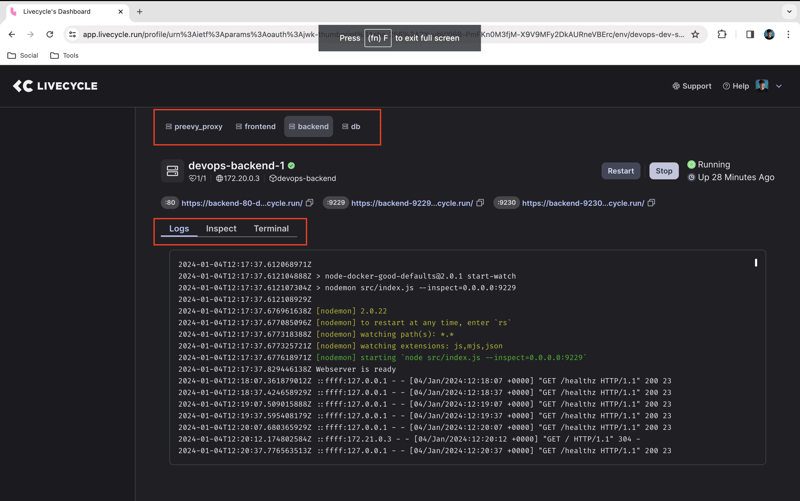
Debugging, inspecting, and logging: Once you have opened the Livecycle dashboard, you can see all the environments/apps that are running. Click on the environment name for which you want to see the logs, terminal, etc. You can view the logs, terminal, and container inspection for each service. Soon we will support on-screen comments for improve the feedback cycle.
That's it! You have successfully installed the Livecycle Docker Extension and shared your local development environment with your team. Now you can easily share your work with anyone in the world with a single click of a button and
And if you want to go through the cloud route, you can check out this blog:


feat: Deploy To Cloud - Livecycle Docker Extension
Pradumna Saraf for Livecycle ・ Jan 25
Also, you can check out the video below for a step-by-step guide on how to get started with it.
We also have detailed documentation and an FAQ section to clear all your doubts. In case you need any help or just want to have fun chat join our Livecycle community.

