Making your digital products accessible to people in different regions around the world opens up new markets for your business and introduces you to a new audience.
Novu recently shipped with a Translation Management feature to make translating your app's notification content to different languages a breeze. In this article, I'll show you a step-by-step technical approach on how to accomplish this in your app.
Prerequisites
Before diving into the article, make sure you have the following:
- Node.js installed on your development machine.
- A Novu account. If you don’t have one, sign up for free at the web dashboard.
If you don’t want to explore the code right away, you can view the completed code on GitHub.
Set up a Next.js App
To create a Next.js app, open your terminal, cd into the directory you’d like to create the app in, and run the following command:
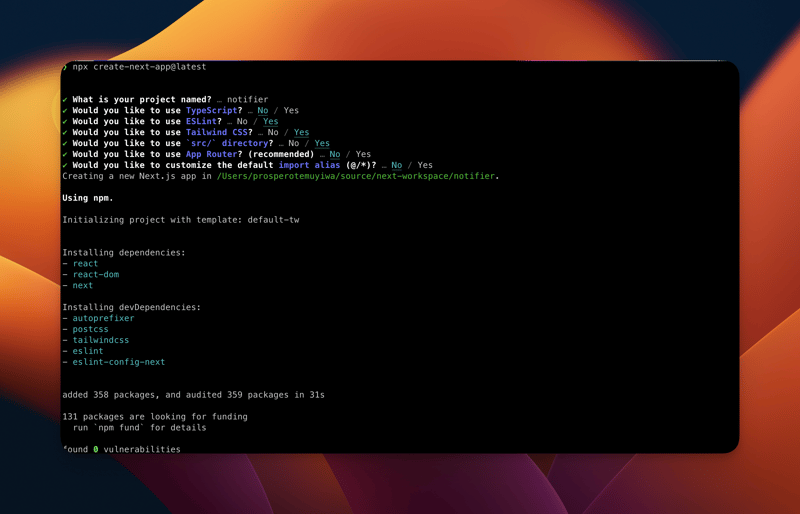
npx create-next-app@latest notifier
Go through the prompts:
cd into the directory, notifier and run to start the app in your browser:
npm run dev
Set up Novu in the App
Run the following command to install the Novu node SDK:
npm install @novu/node
Run the following command to install the Novu Notification Center package:
npm install @novu/notification-center
The Novu Notification Center package provides a React component library that adds a fully functioning notification center to your React app. The package is also available for non-React apps.
Before using Novu in your React app, a few things need to be set up:
- Create a workflow for sending notifications,
- Create a subscriber - recipient of notifications.
Create a workflow
A workflow is a blueprint for notifications. It includes the following:
- Workflow name and Identifier
- Channels: - Email, SMS, Chat, In-App and Push
Follow the steps below to create a workflow:
- Click Workflow on the left sidebar of your Novu dashboard.
- Click the Add a Workflow button on the top left. You can select a Blank workflow or use one of the existing templates.
- The name of the new workflow is currently “Untitled”. Rename it to a more suitable title.
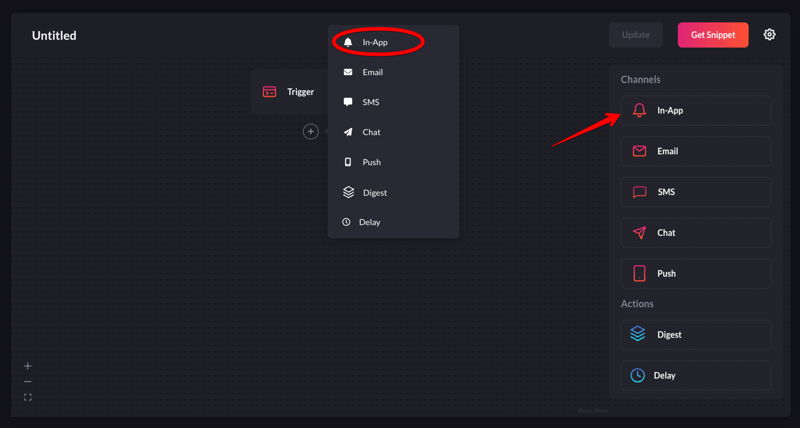
- Select In-App as the channel you want to add.
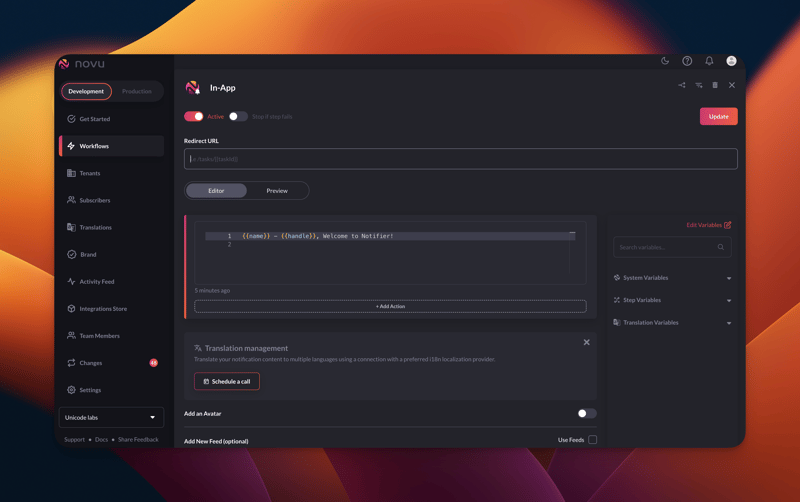
- Click on the recently added “In-App” channel and add the following text to it. Once you’re done, click “Update” to save your configuration.
The {{name}} and {{handle}} are custom variables. This means that we can pass them to our payload before we trigger a notification. You’ll see this when we create the API route to send notifications.
Create a subscriber
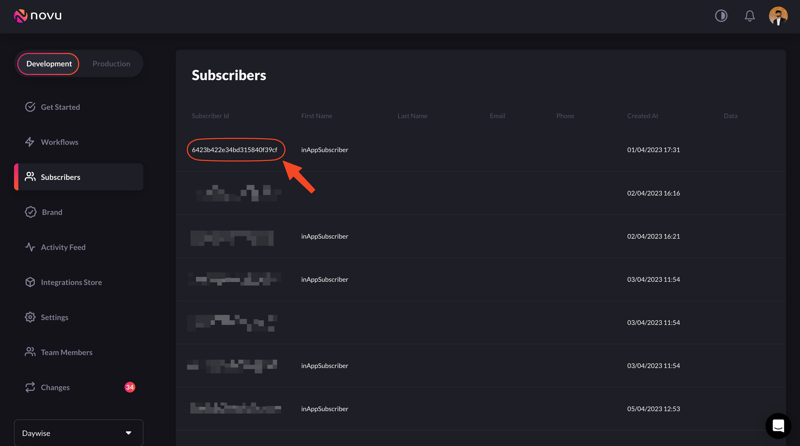
If you click “Subscriber” on the left sidebar of the Novu dashboard, you’ll see the subscriber list. As a first time Novu user, it will be an empty list.
Subscribers are recipients of notifications. In this case, subscribers are your app users.
You can add a subscriber to Novu by running this API endpoint. Fill in the details, add your API key and run it for the sake of this tutorial!
You can add via code. It’s documented in our subscriber docs.
Refresh the Subscribers page on your Novu dashboard. You should see the recently added subscriber now!
Set up Novu Notification Center in the App
Head over to scr/pages/index.js. We’ll modify this page to include the following:
- Import and display the Novu Notification Center.
- A form added to this page.
- A function to submit the form.
- When the form is submitted, it triggers a notification.
- A function to trigger the notification.
Copy and past the code below to replace everything in the src/pages/index.js file.
import Image from "next/image";
import { Inter } from "next/font/google";
import {
NovuProvider,
PopoverNotificationCenter,
NotificationBell,
} from "@novu/notification-center";
const inter = Inter({ subsets: ["latin"] });
export default function Home() {
function handleSubmit(e) {
e.preventDefault();
const name = e.target.name.value;
const handle = e.target.handle.value;
const userID = process.env.NEXT_PUBLIC_SUBSCRIBER_ID;
alert("Sending notification right now...");
triggerNotification(userID, handle, name);
}
async function triggerNotification(userID, handle, name) {
await fetch("/api/send-notification", {
method: "POST",
body: JSON.stringify({
subscriberID: userID,
userHandle: handle,
username: name,
}),
});
}
return (
<main
className={`flex min-h-screen flex-col items-center justify-between p-24 ${inter.className}`}
>
<div className="z-10 max-w-5xl w-full items-center justify-between font-mono text-sm lg:flex">
<p className="fixed left-0 top-0 flex w-full justify-center border-b border-gray-300 bg-gradient-to-b from-zinc-200 pb-6 pt-8 backdrop-blur-2xl dark:border-neutral-800 dark:bg-zinc-800/30 dark:from-inherit lg:static lg:w-auto lg:rounded-xl lg:border lg:bg-gray-200 lg:p-4 lg:dark:bg-zinc-800/30">
APP DASHBOARD - FINANTICS
</p>
<div className="fixed bottom-0 left-0 flex h-48 w-full items-end justify-center bg-gradient-to-t from-white via-white dark:from-black dark:via-black lg:static lg:h-auto lg:w-auto lg:bg-none">
<NovuProvider
subscriberId={process.env.NEXT_PUBLIC_SUBSCRIBER_ID}
applicationIdentifier={process.env.NEXT_PUBLIC_NOVU_APP_ID}
>
<PopoverNotificationCenter>
{({ unseenCount }) => (
<NotificationBell unseenCount={unseenCount} />
)}
</PopoverNotificationCenter>
</NovuProvider>
</div>
</div>
<div className="mt-1 flex justify-center">
<form onSubmit={handleSubmit}>
<div>
<label className="p-3">Name:</label>
<input
className="text-black p-2"
type="text"
name="name"
required
placeholder="Enter name"
/>
</div>
<div className="mt-5">
<label className="p-2">Handle:</label>
<input
className="text-black p-2"
type="text"
name="handle"
required
placeholder="Enter handle"
/>
</div>
<button
type="submit"
className="bg-blue-600 p-2 rounded-md mt-5 px-12 ml-3"
>
Submit Details
</button>
</form>
</div>
<div className="mb-32 grid text-center lg:max-w-5xl lg:w-full lg:mb-0 lg:grid-cols-4 lg:text-left">
<a
href="https://nextjs.org/docs?utm_source=create-next-app&utm_medium=default-template-tw&utm_campaign=create-next-app"
className="group rounded-lg border border-transparent px-5 py-4 transition-colors hover:border-gray-300 hover:bg-gray-100 hover:dark:border-neutral-700 hover:dark:bg-neutral-800/30"
target="_blank"
rel="noopener noreferrer"
>
<h2 className={`mb-3 text-2xl font-semibold`}>
Docs{" "}
<span className="inline-block transition-transform group-hover:translate-x-1 motion-reduce:transform-none">
->
</span>
</h2>
<p className={`m-0 max-w-[30ch] text-sm opacity-50`}>
Find in-depth information about Next.js features and API.
</p>
</a>
<a
href="https://nextjs.org/learn?utm_source=create-next-app&utm_medium=default-template-tw&utm_campaign=create-next-app"
className="group rounded-lg border border-transparent px-5 py-4 transition-colors hover:border-gray-300 hover:bg-gray-100 hover:dark:border-neutral-700 hover:dark:bg-neutral-800/30"
target="_blank"
rel="noopener noreferrer"
>
<h2 className={`mb-3 text-2xl font-semibold`}>
Learn{" "}
<span className="inline-block transition-transform group-hover:translate-x-1 motion-reduce:transform-none">
->
</span>
</h2>
<p className={`m-0 max-w-[30ch] text-sm opacity-50`}>
Learn about Next.js in an interactive course with quizzes!
</p>
</a>
<a
href="https://vercel.com/templates?framework=next.js&utm_source=create-next-app&utm_medium=default-template-tw&utm_campaign=create-next-app"
className="group rounded-lg border border-transparent px-5 py-4 transition-colors hover:border-gray-300 hover:bg-gray-100 hover:dark:border-neutral-700 hover:dark:bg-neutral-800/30"
target="_blank"
rel="noopener noreferrer"
>
<h2 className={`mb-3 text-2xl font-semibold`}>
Templates{" "}
<span className="inline-block transition-transform group-hover:translate-x-1 motion-reduce:transform-none">
->
</span>
</h2>
<p className={`m-0 max-w-[30ch] text-sm opacity-50`}>
Discover and deploy boilerplate example Next.js projects.
</p>
</a>
<a
href="https://vercel.com/new?utm_source=create-next-app&utm_medium=default-template-tw&utm_campaign=create-next-app"
className="group rounded-lg border border-transparent px-5 py-4 transition-colors hover:border-gray-300 hover:bg-gray-100 hover:dark:border-neutral-700 hover:dark:bg-neutral-800/30"
target="_blank"
rel="noopener noreferrer"
>
<h2 className={`mb-3 text-2xl font-semibold`}>
Deploy{" "}
<span className="inline-block transition-transform group-hover:translate-x-1 motion-reduce:transform-none">
->
</span>
</h2>
<p className={`m-0 max-w-[30ch] text-sm opacity-50 text-balance`}>
Instantly deploy your Next.js site to a shareable URL with Vercel.
</p>
</a>
</div>
</main>
);
}
From the code above, you can see the Notification Center component block:
import {
  NovuProvider,
  PopoverNotificationCenter,
  NotificationBell,
} from "@novu/notification-center";

...
...
...

<NovuProvider
  subscriberId={process.env.NEXT_PUBLIC_SUBSCRIBER_ID}
  applicationIdentifier={process.env.NEXT_PUBLIC_NOVU_APP_ID}
>
  <PopoverNotificationCenter>
    {({ unseenCount }) => (
      <NotificationBell unseenCount={unseenCount} />
    )}
  </PopoverNotificationCenter>
</NovuProvider>
...
...
...
The NovuProvider root Component ships with many props that can be used to customize the Notification Center to your taste.
The floating popover component that appears when clicking on the NotificationBell button. It renders the NotificationCenter component inside its content.
Note: Please ensure NEXT_PUBLIC_SUBSCRIBER_ID, NEXT_PUBLIC_NOVU_APP_ID, and NEXT_PUBLIC_NOVU_API_KEY are present with their respective values in your .env file.
The Novu API Key and APP ID can be found in the Settings section of your Novu dashboard.
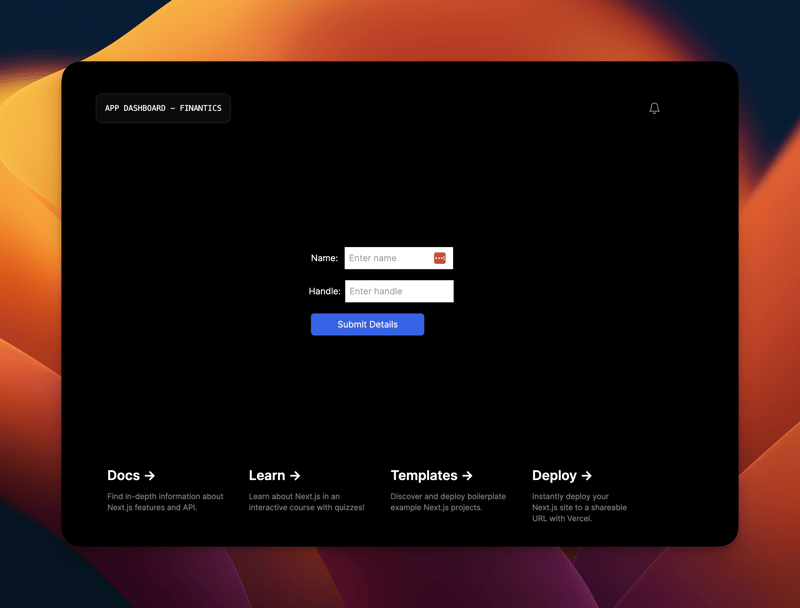
Run your app. It should look like so with the notification bell showing at the top right:
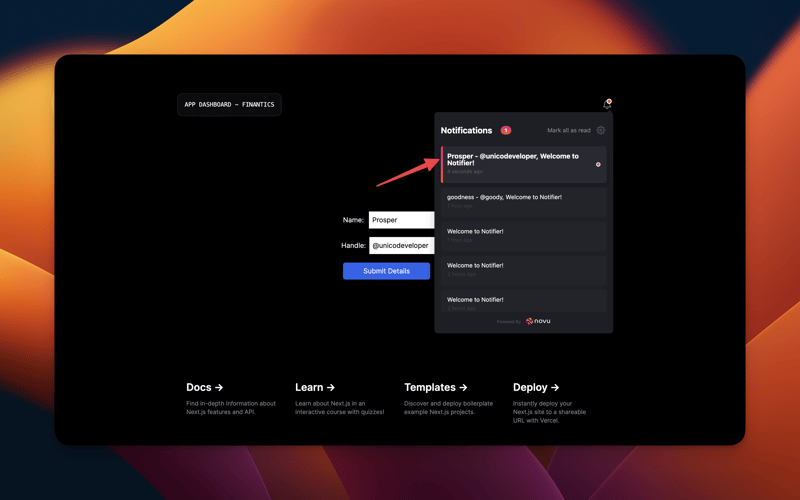
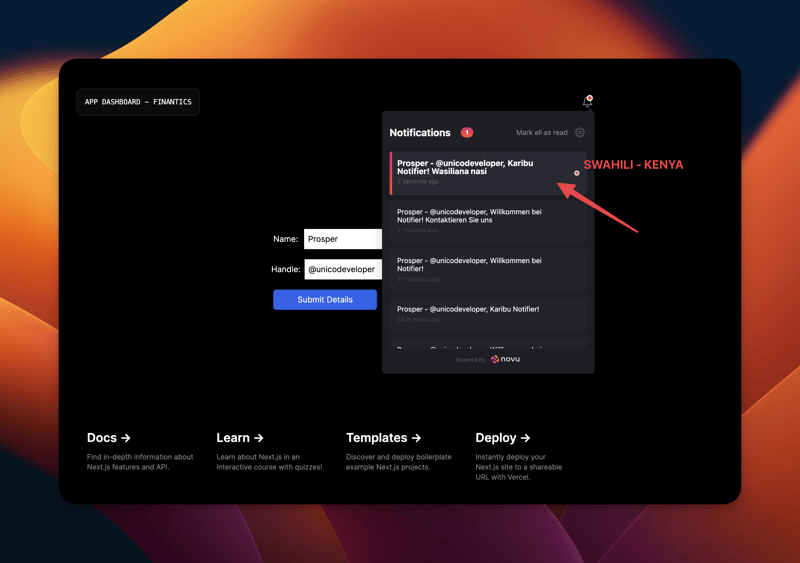
Submit the details with a name and handle. A notification should show up like so:
Set Up App Notification Translation & Internationalization - i18n
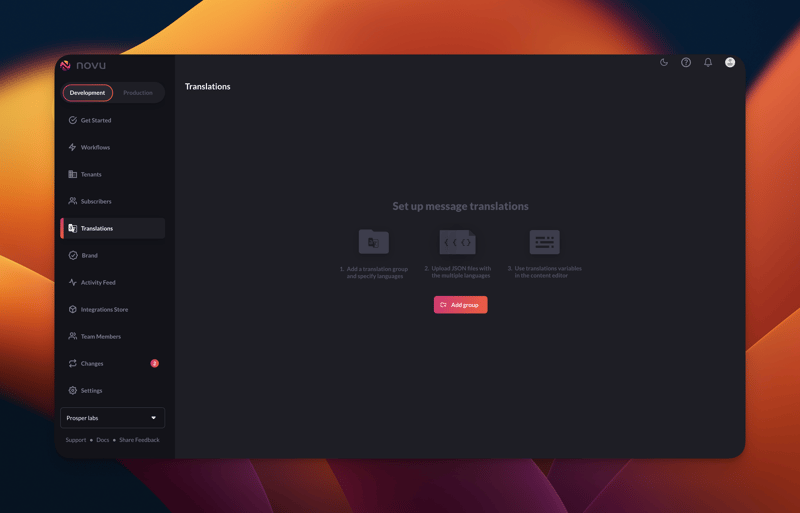
Head over to the Translations section of the left sidebar on Novu Dashboard.
- Create a Translation Group.
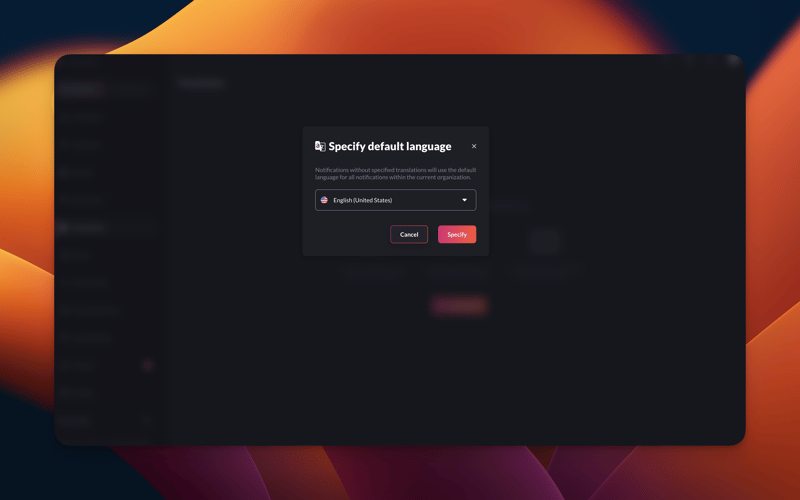
Before creating your first Translation Group you’ll be prompted to specify the default locale for organization.
This locale serves as a fallback option for localized messages in cases where the recipient hasn’t defined a specific locale.
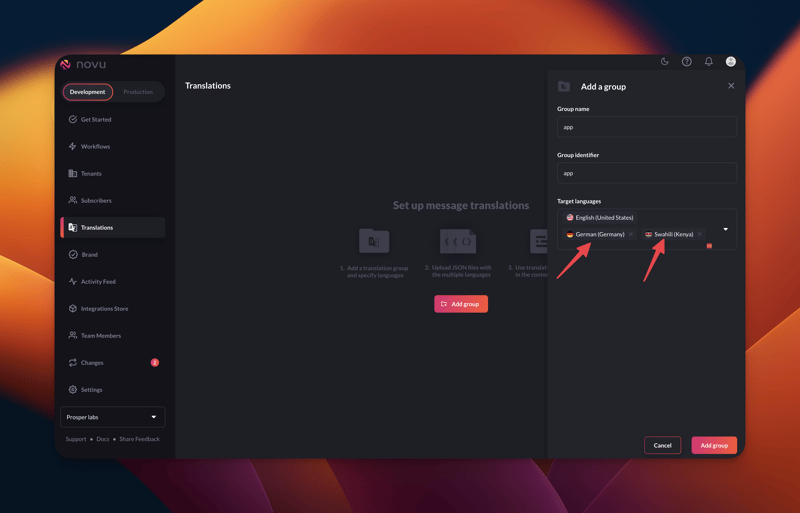
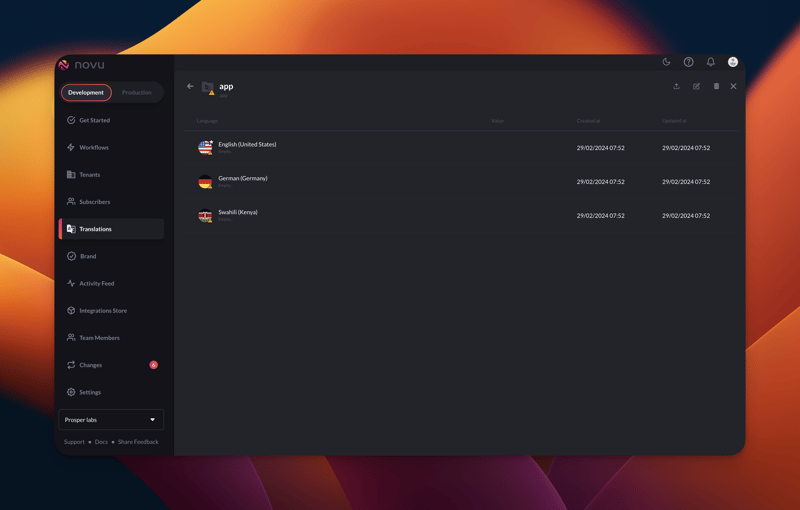
- Name the translation group and add the languages you want your app to support. In our app, we’ll support German and Swahili in addition to the default English language specified earlier.
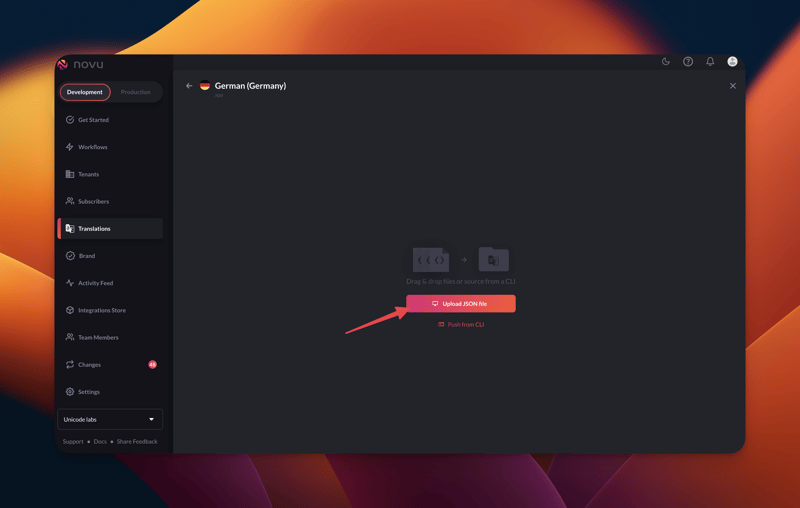
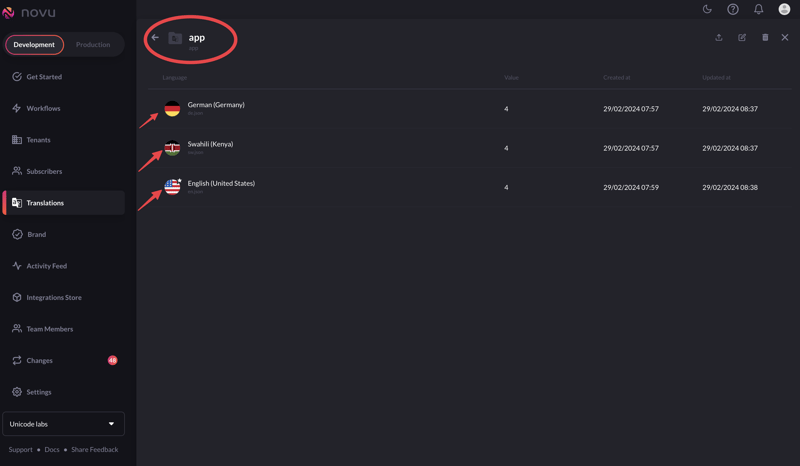
- Upload JSON translation files for each of the languages. In this case, we’ll have to upload for German, Swahili and English.
Create JSON language files with the respective content and translations, then upload them to the corresponding languages on your Novu dashboard.
English (en.json)
{
  "welcome_message": "Welcome to Notifier!",
  "learn_more": "Learn More",
  "special_offer": "Special Offer",
  "contact_us": "Contact Us"
}
German (de.json)
{
  "welcome_message": "Willkommen bei Notifier!",
  "learn_more": "Mehr erfahren",
  "special_offer": "Sonderangebot",
  "contact_us": "Kontaktieren Sie uns"
}
Swahili (sw.json)
{
  "welcome_message": "Karibu Notifier!",
  "learn_more": "Jifunze zaidi",
  "special_offer": "Ofa maalum",
  "contact_us": "Wasiliana nasi"
}
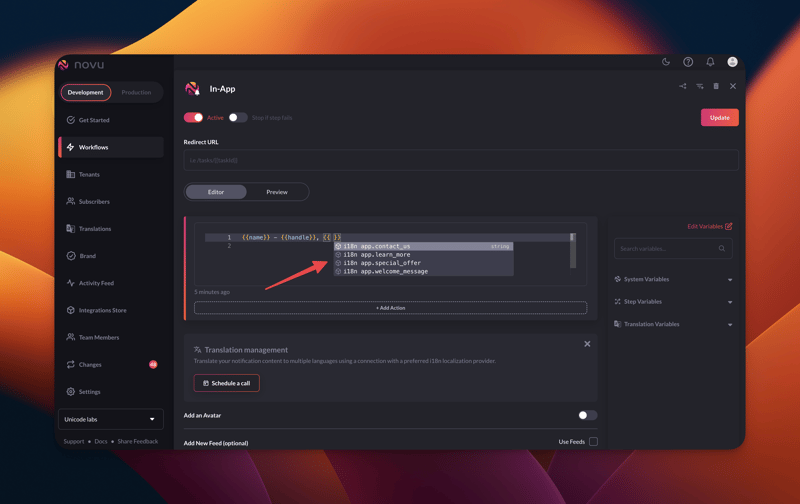
- Now, head back to the In-App channel editor and try to type. Novu auto-suggests the translation variables in the editor. It consists of the
i18nhandlebar helper and path to the translated value.
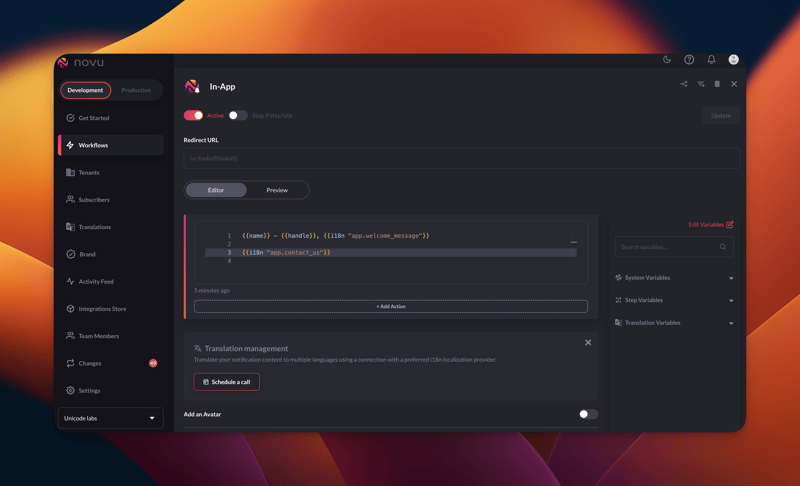
- Let’s localize our message content. Using the
i18nhandlebar helper , we have pointed towelcome_messageandcontact.us. The Subscribers locale defines in which language the message should be delivered to that recipient. When the locale is not specified, it will fallback to the default locale set for the organization.
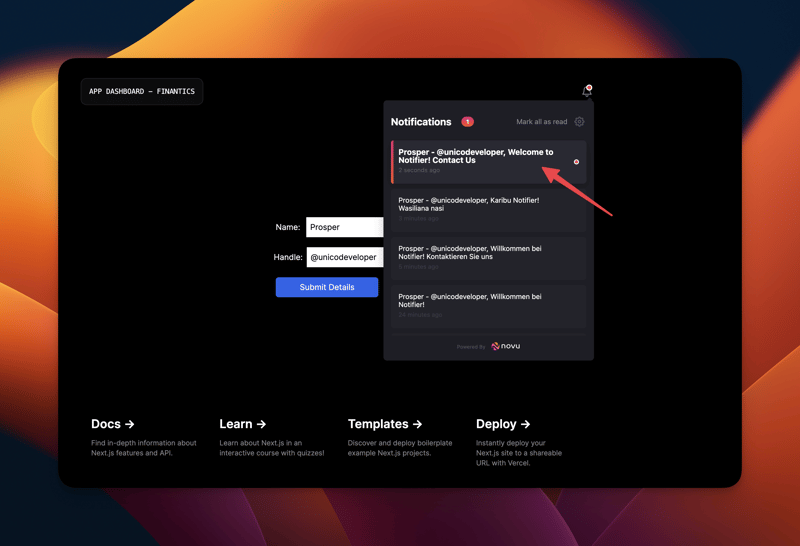
- Set a locale attribute to the subscriber we created earlier. You use the Novu SDK or do it via the API. Before proceeding, let's run the app quickly. It should trigger a notification with the default language locale that we previously set for the organization.
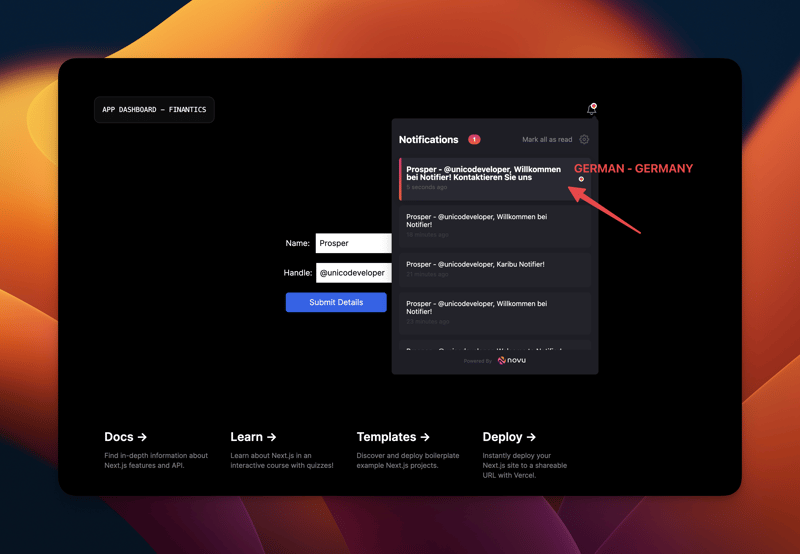
- Set it to German, the locale of the subscriber should be “de_DE”. Now, run your app and check the notification that comes in!
- Set it to Swahili, the locale of the subscriber should be “sw_KE”. Now, run your app and check the notification that comes in!
Hooray! We both understand how amazing and straightforward this is. Wow! I wish I Novu existed when I started coding a decade ago. Feel free to check out the complete code on GitHub.
This is all you need to render your app's notification content in as many languages as you want. You can quickly add more languages, update the locale JSON files with additional content, and expand to as many markets as possible!
Note: The translation feature is only available for Novu Cloud users with Business or Enterprise plans.
Check out the documentation for Translation management and incorporate it into your apps! We can't wait to see the incredible apps you create. Don't hesitate to ask us any questions or for support. You can find us on Discord and Twitter. Feel free to reach out.

