Every goal of every organization has to do with growth in one way or another, which is apparent in the design of Linux with the addition of groups. In fact, an organization is defined as "an organized group of people with a particular purpose..." see what I did there? 😉.
In this article, you will learn everything you need to know to start managing groups on your Linux servers. In the next section, we will start by explaining what groups are in Linux.
For this article, I have set up an Ubuntu desktop virtual machine on my system. However, you should be able to follow along with any Linux system you have, either virtual or physical.
Groups
A group in Linux is a directory of users accessing specific resources on your server. It is used to efficiently control users' access to resources while avoiding confusion. Every file or directory in Linux has a user and a group that owns it.
Listing Groups
You can use the groups command to list all the groups you have access to like so:
groups
You can access the groups that a particular user has access to by adding the username after the command like so:
groups kunlea
Yes, kunlea has a group called kunlea. That was not a mistake. By default, every user on the server is added to the users groups.
Accessing all Groups
You can access all the groups on the server by reading the /etc/group file like so:
cat /etc/group
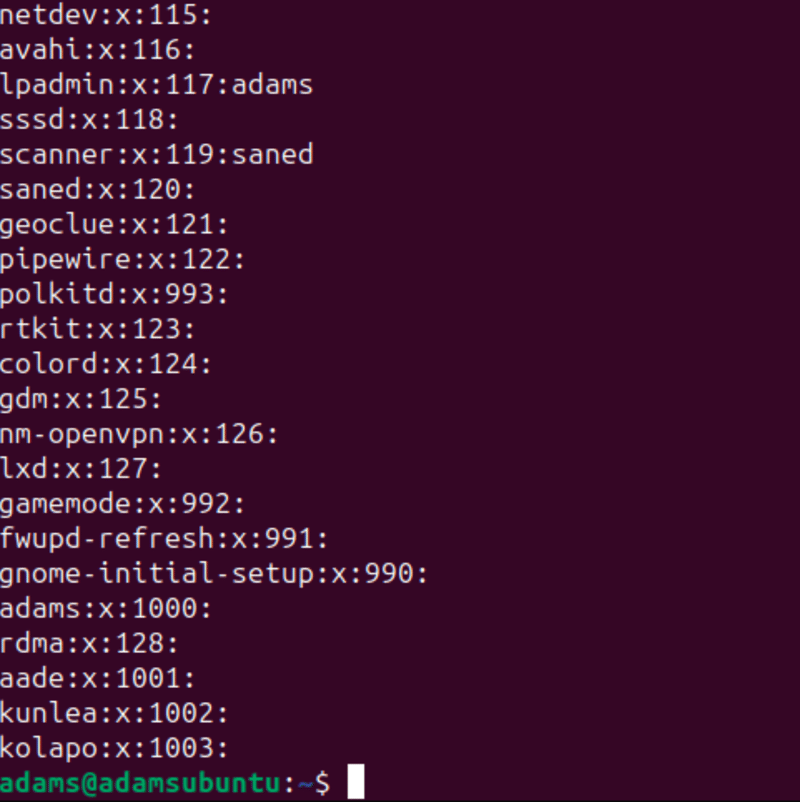
The command above should output a long list of groups like so:
Again, the user names you see are actually groups. Each line in the result above has multiple columns separated by a colon :. Let's explore what each column (of the user we created in the previous section) means.
- The first column is the group name
- The second column is the password represented by an
xfor security reasons. (Using group passwords is NOT recommended) - The third column is the user ID (GID).
- The fourth column is a comma-separated list of users of each group. This can be seen in the third entry in the image above, where
adamsis a member of thelpadmingroup.
Note: Most of the groups didn't have members listed because each user is a member of his or her own group.
Creating Groups
Creating a group is relatively straightforward in Linux with the groupadd command like so:
sudo groupadd employees
The command above will create a group with no user, and you can confirm the creation with this command:
cat /etc/group | grep employees
The command above should return the following:
Adding Users to Groups
You can easily add users into groups with the usermod command like so:
sudo usermod -aG employees kunlea
The command above uses the a flag to append the new group instead of replacing all the groups with the employees group. It also uses the G flag to specify the new group as a secondary group. The employees group should now have one member, kunlea like so:
Note: If you want to make the new group the user's primary group, change the
Gto a lowercaseg.
Removing Users from a Group
Ubuntu provides a gpasswd command that you can use to remove users from groups like so:
sudo gpasswd -d kunlea employees
The command above should remove kunlea from the employees group:
Deleting Groups
Deleting groups in Linux is also relatively straightforward with the groupdel command:
sudo groupdel employees
The command above will delete the employees group from your server.
Conclusion
And that's it! You just learned how to manage groups on your Linux server. You learned how to create groups, delete groups, add users to groups, and much more.
Please feel free to leave a comment to correct, suggest, or even teach me something new! 😉
Finally, remember to follow me here on Dev, LinkedIn, and Twitter. Thank you so much for reading, and I'll see you in the next one!


