Being an automation tester, my job is to automate everything. As I was running my test script via terminal I realised that I’m the only who can execute the scripts I made. What if someone wants to run it? like the Devs, Project Manager, etc. It would be a tedious task to clone my repo, install libraries, and run the script. So I decided that maybe I can store my test script inside a serverless machine and make it accessible via API request.
I experimented with various AWS resources such as creating my own lambda function, checking features of API gateway, Codepipeline, etc. After several attempts, I was finally able to run my script inside. And then I just researched how to access my lambda via API.
This will result in higher production and time savings. Engineers may focus on vital work because automated testing does not require human interaction. This is like a portable testing device that anyone could execute. With fast test execution, developers get testing reports in an instant, so whenever a failure occurs, they will react to it quickly. Test automation will make it easier to update programs quickly. As a result, automated testing leads to increased team responsiveness, improved user experience, and increased customer satisfaction.
Overview
- Create 2 Lambda layers that has selenium and chromedriver libraries
- Include created lambda layers in serverless.yml of lambda then deploy
Creating Selenium Lambda Layer
Place libraries in python/lib/python3.6/site-packages/ to include them in a layer.
Download Selenium to layer directory
$ pip3.6 install -t selenium/python/lib/python3.6/site-packages selenium==3.8.0
$ cd selenium
$ zip -r python.zip python/
Once finished, Create lambda layer then upload zip file
1. Go to AWS Console Lambda/Layers
2. Click Create Layer
3. Input the following in the layer configuration
Name: selenium
Description: Selenium layer
Upload zip file created: python.zip
Compatible runtimes: Python 3.6
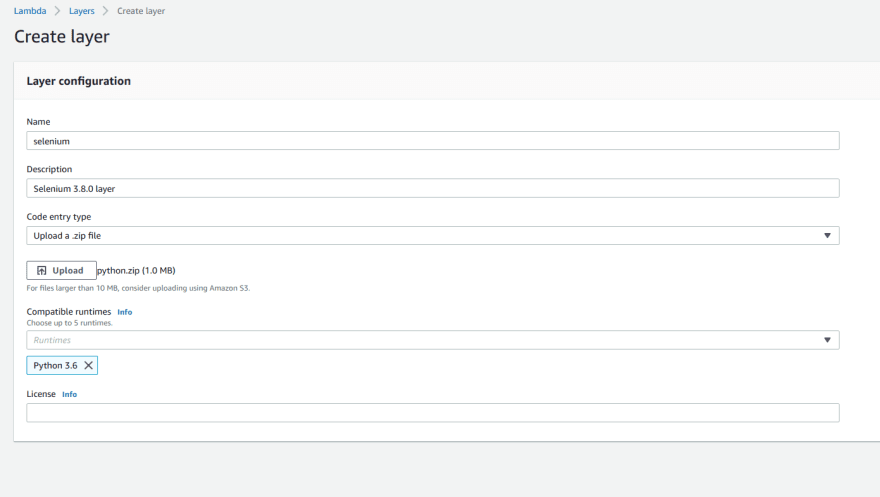
4. Click Create
Note: You can user whatever version you prefer, you just need to select compatible runtime when uploading your package
Creating Chromedriver Lambda layer
Download chrome driver
$ mkdir -p chromedriver
$ cd chromedriver
$ curl -SL https://chromedriver.storage.googleapis.com/2.37/chromedriver_linux64.zip > chromedriver.zip
$ unzip chromedriver.zip
$ rm chromedriver.zip
Download chrome binary
$ curl -SL https://github.com/adieuadieu/serverless-chrome/releases/download/v1.0.0-41/stable-headless-chromium-amazonlinux-2017-03.zip > headless-chromium.zip
$ unzip headless-chromium.zip
$ rm headless-chromium.zip
Compress driver and binary
$ ls
chromedriver headless-chromium
$ zip -r chromedriver.zip chromedriver headless-chromium
Once finished, Create lambda layer then upload zip file
1. Go to AWS Console Lambda/Layers
2. Click Create Layer
3. Input the following in the layer configuration
Name: chromedriver
Description: chrome driver and binary layer
Upload zip file created: chromedriver.zip
Compatible runtimes: Python 3.6

4. Click Create
Creating Lambda Function
To ensure that your function code has access to libraries included in layers, Lambda runtimes include paths in the '/opt' directory.
File Structure
── /lambda/            # lambda function
  ├── /handler.py      # source code of lambda function
  └── /serverless.yaml # serverless config
Code
Copy the code below to /lambda/handler.py
from selenium import webdriver
from selenium.webdriver.chrome.options import Options

def main(event, context):
    options = Options()
    options.binary_location = '/opt/headless-chromium'
    options.add_argument('--headless')
    options.add_argument('--no-sandbox')
    options.add_argument('--single-process')
    options.add_argument('--disable-dev-shm-usage')

    driver = webdriver.Chrome('/opt/chromedriver',chrome_options=options)
    driver.get('https://www.google.com/')

    driver.close();
    driver.quit();

    response = {
        "statusCode": 200,
        "body": "Selenium Headless Chrome Initialized"
    }

    return response
Copy the code below to /lambda/serverless.yaml.
service: selenium-lambda

provider:
  name: aws
  runtime: python3.6
  region: ap-southeast-2
  timeout: 900

functions:
  main:
    memorySize: 1000
    handler: handler.main
    events:
      - http:
          path: test
          method: get

    layers:
      - arn:aws:lambda:ap-southeast-2:{}:layer:chromedriver:2
      - arn:aws:lambda:ap-southeast-2:{}:layer:selenium:2

resources:
  Resources:
    ApiGatewayRestApi:
      Properties:
        BinaryMediaTypes:
          - "*/*"
Deploy Lambda Function
Go to /lambda directory
$ sls deploy
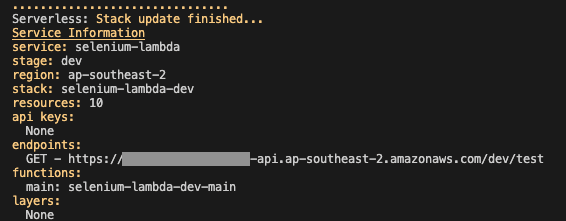
Output
Serverless: Stack update finished...
Service Information
service: selenium-lambda
stage: dev
region: ap-southeast-2
stack: selenium-lambda-dev
api keys:
  None
endpoints:
  GET - https://{name}.execute-api.ap-southeast-2.amazonaws.com/dev/test
functions:
  main: selenium-lambda-dev-main
You should get same response as below when accessing API
{
"statusCode": 200,
"body": "Selenium Headless Chrome Initialized"
}
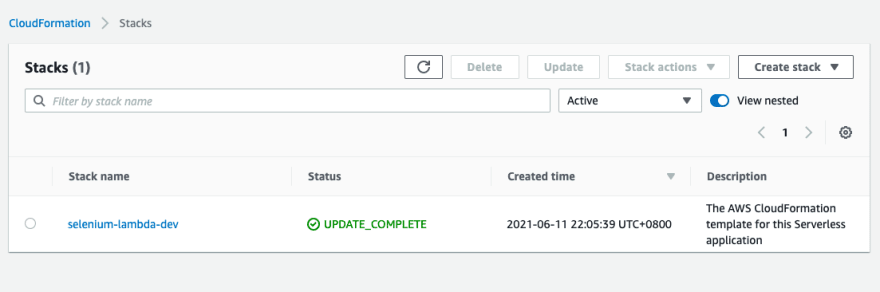
This deployment automatically creates cloudformation stack and s3 bucket.

Deprecation note:
Since python3.6 has been deprecated, you can try using the ff packages compatible with 3.9. note that if this exceeds lambda function zip file, you can try using docker image or uploading to s3 instead.
$ python3.9 -m pip install -t python/lib/python3.9/site-packages selenium==4.5.0
$ cd selenium
$ zip -r python.zip python/
Name: selenium
Description: Selenium layer
Upload zip file created: python.zip
Compatible runtimes: Python 3.9
$ mkdir -p chromedriver
$ cd chromedriver
$ curl -SL https://chromedriver.storage.googleapis.com/107.0.5304.62/chromedriver_linux64.zip > chromedriver.zip
$ unzip chromedriver.zip
$ rm chromedriver.zip
$ curl -SL https://github.com/adieuadieu/serverless-chrome/releases/download/v1.0.0-57/stable-headless-chromium-amazonlinux-2.zip > headless-chromium.zip
$ unzip headless-chromium.zip
$ rm headless-chromium.zip
References for new releases:
chromedriver release
https://chromedriver.chromium.org/downloads
serverless-chrome release
https://github.com/adieuadieu/serverless-chrome/releases
Checkout Achim's comment on how he used 3.9 using dockerimage
https://dev.to/achimgrolimund/comment/22d99