1. Preface
React Native is an open-source framework developed by Facebook that allows developers to use JavaScript and React to build genuine native mobile applications. Its main advantage is the ability to use the same codebase to build applications for both iOS and Android platforms. In this article, we will detail how to develop a React Native app from scratch.
2. React Native Implementation Principles and Technical Details
React Native is a framework based on React, allowing developers to write native apps using JavaScript. The core philosophy of React Native is "Learn once, write anywhere," meaning you learn once and write everywhere. Below we will delve into the implementation principles and technical details of React Native.
2.1. React Native Rendering Principle
The rendering principle of React Native is based on the concept of React's virtual DOM, but it is different from React running in the browser. In React Native, the virtual DOM is not converted into HTML but is mapped to native UI components. Here is a brief overview of the React Native rendering process:
JavaScript Thread: The application's JavaScript code runs on this thread. This includes React component lifecycle methods, state management, and business logic.
Virtual DOM Tree: The JSX written by developers is converted into a virtual DOM tree. When a component's state changes, React creates a new virtual DOM tree.
Diff Algorithm: React uses a Diff algorithm to compare the new and old virtual DOM trees and calculates the minimum updates needed.
Bridge: React Native uses a system called "Bridge" to communicate between the JavaScript thread and the native thread. Updates (called operation instruction sets) are sent across the bridge to the native side after serialization.
Native Thread: After receiving the operation instruction set, the native thread updates the native UI components according to these instructions. This process is carried out on the application's main UI thread, ensuring the smoothness of the UI.
Native UI Components: React Native encapsulates a series of React components corresponding to native platform UI components, such as
Viewcorresponding toUIViewon iOS andViewGroupon Android.
2.2. JavaScript to Native Bridging
At the heart of React Native is a bridge between JavaScript and the native platform (Bridge). This bridge allows JavaScript code to call native modules, and native modules can callback JavaScript code.
When JavaScript code is executed, it sends a JSON-formatted message to the native side via this bridge. The native side parses this message and performs the corresponding native operations based on the message content. After the native operation is completed, it can send the result back to the JavaScript side through the same bridge.
2.3. Virtual DOM (Virtual DOM)
React Native utilizes the concept of React's virtual DOM. The JavaScript code written by developers is actually building a virtual DOM tree. When the state changes, React Native calculates the differences in the virtual DOM tree and sends these differences to the native side to update the actual UI.
2.4. Native Components
React Native provides a series of encapsulated native components, such as View, Text, Image, etc., which correspond to native UI components on iOS and Android. When these components are rendered, they are converted into native views for the respective platforms.
2.5. Thread Model
React Native applications typically have three main threads:
- JavaScript Thread: Runs JavaScript code.
- Main UI Thread: The native platform's UI thread, used for rendering UI and handling user interactions.
- Background Thread: Used for executing long-running tasks such as network requests and image loading.
2.6. Hot Updates and Hot Reloading
Hot Update or Hot Reloading is a technology that allows developers to update and replace modules in the application in real-time without restarting the entire application. In React Native, this feature is implemented by replacing JavaScript modules without recompiling the native code. Here are the implementation details of hot updates:
2.6.1. JavaScript Bundle
A React Native application loads a bundle file containing all JavaScript code at runtime. This bundle file is created by a packaging tool (such as Metro Bundler) that packages all JavaScript files and resources into a single file.
2.6.2. Module System
React Native uses a module system where each JavaScript file is considered a module. These modules are identified by unique module IDs in the bundle file.
2.6.3. Hot Update Process
Listening for File Changes: When developers enable the hot update feature, the packaging server (such as Metro) listens for changes in the project files.
Module Replacement: When a file is modified and saved, the packaging server repackages the file and sends the updated module to the running application.
Bridge Communication: The bridge system in React Native receives the updated module and passes it to the JavaScript thread.
Module Hot Replacement: The JavaScript thread uses the new module code to replace the old module instance. This usually involves updating the module cache and re-executing the module's export code.
State Preservation: To maintain application state, hot updates try to avoid reloading the entire application. It attempts to replace only the changed parts while maintaining the current state of the application.
UI Refresh: After replacing the module, React Native triggers a re-rendering process to ensure the UI reflects the latest code changes.
2.6.4. Fast Refresh
Fast Refresh is an improved version of hot updates in React Native, combining the advantages of hot reloading and live reloading. The implementation details of Fast Refresh include:
Error Recovery: If an error occurs during the hot update process, Fast Refresh attempts to revert to the last normal state instead of crashing the application.
State Preservation: Fast Refresh tries to preserve the state of components as much as possible, including React's local state and Hooks state.
Intelligent Reloading: If Fast Refresh detects that changes cannot be safely applied through hot updates, it will fall back to a global reload while still trying to preserve the application state.
React Native supports Hot Reloading and Fast Refresh. Hot Reloading allows developers to see the effects of code changes in real-time without restarting the entire application. Fast Refresh is a new feature introduced in React Native version 0.61, which improves hot reloading and provides a more reliable update experience. Hot updates are a powerful feature in React Native development, greatly enhancing development efficiency.
2.6.5. Modularization and Plugins
React Native allows developers to create modular code and install third-party plugins via npm. These plugins can be purely JavaScript or include native code. If they contain native code, the plugin needs to provide implementations for both iOS and Android.
3. Latest Technologies
3.1. React Native Re-architecture (Fabric)
- New UI Layer: Will operate directly on the UI thread, reducing communication with the JavaScript thread and improving performance.
- New Bridging System: The new bridging system will be asynchronous, allowing batch transmission of updates, reducing communication overhead.
- JSI (JavaScript Interface): JSI is a new lightweight API layer that will replace the existing bridge system, allowing JavaScript to directly call C++ code instead of through the bridge.
3.2. TurboModules
TurboModules is another new feature of React Native, allowing native modules to be loaded on demand rather than all at once at application startup. This will reduce the application's startup time and improve overall performance.
3.3. CodeGen
CodeGen is an automation tool used to generate bridging code for native modules. It simplifies the process of creating native modules and ensures type safety.
3.4. Expo
A platform for building and deploying React Native applications, it provides pre-built modules, tools, and services that simplify the development process.
3.5. Hermes
A JavaScript engine developed by Facebook, optimized for React Native, providing faster startup times and smoother performance.
3.6. Reanimated 2
An animation library that provides advanced features needed to create complex and high-performance animations.
3.7. Flipper
A debugging tool developed by Facebook, allowing developers to inspect and debug their React Native applications in real-time.
3.8. Suspense
A new data fetching mechanism that allows components to display a loading state while waiting for data.
3.9. SWR
A data fetching library that provides out-of-the-box caching, revalidation, and optimistic updates.
3.10. Next.js
A framework for building server-side rendered React applications, it now supports React Native, allowing developers to create hybrid mobile applications.
4. Developing a React Native App
4.1. Preparation
Before starting, make sure your development environment has Node.js, npm (or yarn), and the React Native command-line tool (react-native-cli) installed.
npm install -g react-native-cli
For iOS development, you need to install Xcode; for Android development, you need to install Android Studio and the corresponding SDKs.
4.2. Initializing the Project
Create a new React Native project using the React Native CLI:
react-native init MyAwesomeApp
This will create a new directory called "MyAwesomeApp" and set up all the necessary dependencies and project files.
4.3. Directory Structure
Entering the project directory, you will see the following structure:
MyAwesomeApp/
├── android/
├── ios/
├── node_modules/
├── index.js
├── App.js
└── package.json
-
android/andios/directories contain the native code for their respective platforms. -
node_modules/is where the project dependencies are. -
index.jsis the application's entry file. -
App.jsis a React component representing the application's main interface. -
package.jsoncontains the project's dependencies and configuration information.
4.4. Writing React Components
Open App.js and start writing your first React component. React Native provides a series of core components, such as View, Text, Button, etc., that can be used to build the interface.
import React from 'react';
import { View, Text, StyleSheet } from 'react-native';

const App = () => {
  return (
    <View style={styles.container}>
      <Text>Welcome to React Native!</Text>
    </View>
  );
};

const styles = StyleSheet.create({
  container: {
    flex: 1,
    justifyContent: 'center',
    alignItems: 'center',
    backgroundColor: '#F5FCFF',
  },
});

export default App;
4.5. Running the App
Make sure your device or emulator is up and running. Then, in the project directory, run the following commands to start the app:
For iOS:
react-native run-ios
For Android:
react-native run-android
These commands will start the React Native packager, compile the app, and install it on the device or emulator.
4.6. Debugging and Development
React Native provides the Hot Reloading feature, which allows you to see updates immediately after you save files. Additionally, you can shake the device or use the command ⌘D (iOS) or ⌘M (Android) to open the developer menu, where you can access debugging tools, performance monitoring, and other features.
4.7. Adding Navigation
Most apps require navigation functionality. React Navigation is the most popular navigation library in React Native. First, install it:
npm install @react-navigation/native
npm install react-native-screens react-native-safe-area-context
For stack navigation, you also need to install the stack navigator:
npm install @react-navigation/stack
Then, you can create a navigation stack:
import { NavigationContainer } from '@react-navigation/native';
import { createStackNavigator } from '@react-navigation/stack';
import HomeScreen from './HomeScreen';
import DetailsScreen from './DetailsScreen';

const Stack = createStackNavigator();

function App() {
  return (
    <NavigationContainer>
      <Stack.Navigator initialRouteName="Home">
        <Stack.Screen name="Home" component={HomeScreen} />
        <Stack.Screen name="Details" component={DetailsScreen} />
      </Stack.Navigator>
    </NavigationContainer>
  );
}
5. Developing a React Native App from Scratch with Codia AI Code
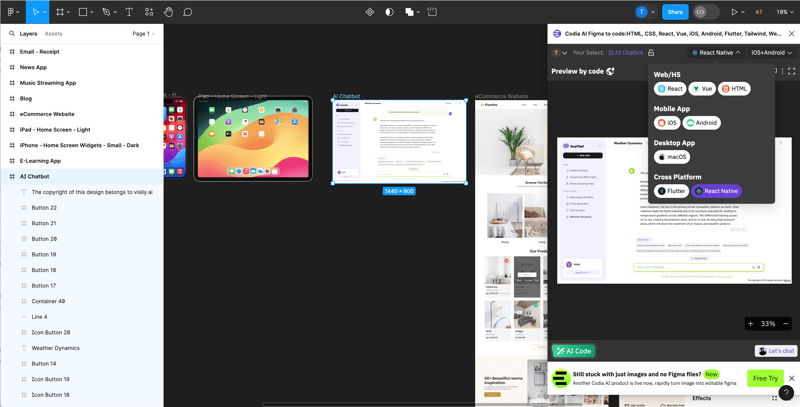
To integrate Codia AI into your Figma to React Native development process, follow these instructions:
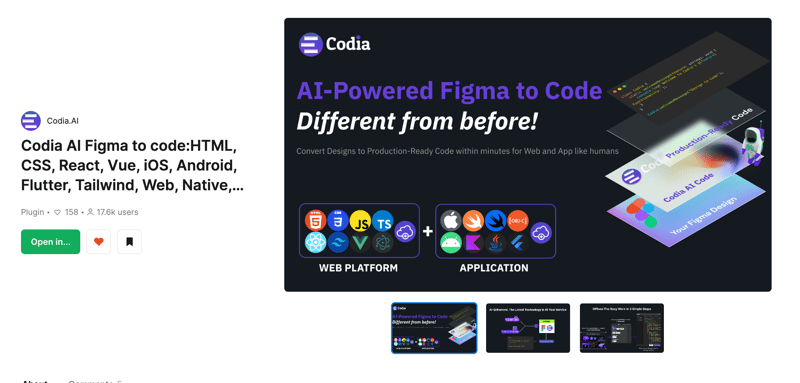
Open the link: Codia AI Figma to code: HTML, CSS, React, Vue, iOS, Android, Flutter, ReactNative, Tailwind, Web, App
- Install the Codia AI Plugin: Search for and install the Codia AI Figma to React Native plugin from the Figma plugin store.
- Prepare Your Figma Design: Arrange your Figma design with clearly named layers and components to ensure the best code generation results.
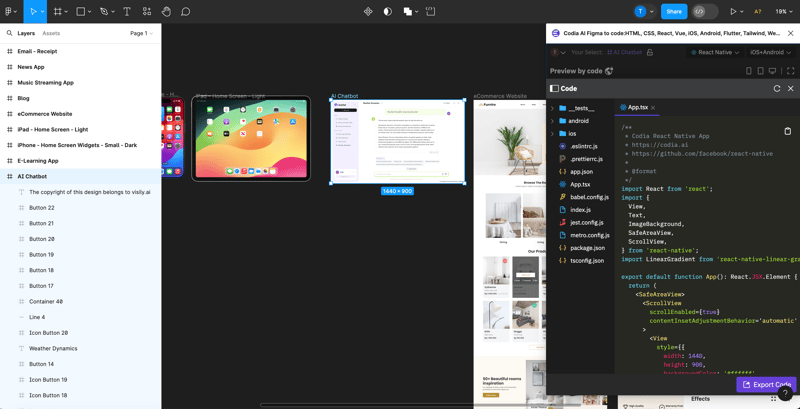
- Convert with Codia AI: Select your design or component in Figma and use Codia AI to instantly.
generate React Native code


