
Written by Marie Starck✏️
Expo announced the release of Expo Router v3 in January 2024, marking it as the first universal, full-stack React framework. Expo Router launched about a decade ago, and this release reflects its attention to the continued changes in the mobile and fronted landscape.
A decade ago, mobile development was split up into iOS and Android. Then, React Native came on the scene and allowed for cross-platform development. Finally, Expo came and made mobile development easier than ever.
Today, Expo is a full suite of tools and services that allow developers to create truly cross-platform applications, mobile and web, and to do so completely in React. Together with Expo Router, Expo makes it easier than ever to implement navigation that will work on both mobile devices and the web seamlessly.
In this article, we’ll discuss Expo Router, its key features, and how it measures up to React Navigation to help you assess whether adopting this tool is the right decision for your next project.
What is Expo Router?
Before we talk about Expo Router, it’s important to learn about the framework it’s based on: React Native.
As we mentioned earlier, before React Native was created in 2015, iOS and Android development was split. This split doubled development time and required companies to hire two types of developers if they wanted their apps in both the Apple Store and the Google Store.
During an internal hackathon, Meta invented React Native, a framework based on JavaScript that supported cross-platform development. Thanks to this framework, JavaScript developers specializing in web development could also work on mobile development for Android and iOS applications.
Expo is an open source platform built on React Native that allows developers to create applications that run on Android, iOS, and the web. It includes a suite of tools and services to build, run, and test native applications. Expo Router is probably one of the most popular Expo tools and is incredibly practical for handling navigation in a mobile application.
At first, Expo Router used the standard concept of stacks to create pages and navigate between them. The idea was that screens would be placed on top of each other in a stack, similar to the first-in-last-out principle.
Since then, Expo Router has moved away from this navigation philosophy and now uses a file-based router to implement the navigation. If you’ve worked with Next.js, you’re likely familiar with this concept already.
In file-based routing, anytime a file is added to the app directory, a new route is created:
/app
    --> index.js         matches '/'
    --> about.js         matches '/about'
    --> /dashboard
        --> index.js     matches '/dashboard'
        --> login.js.    matches 'dashboard/login'```


This type of routing makes it truly cross-platform, as it can also be used on the web, which isn’t possible with the mobile-only stack approach.

#### _Further reading:_

*   [Getting started with React Native and Expo SDK](https://blog.logrocket.com/getting-started-with-react-native-and-expo-sdk/)
*   [Building cross-platform apps with Expo instead of React Native](https://blog.logrocket.com/building-cross-platform-apps-expo-instead-of-react-native/)
*   [A guide to native routing in Expo for React Native](https://blog.logrocket.com/native-routing-expo-react-native/)

* * *

## Why choose Expo Router?

Now that we have gone over what Expo Router is, let’s go over some reasons you might consider using it:

*   **Performance**: There are no performance issues when it comes to Expo Router. Even though it adds an extra layer on top of React Navigation, the experience is fluid and smooth, with no flickering between the screens
*   **Ease of use**: Expo Router’s popularity has a lot to do with its excellent DX. Like Create React App, you can create an Expo app with one command (`npx create-expo-app@latest`) and run it with another (`npx expo start`). There are no external libraries to install, and the famous Metro bundler compiles and creates the build for you to test and debug your native application
*   **Bundle size**: Considering that Expo Router is an additional layer on top of React Navigation, there’s reason for concern about the bundle size due to running Expo. However, to mitigate this concern, Expo Router comes with the [Metro bundler](https://docs.expo.dev/guides/customizing-metro/) tool for compiling and building your native application, even for production. It’s built and optimized for React Native and comes with bundle splitting, modification, and web support
*   **Community & ecosystem**: The Expo community is thriving. On top of a Discord group of over 33k members, they have GitHub repositories with over 30k stars and loads of discussions. On top of that, the Expo team is working hard to release new features. They released Expo v2 in July 2023 with a [Medium blog post](https://blog.expo.dev/introducing-expo-router-v2-3850fd5c3ca1) and released v3 just half a year later in January 2024 with [game-changing new features](https://expo.dev/changelog/2024/01-23-router-3) such as bundle splitting, testing library, and more
*   **Learning curve**: The learning curve for Expo is fairly low, especially for JavaScript developers. If you have experience coding for the web, you will likely find it easy to pick up Expo, since file-based routing is already used in other popular frameworks
*   **Documentation**: Expo’s docs are complete, thorough, and detailed. The team has even provided [a repository with example projects](https://github.com/expo/examples) for people to experiment with
*   **Integrations**: Expo works pretty well with other frameworks. Whether you want to integrate a library such as NativeWind to implement Tailwind CSS styling or a third-party application like Firebase to handle authentication, the setup is straightforward.
*   **Ecosystem**: The great thing about Expo Router is that it doesn’t come by itself. The Expo team is currently developing additional tools to assist with application development. Recently, the team created Expo Application Services (EAS), which integrates cloud services to test, build, and deploy your applications

Of course, it’s also important to weigh Expo Router’s drawbacks as you consider whether you should choose it. A few cons to keep in mind include:

*   **Confusing routing**: While file-based routing brings working with Expo Router closer to a web-like DX, it’s a step away from the stack-based routing that mobile developers are used to. Some developers recommend learning React Navigation basics before moving on to Expo Router
*   **Navigation options**: An alternative like React Navigation offers more types of navigation, including Drawer, Tab, Stack, and more

Overall, Expo Router is a great choice for developers creating mobile applications. It’s both simple and yet filled with features and tools to get up to speed quickly. Its thriving community also ensures that there will be tons of resources to help you out if you’re just getting started with Expo Router.

### Getting started with Expo Router

Creating an Expo application is very easy. Like Create React App, there is a command that will create a sample application:


```bash
npx create-expo-app@latest --template tabs@50
This will generate a simple application with Expo Router already set up using a tabs template at version 50. You can then run the project with npx expo start. Once done, you should see this: 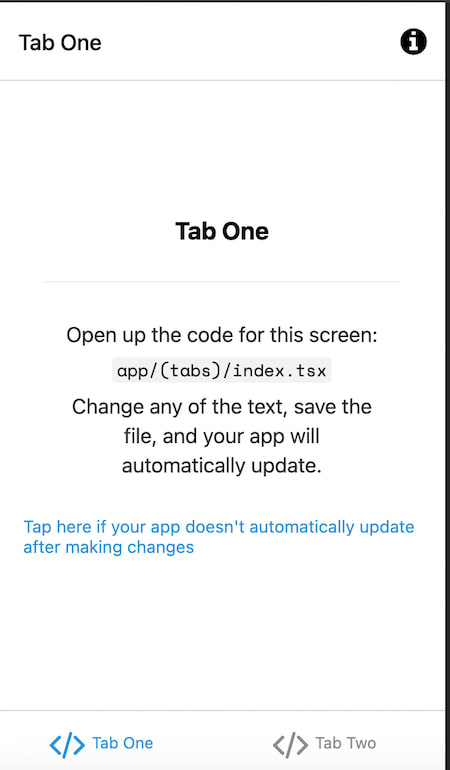
Further reading:
- Getting started with NativeWind: Tailwind for React Native
- Integrating Firebase authentication into an Expo mobile app
- Best CI/CD tools for React Native
Key Expo Router features to know
Expo Router has some key features that are helpful to understand as you evaluate this framework. Let’s go through them now.
Navigation logic
As mentioned above, Expo Router uses file-based routing logic, meaning that every file added to the app directory is a new route. You can also create html-specific routes along with dynamic routes.
Header and tab bars are created using layout files. By calling the _layout.js file, you can specify your layout, which will wrap around the routes to persist the layout across different pages.
Navigation between pages is done through links, either with the <Links /> React component or the <a> element. This navigation approach comes closer to how navigation is done on the web.
Expo’s sample project, for example, has this structure:
/app
    --> modal.tsx         // modal component
    --> _layout.tsx       // specifies the layout (headers, tabs, ...)
    --> +html.tsx         //  HTML-specific to configure root HTML
    --> +not-found.tsx    // 404 pages
    --> (tabs)            // This is a dynamic route for / or /(tab-number)
        --> index.tsx     // matches '/'
        --> two.tsx       // matches '/two'
        --> _layout.tsx   // layout for the tab pages
Deep linking
Deep linking is the process by which a user will click on a link outside of your app and be redirected to either a specific part of the app or the App Store to download the app. It’s helpful when you need to direct a user to your app from elsewhere, such as from a webpage.
There isn’t any configuration needed, as deep linking comes out-of-the-box with Expo Router. Since Expo Router uses file-based routing, you already have the URLs by default — i.e., /auth/login. No prefix is required, as Expo Router handles it.
You do, however, need to set up your scheme in your app.json config file, like so:
{
  "scheme": "your-app-scheme"
}
You can test your links with uri-scheme. See Expo Router’s documentation on the subject to help you.
Native support
Expo applications can work with third-party React Native libraries or custom native code. Expo router uses autolinking to link native dependencies to the Expo project.
Autolinking enables developers to integrate third-party libraries easily and without additional configuration. You simply have to run npm install and rerun pod install.
Further reading:
- Implementing in-app updates for React Native apps
- React Native push notifications: A complete how-to guide
Use cases for Expo Router
Many developers have used Expo Router simply because it’s easy to use, but it’s important to note whether a framework is scalable. Realizing the technology you used in your MVP doesn't scale with your growth can be frustrating, especially if you have to discard and rebuild the entire project.
This is why it’s interesting to see which customers use Expo and why. Thankfully, Expo has a list of customers on their website, many of whom explain their particular use case and why Expo Router is the best fit for their needs.
Insider, for example, explains that they moved to Expo to move away from the development split between iOS, Android, and web that required them to hire three developers to support what should essentially be the same product. The team had a proof of concept in a week and a fully redesigned, multi-platform app nine months later.
Goody, on the other hand, used Expo from the start. What they liked was the out-of-the-box tools that came with Expo. Push notifications, for example, work as is which was a vast improvement from React native which asks for an SDK or a push notification server. This ease of use made the development much faster than had they chosen React Native.
From these example customer stories, you can see that the list of Expo Router’s out-of-the-box features and its quick setup can allow your team to reduce development-related costs and time by maintaining only one application. Your team could also become more efficient, as Expo Router can help you create new features more quickly.
Expo Router vs. React Navigation
The main alternative to Expo Router is React Navigation. Both frameworks were developed by the Expo team. For developers who don’t want the Expo SDK or are unfamiliar with file-based routing, using React Native with React Navigation would be your good choice.
Let’s go over their main differences:
- Features: The main difference between the two is their navigation logic. Expo uses file-based routing and React Navigation uses stacks. If you have more web experience, you will find Expo easier to use. For seasoned mobile developers, React Navigation will make sense to you. Apart from that, Expo comes with lots of out-of-the-box features
- Performance: Today’s users expect apps to have a smooth and fluid UI that works quickly without errors. As a result, frameworks are putting all the work into making their apps performant. Expo Router and React Navigation are no exception. Both are near-native when it comes to performance
- Community: Both tools have a thriving Discord community. React Navigation has more than 200k members compared to over 33k members for Expo. But for either framework, you’ll find an active group of people to connect and share resources, questions, and answers with
- Documentation: There are extensive documentation, articles, and tutorials available for both tools. Fortunately for new developers, many experienced developers have even written articles or answered questions on StackOverflow for both tools
- Use cases: It is important to note that you can use React Navigation in an Expo application — you’re not required to use Expo Router. However, Expo Router is tied to Expo, which means you can access a lot of features, but you’re stuck in that ecosystem. So, despite the fact that Expo Router is built on React Native, you’re dependent on Expo for updates and features. One reason to use React Native and React Navigation instead is to have more freedom for customization
Let’s summarize this information in a table so you can compare the two options at a glance:
| Expo Router | React Navigation | |
|---|---|---|
| Features | File-based navigation logic Cross-platform (iOS, Android, Web) Deep linking Expo tools (Metro bundler,…) | Stack and Drawer navigation logic Web support Deep linking Server rendering |
| Performance | Near native | Near native |
| Community | Strong community | Strong community |
| Documentation | Extensive | Extensive |
| Uses Cases | Great for developers wanting something out of the box with lots of tools and services. | Great for developers wanting more flexibility when customizing their navigation. |
Conclusion
Expo Router provides a file-based routing solution offered by the Expo team with crucial features such as deep linking and native support.
Expo has been widely popular for the last ten years, and it’s easy to see why. The Expo Router documentation is extensive and includes example repositories, and there’s a thriving community of developers you can seek help from and engage with.
Whether you are trying to learn mobile development or working on a production application, Expo Router is a good choice for you.
Get set up with LogRocket's modern error tracking in minutes:
- Visit https://logrocket.com/signup/ to get an app ID.
- Install LogRocket via NPM or script tag.
LogRocket.init()must be called client-side, not server-side.
NPM:
$ npm i --save logrocket

// Code:

import LogRocket from 'logrocket';
LogRocket.init('app/id');
Script Tag:
Add to your HTML:

<script src="https://cdn.lr-ingest.com/LogRocket.min.js"></script>
<script>window.LogRocket && window.LogRocket.init('app/id');</script>
3.(Optional) Install plugins for deeper integrations with your stack:
- Redux middleware
- ngrx middleware
- Vuex plugin


