Hello Readers,
After Reading This Full Article you will be able to create an architecture with HIGH AVAILABILITY.
Prerequisites:
Created an AWS account.
Install AWS CLIv2 in OS.
Configure AWS CLIv2 with IAM user.
Some Basics of How to configure WebServer.
If you are a beginner in AWS CLI you can refer to my another article.
https://dev.to/piyushbagani15/getting-started-with-aws-cliv2-135n
What Is AWS CLI??
The AWS Command Line Interface (CLI) is a unified tool to manage your AWS services. With just one tool to download and configure, you can control multiple AWS services from the command line and automate them through scripts.
To Learn More about AWS CLI: https://aws.amazon.com/cli/
What is AWS S3 ?
Amazon Simple Storage Service is storage for the Internet. It is designed to make web-scale computing easier for developers.Amazon S3 has a simple web services interface that you can use to store and retrieve any amount of data, at any time, from anywhere on the web. It gives any developer access to the same highly scalable, reliable, fast, inexpensive data storage infrastructure that Amazon uses to run its own global network of web sites. The service aims to maximize benefits of scale and to pass those benefits on to developers.
What is AWS Cloud Front Service ?
Amazon CloudFront is a web service that speeds up distribution of your static and dynamic web content, such as .html, .css, .js, and image files, to your users. CloudFront delivers your content through a worldwide network of data centers called edge locations. When a user requests content that you’re serving with CloudFront, the user is routed to the edge location that provides the lowest latency (time delay), so that content is delivered with the best possible performance.
What Does The Architecure Includes?
✔ Webserver configured on EC2 Instance
✔Document Root(/var/www/html) made persistent by mounting on EBS Block Device.
✔Static objects used in code such as pictures stored in S3
✔Setting up Content Delivery Network using CloudFront and using the origin domain as S3 bucket.
✔Finally place the Cloud Front URL on the webapp code for security and low latency.
🎇 All the above steps must be performed using AWS CLI 🎇
🎯For Creating this kind of architecture we are going to Integrate AWS S3 with CloudFront Service of AWS .
So Lets Begin
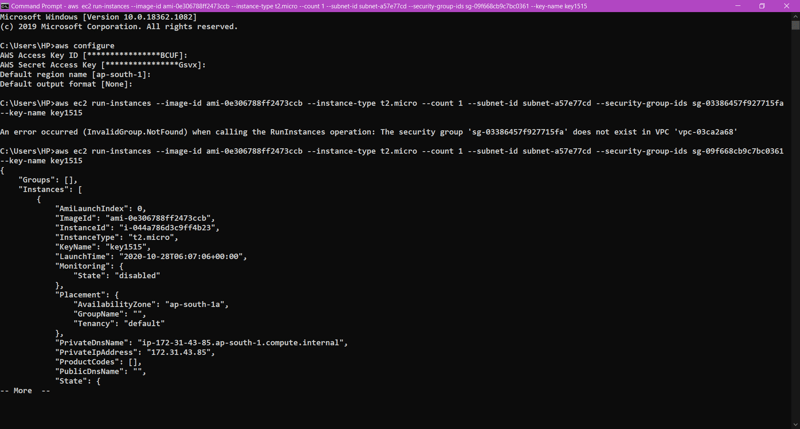
First we have to launch one EC2 Instance in which we will configure the Apache Webserver .To launch EC2 Instance via AWS CLI we have command as :
aws ec2 run-instances --image-id ami_ --instance-type _type_id --count no_of_instance --subnet-id -a57e77cd --security-group-ids group_id --key-name key_name
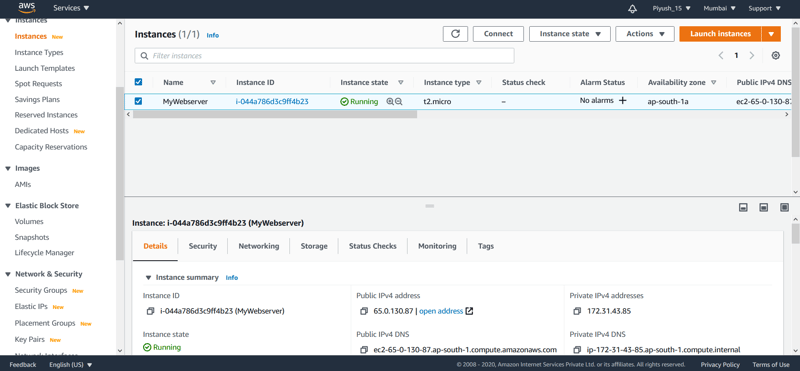
Confirmation in AWS Console:
Now In this Launched Instance we will quickly configure the Webserver.
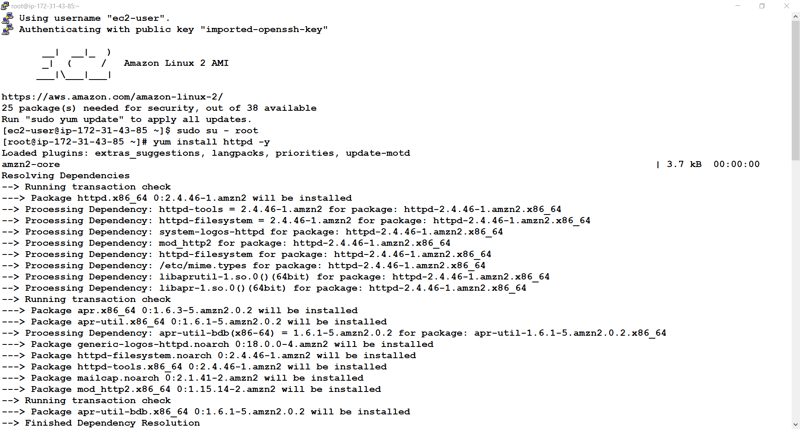
First we need to install httpd software using the following command:
yum install httpd -y
Commands are →
- cd /var/www/html/
- vi index.html
- We will give the content in the index.html file.
- systemctl start httpd
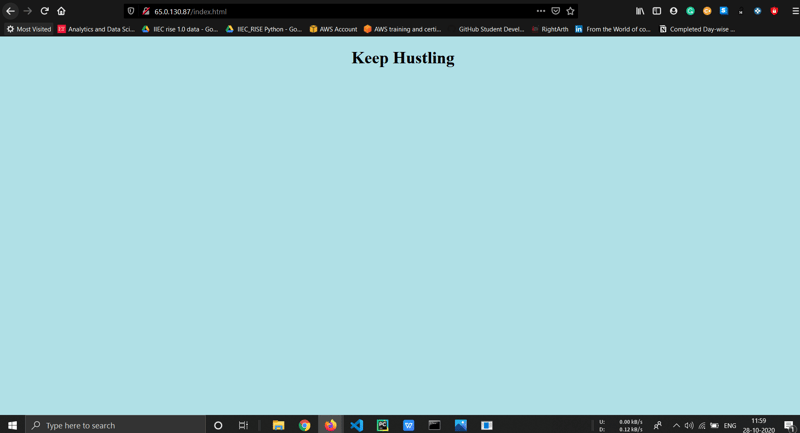
Finally Check that webserver started or not by loading the page in which we have public_ip/filename.html. In My case it is working Fine. To permanently enable it use command.
systemctl enable httpd
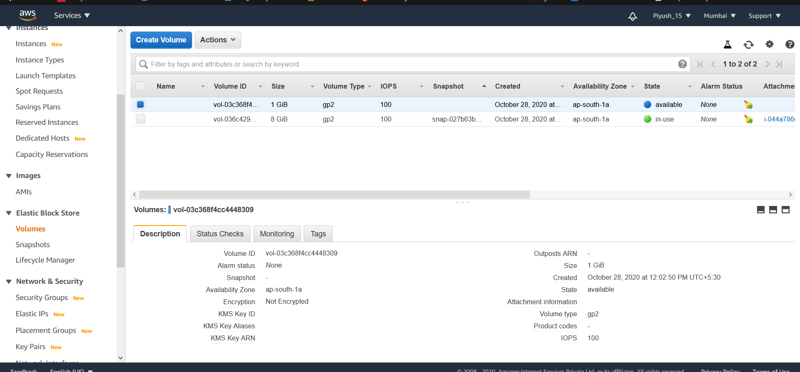
- Now we have to create 1 EBS Volume which serves as Document Root Device.After creating EBS Volume let’s attach it to the EC2 Instance .
To Create EBS Volume AWS CLI has command as :
aws ec2 create-volume — volume-type volume type — size 1 — availability-zone Zone

Confirming in AWS Console
To Attach EBS Volume to EC2 Instance we have command :
aws ec2 attach-volume --volume-id volume_id --instance-id instance_id --device device_name

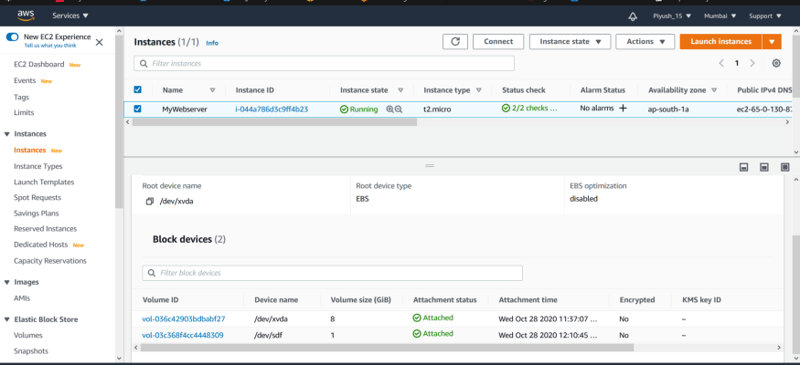
3) To make Document root /var/www/html of web server we have to mount it on EBS Volume.
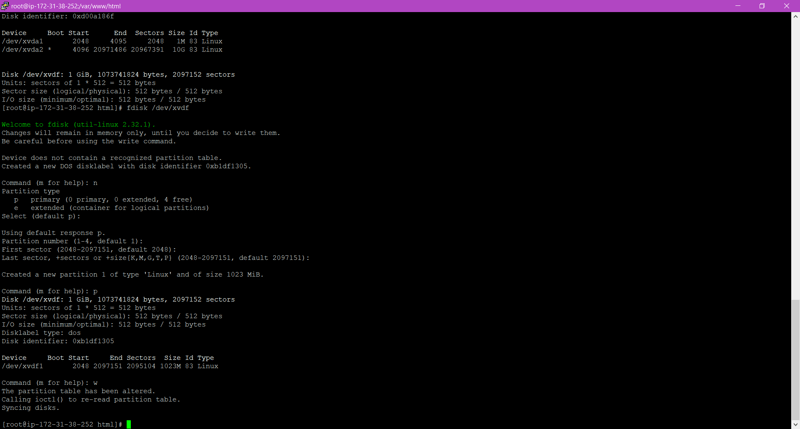
To use any volume first we have to Create Partition then Format it and after that we can mount.
Creating the partition :
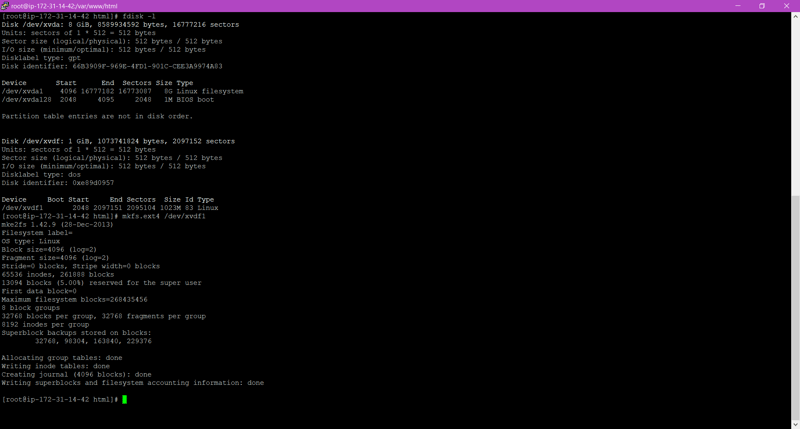
To Create Partitions we Use fdisk /dev/xvdf command and after that just press enter and enter. Make sure to save by pressing w.
Formatting the partition :
To format, we use → mkfs.etx4 /dev/xvdf1 command.
To mount, we use →mount /dev/xvdf1 /var/www/html command.
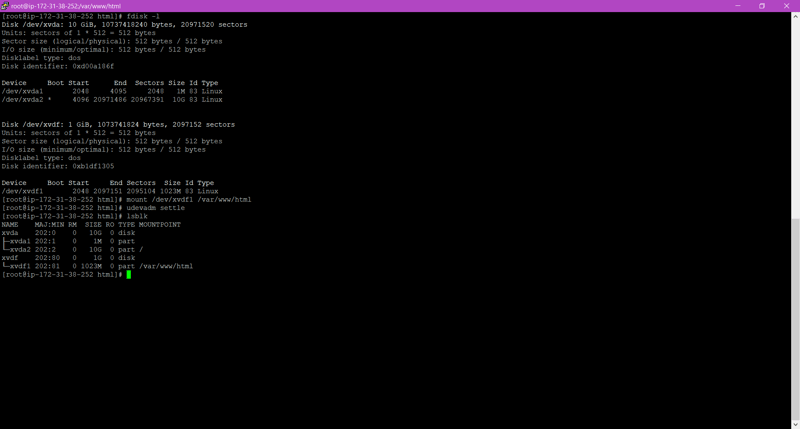
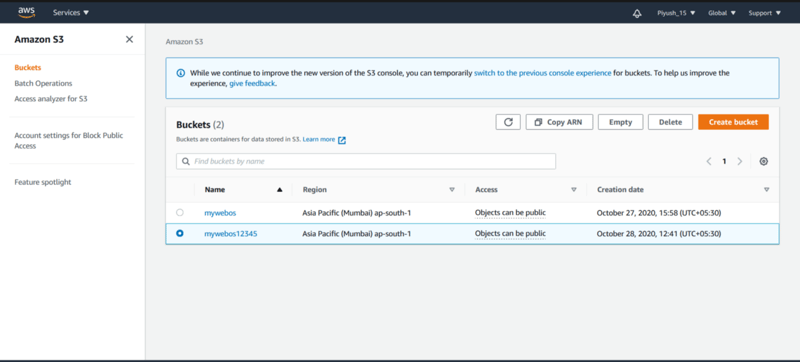
4) Now we have to put the static content like images used in web code into the S3 Bucket for better availability . For these we have to create one S3 Bucket .
aws s3api create-bucket — bucket bucketname— region ap-south-1 — create-bucket-configuration LocationConstraint=ap-south-1

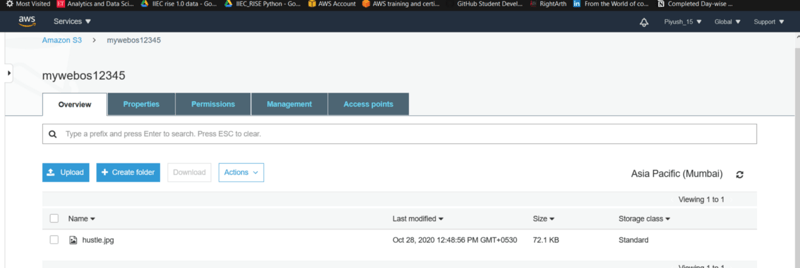
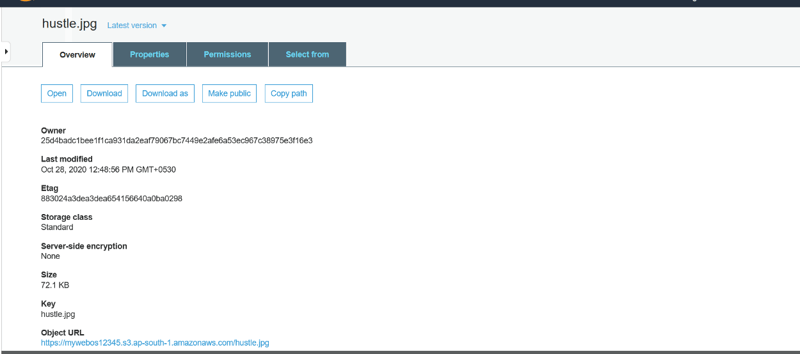
Now The webpage looks like :
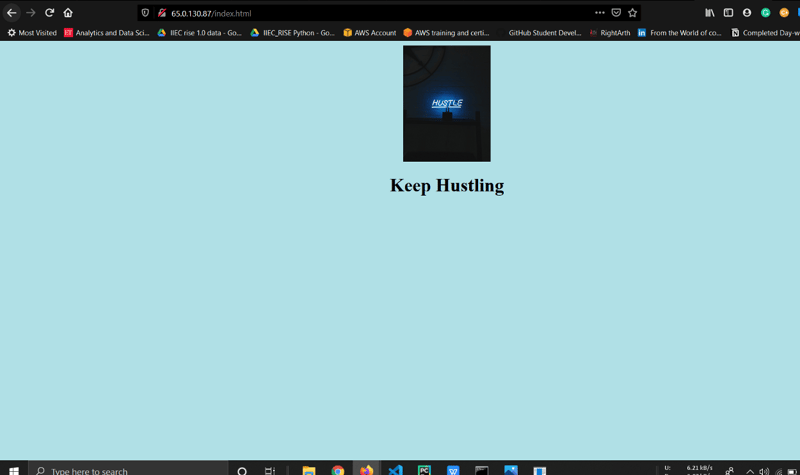
5) To access this webpage We are now using S3 URL due to this we have to travel through public Internet which may cause some kind of Delay or Latency.
To solve this issue we can use AWS CloudFront service which provide unique url to s3 object.Using this URL we can access from anywhere with less latency because here AWS private internet infrastructure is used behind the scenes.
To create CloudFront Distribution for our S3 Bucket Objects .
aws cloudfront create-distribution --origin-domain-name {domain_name}
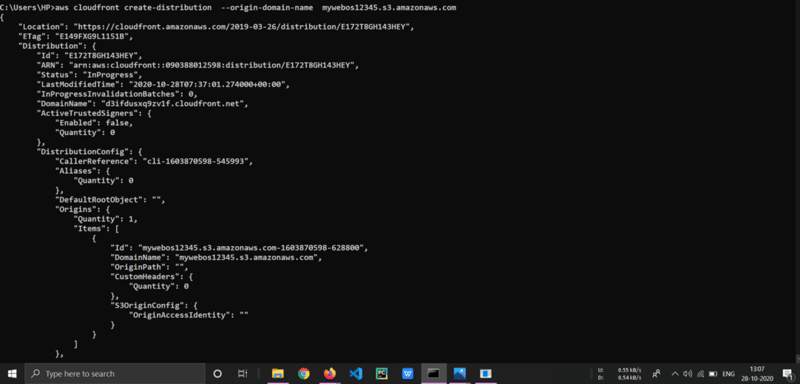
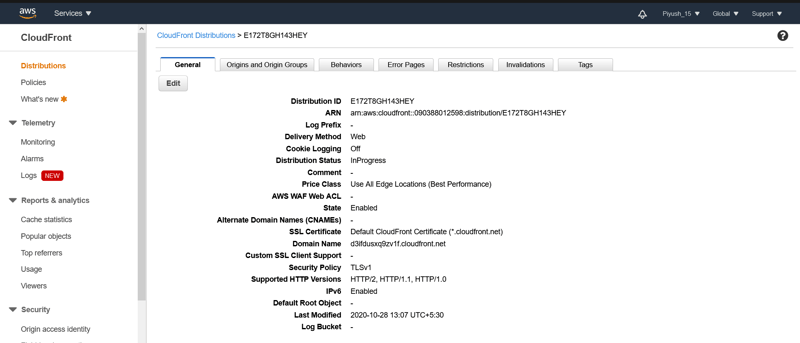
We can see that CloudFront service of AWS provides one Domain Name or unique URL to access the content with fast speed and low latency . Now we have to give this Cloud Front URL in our Code for the Image instead of S3 URL.
6) Now after updating the code, we get the final webpage as follows:
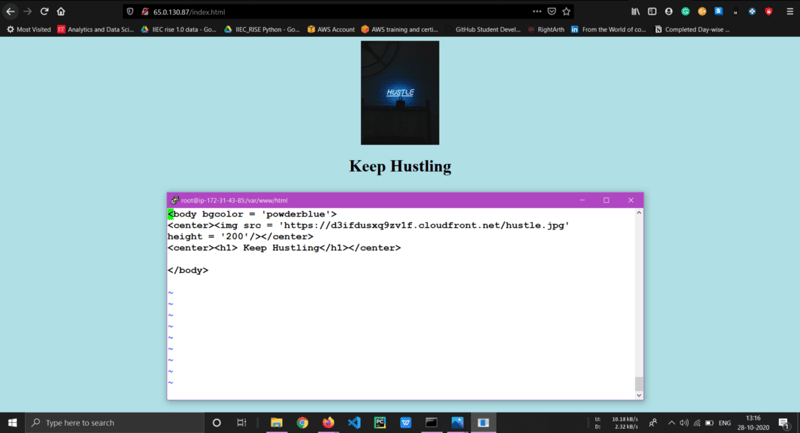
Now Our webpage becomes faster in terms of speed and here we successfully completed our Target.
🎇 Cheers 🎇
Thank You For Reading🙏🙏.

