If you’re not familiar with the Messages API, you can send text, images, and video to Facebook Messenger, Viber, WhatsApp, and the more basic SMS channel. Vonage has a sandbox testing environment for you to play with these, so in this tutorial, we’re going to use that to play with WhatsApp Messaging using a demo Laravel application I’ve already set up.
Prerequisites
We’re going to keep this as simple as possible. You will need:
- PHP8.1+
- Composer
- git
- ngrok
- A Vonage API Account
How to Clone the Repository Code
Using the command line, clone the application code:
$ git clone git@github.com:Vonage-Community/blog-messages-laravel.git
Copy the .env.example as .env to create our environment variables file:
$ cd blog-messages-laravel
$ cp .env.example .env
And finally, install the dependencies with composer:
$ composer install
How to Set up the Vonage Dashboard
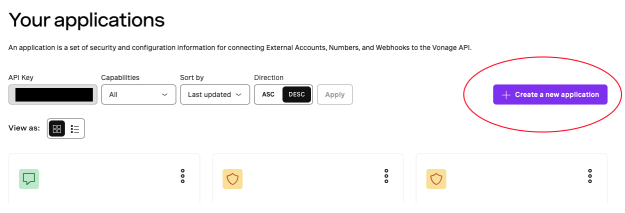
First, we’re going to need an application ID to send messages. Head to the Vonage Dashboard, and create a new application:
Name your application with an identifier (i.e. laravel-messages) and turn on the Messages capability. You’ll need to add two webhooks here, but we won’t actually be using these so you can put dummy placeholders in e.g. https://www.example.com
Hit “Generate public and private key”. You’ll notice that a private.key will be generated: move this into your application code’s root directory. Take note of the Application ID that is created: we’ll need this shortly.
That takes care of the Application settings, so we now need to set up the Sandbox.
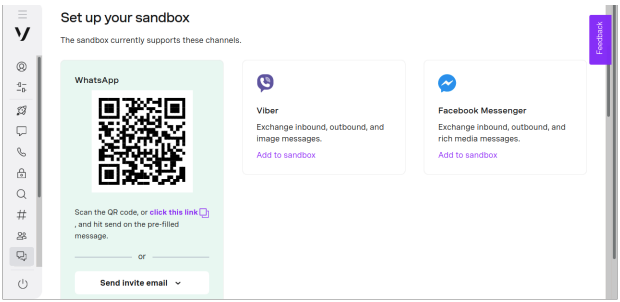
Head to this page or navigate to it using the left sidebar under Troubleshoot & Learn > Developer Tools > Messages Sandboxand follow the instructions to create a WhatsApp sandbox by scanning the QR code.
For a fully integrated solution in production, you would need a WhatsApp Business Account (WABA) registered with Meta. What the sandbox allows you to do is use a temporary WABA - you’ll now have your number on an allow list, with a preset number that is linked to Vonage’s servers.
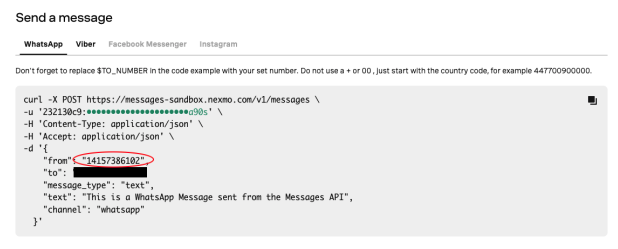
Once the number has been set up, you can scroll down to some example cURL code that gives you the sender number to use:
Configure The Application Environment
When we created the .env file, you’ll notice that there are three variables to fill out:
VONAGE_APPLICATION_ID=
VONAGE_PRIVATE_KEY_PATH=
VONAGE_FROM_NUMBER=
We should now have all three of these. The from number was created in the previous step, enter private.key as our path (the application code uses the Laravel helper function base_path() to determine the fully qualified path, so if you wanted to move the key into a different directory structure you’d do it relative from the root). Our Application ID can be pasted in from the Vonage Dashboard when we created a Vonage Application.
Boot Up the Application
No fancy stuff like Sail or Herd here: we’re just going to use the built-in PHP server that Laravel wraps:
$ php artisan serve
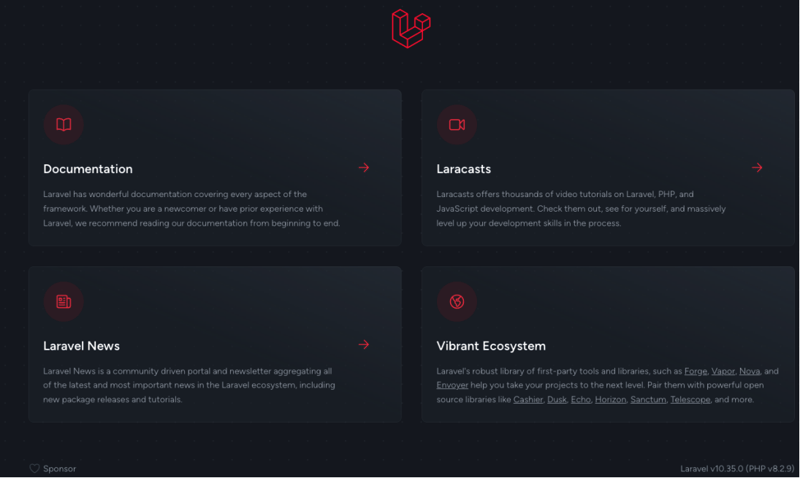
And we should get the lovely landing page by navigating to localhost:8000:
We’ve not got any way for the Vonage servers to give us incoming message webhooks, so to get a public URL we are going to use ngrok to map to our running Laravel application:
$ ngrok http 8000
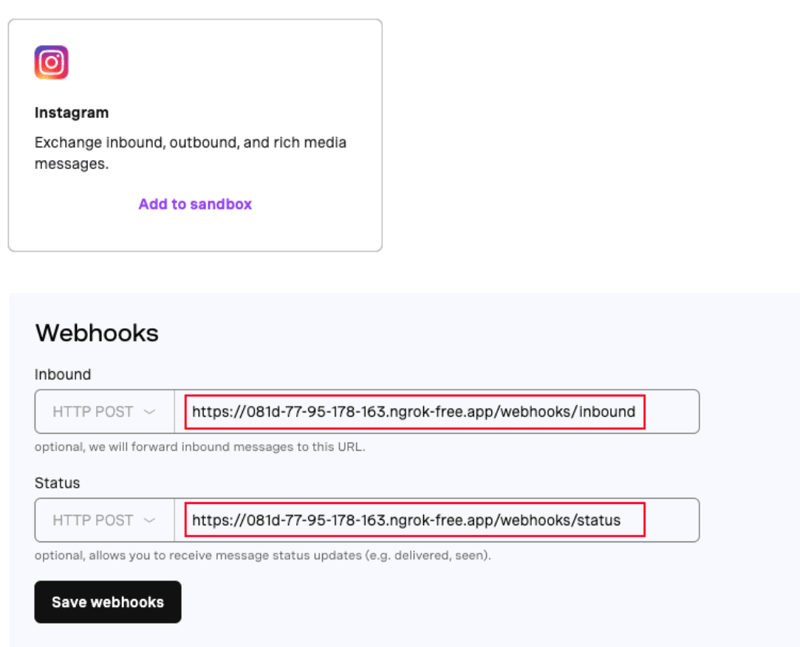
You now have a public URL! The last part of the configuration is to create our webhooks, so head back to the Messages Sandbox on the Vonage Dashboard. Take the public URL we have, and add /webhooks/status and /webhooks/inbound to the relevant fields:
Test It!
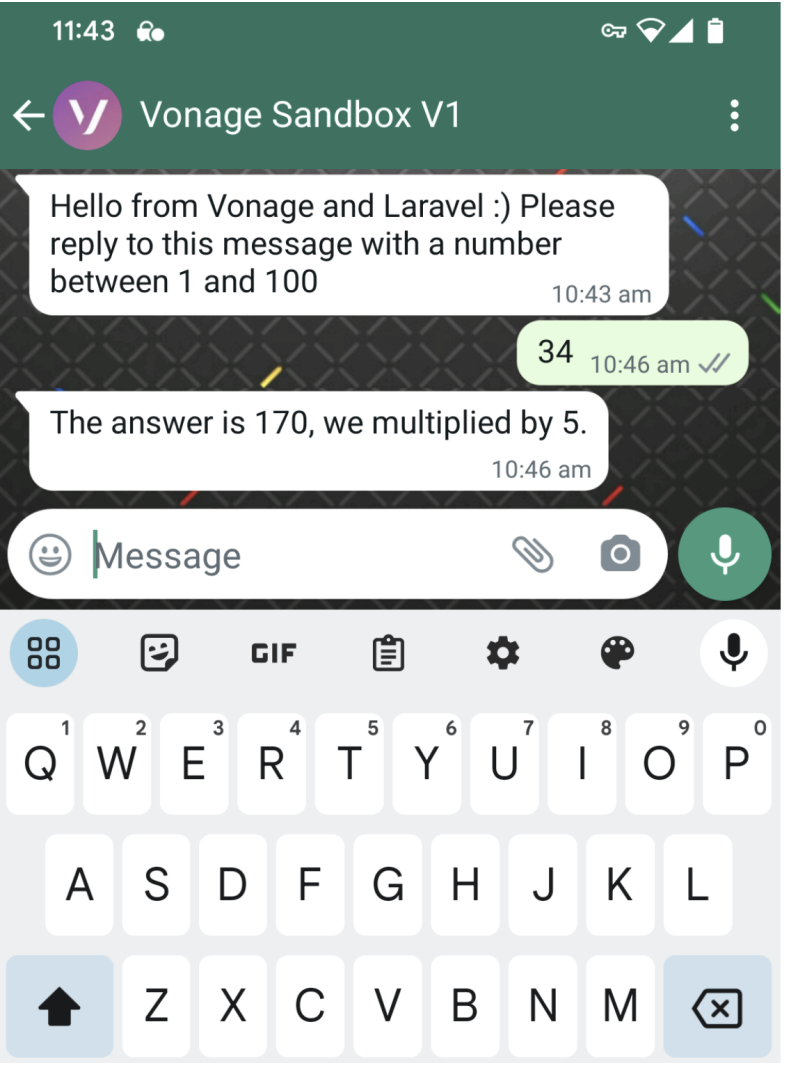
Head to localhost:8000/message and send a message!
How Does It Do That?
It’s time to dive into the code. All of the logic is only in the routes/web.php file instead of in controllers to keep things simple. Two important routes to look at make up the essential parts of the app. Firstly, the outgoing message route:
Route::post('/message', static function(Request $request) {
   $number = $request->input('number');
   $fromNumber = config('vonage.from_number');
   $text = 'Hello from Vonage and Laravel :) Please reply to this message with a number between 1 and 100';
   $message = new Vonage\Messages\Channel\WhatsApp\WhatsAppText($number, $fromNumber, $text);

   $credentials = new Keypair(file_get_contents(config('vonage.private_key_path')), config('vonage.application_id'));
   $client = new Vonage\Client($credentials);
   $client->messages()->getAPIResource()->setBaseUrl('https://messages-sandbox.nexmo.com/v1/messages');
   $client->messages()->send($message);

   return view('thanks');
});
This is the form and POST request when sending out the initial message. The only task of this route is to take the number entered in the form and to send out a WhatsApp message. If you’re wondering how we send this to Vonage, the answer is in the Vonage PHP SDK. The SDK Client object takes a credentials object (in this case, a Keypair instance), which we pass in the Application ID and Private Key path environment variables we created earlier to the constructor.
$credentials = new Keypair(file_get_contents(config('vonage.private_key_path')), config('vonage.application_id'));
$client = new Vonage\Client($credentials);
For more information on how you can use the PHP SDK, check out the ReadMe that gives examples for using the Messages API. To send a message, we create a WhatsAppText object, pass in the the destination number and the sandbox from number configured earlier.
Before we send the message using the client, there is an important step that is specific to our use case:
$client->messages()->getAPIResource()->setBaseUrl('https://messages-sandbox.nexmo.com/v1/messages');
This line here uses the decoupled nature of the PHP SDK (all of the parts of the SDK can be reconfigured or swapped out) to pull out the production-configured APIResource object and override it with the sandbox URL. So, all the client needs to do now is send it:
$client->messages()->send($message);
How to Receive an Incoming WhatsApp Message
The second part is coding a route that listens for incoming webhooks that have come from Vonage - these will be triggered every time someone replies to the thread we created in the first step. Here is the endpoint:
Route::post('/webhooks/inbound', static function(Request $request) {
   $data = $request->all();
   $number = (int)$data\['text'];

   if ($number > 0) {
       $randomNumber = random_int(1, 8);
       $respondNumber = $number * $randomNumber;
       $toNumber = $data\['from'];
       $fromNumber = config('vonage.from_number');
       $text = "The answer is " . $respondNumber . ", we multiplied by " . $randomNumber . ".";
       $message = new Vonage\Messages\Channel\WhatsApp\WhatsAppText($toNumber, $fromNumber, $text);

   $credentials = new Keypair(file_get_contents(config('vonage.private_key_path')), config('vonage.application_id'));
   $client = new Vonage\Client($credentials);
   $client->messages()->getAPIResource()->setBaseUrl('https://messages-sandbox.nexmo.com/v1/messages');
   $client->messages()->send($message);
});
Here we extract the details we need to reply to the message - namely the phone number to reply to and the number they sent as part of the message. With this information, the number sent is multiplied by a random number between 1 and 8 and we fire off a reply with the same structure as how we sent the initial message.
Conclusion
And there we have it: ways to interact using WhatsApp in Vonage! As you can imagine, this sort of setup is ideal for automated chatbots such as a helpline, but what will you build? Let us know on the Vonage Community Slack or hit me up on Mastodon.
More Resources
Scrub Up! Cleaning Your PHP Application with PHPStan
Sending an SMS via a PHP API with SlimPHP

