What
props stands for properties.
They are the argument passed into React Component.
Props are passed to Component via HTML attribute.
How
React Props are just like the attribute in the HTML.
To send the props into the HTML , we use the same syntax as HTML attribute.
Like,
**Suppose we have a Hello
Component which takes the name as the argument
so we can give it in this way.**

ReactDOM.render(<Hello name="Harry"/>,document.getElementById('root'));
The Component receives the argument as props object.
u can see that using Console.log in the render method.
console.log(this.props)
and u can use this name as {this.props.name}
Why
We don’t want any Component which give the same Output each time we call.
Using Props we can make the Component more Customizable or Configurable.
Look at the Below Example👇
**App.js**
class App extends React.Component{
    render(){
        return <p>Hi Everyone!</p>
    }
}
- So this always give the same output whenever we use this Component.
With Props 👇
**App.js**
class App extends React.Component{
    render(){
        return <p> Hello {this.props.name} </p>
    }
}

ReactDOM.render(<App name="Rohan"/>,document.getElementById('root'));
Every time we pass the different name it gives us the Different Output.
Also props can be used to Pass the Data from one Component to another.
Like,
**Suppose i have 2  Components Library and Books**

class Books extends React.Component{
    render(){
        console.log(this.props);
        return(<div>
        <h2>The Availabe Books are </h2>
        <p>{this.props.books[0]} , {this.props.books[1]} , {this.props.books[2]} </p>
        </div>)
    }
}

class Library extends React.Component{
    render(){
        const Types = ["Adventure","Romantic","Horror"];
        return(
        <div>
        <h1>How many Types of Book do I have?</h1>
        <Books books={Types}/>
        </div>
        )
    }
}

ReactDOM.render(<Library/>,document.getElementById('root'));
If u have to send a Variable or object then u have to put them inside the Curly Brackets.
Some Other Properties of Props →
-
Props are Immutable
Once Defined u can’t change them.
Like,
**Hello.js**

class Hello extends React.Component {
    render(){
        this.props.to = "Rohit";         //**This will Give Error.**
        return (
            <h1>Hello {this.props.to} form {this.props.from}</h1>
        )
    }
}

ReactDOM.render(<Hello/>,document.getElementById('root'))
Passing Different types of Data using Props.
class App extends React.Component{
    render(){
        return(
            <User
            name="Ringo"           //**A String**
            isMarried={true}       //**Boolean**
            age={16}               **//Number (Child Marriage case Reported🤣)**
            hobbies={['Reading','Playing Golf']}   **//An Array**
            />
        )
    }
}
Looping in JSX
-
To use the Loops in JSX we Mostly use the
Array Map Function.- map() calls a function once for each element in an array.
- Syntax →
array.map(function())
Example →
class Books extends React.Component{
    render(){
        const{books} = this.props;
        return(<div>
        <h2>The Availabe Books are </h2>
        <ul>
            {books.map(m=> <li>{m}</li>)}
        </ul>
        </div>)
    }
}

class Library extends React.Component{
    render(){
        const Types = ["Adventure","Romantic","Horror"];
        return(
        <div>
        <h1>How many Types of Book do I have?</h1>
        <Books books={Types}/>
        </div>
        )
    }
}

ReactDOM.render(<Library/>,document.getElementById('root'));
Adding default Props ⇒
To add the default props we have to use a keyword called defaultProps.
class User extends React.Component{
    static defaultProps = {
        name:"Paul",
        hobbies:["watching tv","cooking"]
    }
    render(){
        return(
        {/* Code */}
        )
    }
}
Styling In React
- For Styling u can either use the Stylesheet or Inline-CSS
Using Stylesheet
style.css

.red{
    background-color:red;
}

app.js

class App extends React.Component{
    render(){
        return(
            <div className="red">
            <h1>Hello</h1>
            </div>
        )
    }
}
As class is the Reserved word so we have to use the word className.
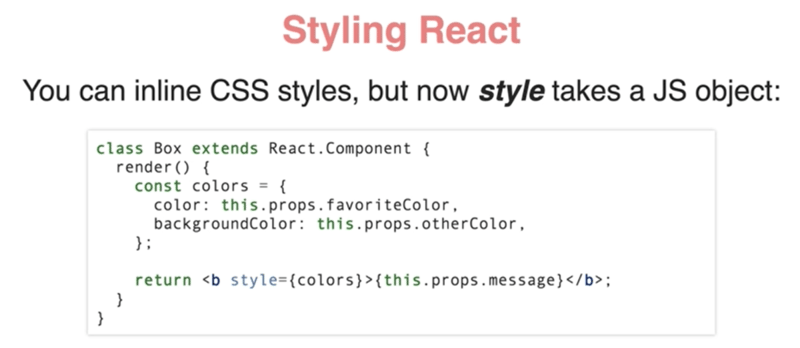
Inline CSS →
class App extends React.Component{
    render(){
        const color = {color:'red'};
        return(
            <div style={color}>
            <h1>Hello</h1>
            </div>
        )
    }
}


