Transferring projects using one click typically refers to moving digital projects—such as websites, applications, databases, or other software-related assets—seamlessly and with minimal manual intervention from one hosting environment to another. It's a standard process companies and engineering teams adopt when switching hosting providers, upgrading infrastructure, or deploying projects to different environments—a process that is useful in any step of the project from development to production.
The term "one-click" implies that migration can be initiated with a few actions, simplifying what can otherwise be a complex and time-consuming process. Migrations are often facilitated by specialized tools, services, or scripts that automate the transfer of files, databases, configurations, and other components.
Technology overview
Migration in Appwrite can help you migrate existing projects and move quickly to Appwrite. You can move your app from Firebase, Supabase, and Nhost and even between self-hosted and cloud projects using Migrations. You can also use Migrations to move between two self-hosted instances or duplicate projects on the same instance. Migrations will automatically move accounts, database documents, and storage files from one source to another.
Appwrite Cloud is an extension of the open-source version of Appwrite. It comes with all the services included in the open-source version but now has a fully managed service and minimum friction.
Project overview
This article will discuss migrating an existing Next.js and Supabase project that stores products in the Supabase database to the Appwrite cloud database.
GitHub
Check out the complete source code here.
Prerequisites
To follow along with this tutorial, you should have a working knowledge of the following:
- Basic understanding of JavaScript
- An Appwrite Cloud account; you can sign up for one here
- A Supabase project; you can create one here
Setting up the product application
To set up your application, you'll clone this repository using the command below:
git clone <repo-git-url>
Then, run the command below in the project directory:
$ cd <project-directory>
$ npm install
This repository contains all the initial setups you'll need for your app, helping you focus on your app's main functionality.
Then, run the development server using the command below:
npm run dev
Once the development server runs, you can view it on your browser at http://localhost:3000.
Note: You may run into some errors if you run the app as it is. This means you have to manually set your supabase project configuration and get the required credentials like the
EndpointandAPI Keys.
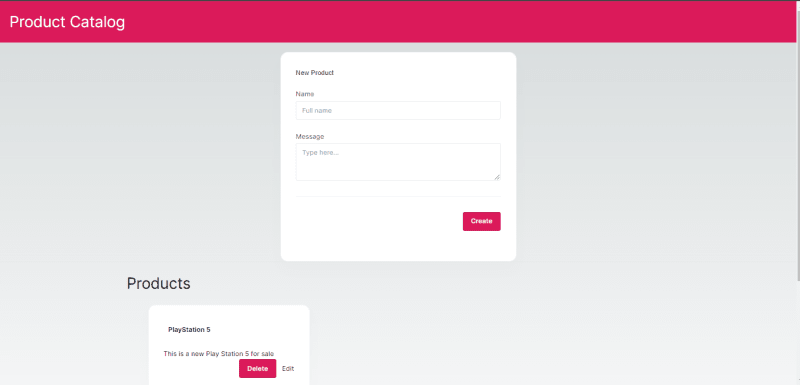
The product catalog app should look like this:
Migrating your project to Appwrite in one click
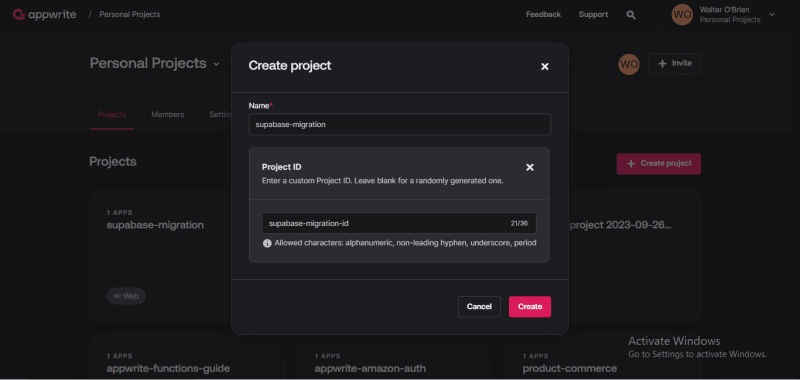
To get started, log into your Appwrite cloud, click the Create project button, input supabase-migration as the name, and then click Create.
Next, navigate to the Settings and click on the Migrations tab.
Next, click the Import data button and select Supabase as your source.
Then, you must fill in the details of your Supabase Postgres credentials in the appropriate fields and click Next.
Note: You can get the Host, Port, Username, and Password credentials from your Supabase Settings > Database, while you can get the Endpoint and API Key credentials at the Supabase Settings > API
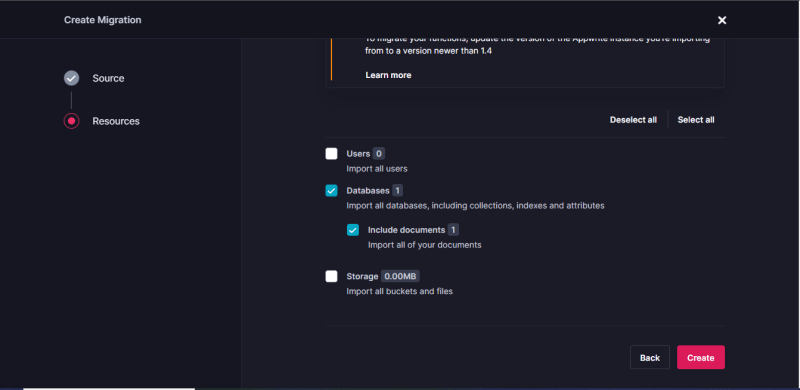
Next, select the Resources you want to migrate; you can choose one or all available options. In this case, select the Databases and click on Create to start your migration.
While waiting for your data to import, navigate to your project Overview and Add platform. Choose Web App and complete the necessary fields. This is necessary because Appwrite will reject requests from any unknown web to protect them from malicious attacks.
After completing the above configurations, navigate back to your Migration tab, and you should see this in your imported data.
The above indicates that your supabase project has successfully transferred to your Appwrite.
To confirm this, click on Databases and check your database collections. You should see something like this:
You have successfully imported your Supabase project into your Appwrite without hassle.
Conclusion
This post discussed how to quickly transfer your data from other sources like Supabase to Appwrite Cloud. This process also demonstrates how Appwrite as a backend-as-a-service makes development less hassle for developers and businesses with the easy use of Appwrite Migration.


