Avatar background images and user profiles are examples of application features that developers use image uploads to scale. The project may sometimes be more significant in scope, such as a collection of photos accessible to the public or a developer's desire to learn about reactive systems.
This tutorial explains how to use Appwrite functions in reactive systems by creating an image upload and retrieval application. We will demonstrate how to select a picture from local storage, upload it to an Appwrite console, retrieve the list of all the images from the server, and update the UI.
Here is the link to the GitHub repository containing all the code.
Prerequisites
To follow along with this tutorial, the following requirements apply:
- Xcode (with developer account for Mac users).
- Either IOS Simulator, Android Studio, or Chrome web browser — to run our application.
- Docker installation (recommended), DigitalOcean droplet, or Gitpod.
- An Appwrite instance. Check out this article for the setup.
- The user interfaces template. Here is a link to the repository containing the UI template.
Setting up the Appwrite project
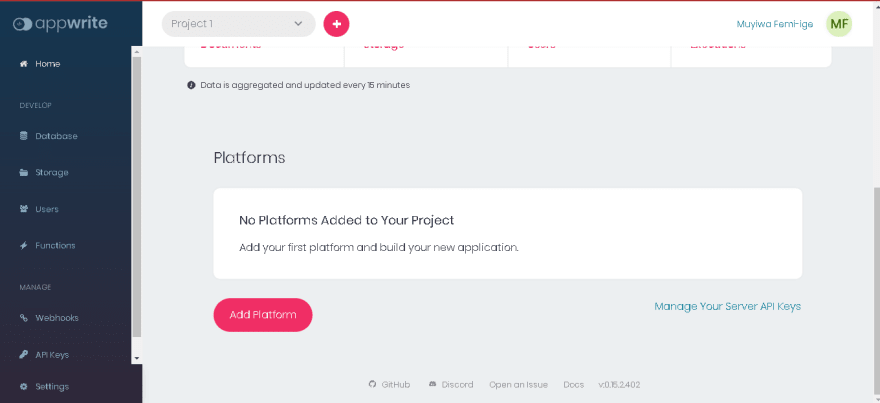
To set up a project, we’ll type in the host or IP address of our device in the browser to open an appwrite console. Then, click on create project and give it a project name and ID (ID can be autogenerated).
In the home section of the Appwrite console, we will select create platform, and in the popup, select Flutter. Within the Flutter section, choose Android and input the application name and package name (we can find them in our app-level build.gradle file by heading to android>app folder).
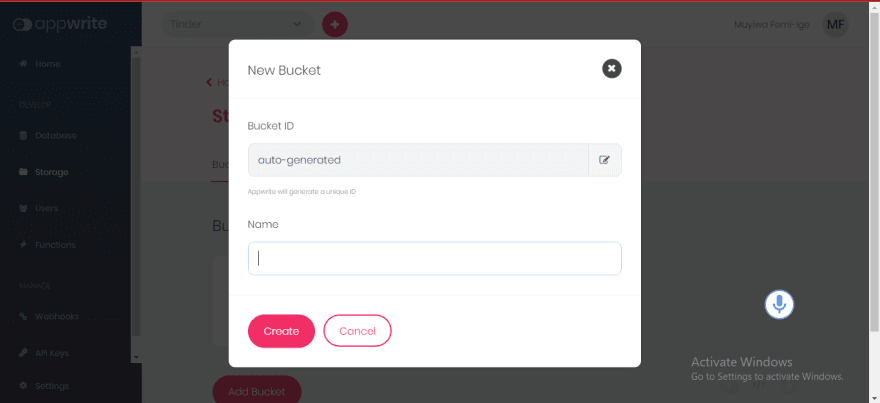
Next, we want to set up a storage bucket. Head to the storage section and click on add bucket. Then, we’ll set the bucket-level permission's read and write access to allow all users (role:all).
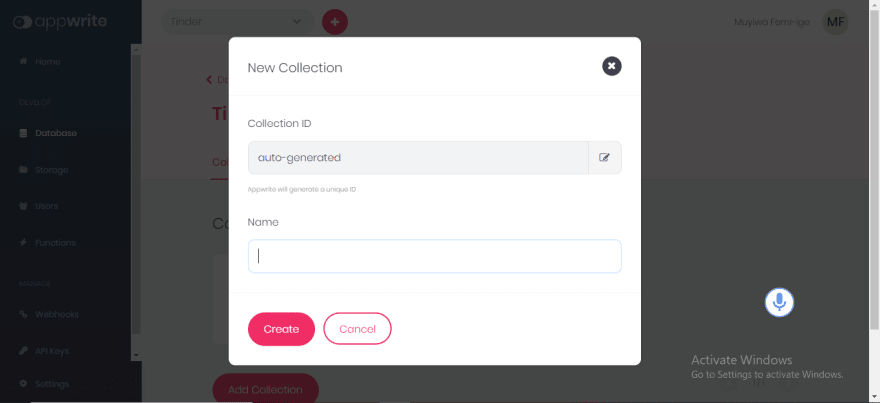
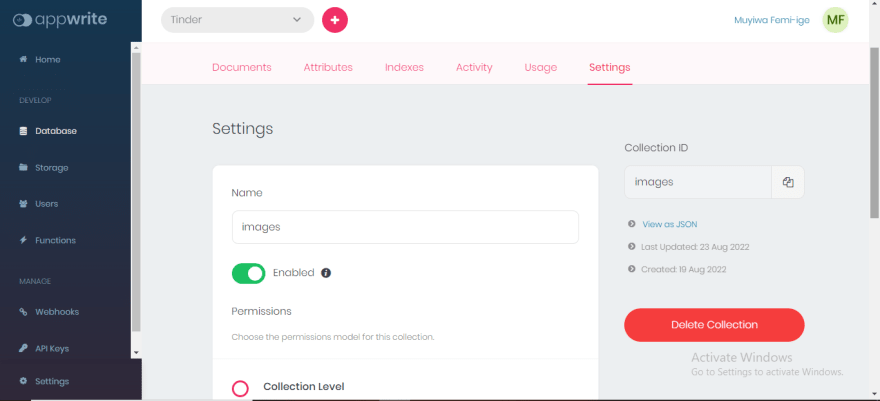
Finally, we want to create a database. To do so, we’ll navigate to the database section and click on add database. Then, create a collection and set the collection-level permission's read and write access to allow all users (role:all). We will also create a required string attribute to store the URL of each image added to the storage.
Cloning the Flutter UI template and connecting to Appwrite
In this section, we will need to clone the repository specified in the prerequisites. To do that, click on the link to the repository, and within the repository, click on code and download it as a .zip file. To use the other methods, check out the GitHub docs on how to clone a repository.
Next, to utilize our Appwrite storage and database, we need to connect our Flutter project to the console. Doing this varies among devices. Thus, we will show the process of connecting to Android and iOS devices.
i*OS*
First, we will need to obtain the bundle ID, which we can do by going to the project.pbxproj file (ios > Runner.xcodeproj > project.pbxproj) and searching for our PRODUCT_BUNDLE_IDENTIFIER.
Now, we will head to the Runner.xcworkspace folder in the applications iOS folder in the project directory on Xcode. Now, we want to select the runner target, and to do this; we will choose the Runner project in the Xcode project navigator and then find the Runner target. Next, select General and IOS 11.0 in the deployment info section as the target.
Android
To do this, copy the XML script below and paste it below the activity tag in the Androidmanifest.xml file ( to find this file, head to android > app > src > main).
Note: change [PROJECT-ID] to the id you used when creating the Appwrite project
Getting started
The cloned repository contains an authprovider folder, the homepage.dart file, and the main.dart file in the lib folder. When we run it, we should have a UI that looks like the image below:
As we can see above, there are two buttons (select file and retrieve) and a display area that shows the images uploaded to the database in a grid format. Currently, the template lacks functionality; thus, we will work on that in the coming sections.
Before we begin, we will need to add the following dependencies to the pubspec.yaml file:
- provider: ^6.0.3
- file_picker: ^4.5.1
- appwrite: ^6.0.0
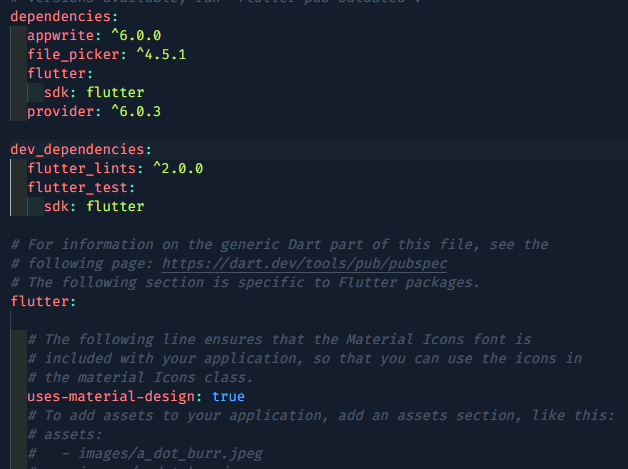
Next, within the lib folder, we will create two different folders; constants and models. In the constant folder, we will create a file called app_constants.dart and will add the code below to the file:
To get the IP address for a physical emulator, we will connect our device running the Appwrite instance and physical emulator to the same wifi device and type the command below in the terminal:
ipconfig
The command above will bring out the IPs of the devices connected to our PC.
Creating the image upload feature
We will need to create a model class to convert the response received when we send a file to the Appwrite storage bucket. We do this because, unlike the web SDK, Appwrite does not return a link when getting a file preview. Thus, we will have to create a URL manually for every file added to the storage bucket, and we will need two data (bucketId and fileid).
Now, within the model folder, we will create a file called fileurl.dart and add the code below to it:
The code above creates a class called UploadedFiles with some required properties followed by some constructors. It then creates a fromJson and toJson method for serialization.
To create our application's core logic, we will update the code in the imageprovider.dart file in the template. Using the provider package, we can affect the state of our UI. Before we can do that, we need to update the imageprovider.dart file with the code below:
In the code above, we have a ChangeNotifier class. Within it, we called the Appwrite client, account, storage API, a PlatformFile (from the file_picker package), and also the model class we created earlier. Next, we called a getter for the model class and created a function called _initialize(). Within the _initialize() function, we set the _selectedfile and _uploadedFiles to null (initializers), initialize the Appwrite's API, and call the _getaccount function, which conditionally creates an anonymous user session.
Next, we will use the file_picker package within the filepicker function to select image files from our device storage. The function calls the Filepicker method and checks whether it returns null. If false, it will return the result.files.first.
As specified in the code above, we will need to create a function called _uploadfile(). After picking the file, we’ll use the Appwrite storage API to get the image selected by the path and upload it to the file bucket within our Appwrite storage. We will then check if the id is present, and if true, we will map the value of the uploaded image file to the model class; if false, we do nothing.
Creating the image retrieval feature
Now that we can upload images to the server, we want to be able to get the image from the Appwrite server. As mentioned earlier, we created a model class to manually create a URL. Before we delve into that aspect, we will need to create a model class to map the data sent to the database.
Now, we will call the Appwrite database API and the model class we created above, followed by a getter for the model class. Next, we will initialize the database API and call the createdocument() function in the filepicker function (add it before notifylisteners). The createdocument() will handle uploading the URL we created to the database.
The createdocument() function contains a manually created URL generated from an interpolation of other data stores (variables, constants, model classes), and here is how it looks:
var url='${Appconstants.endpoint}/storage/buckets/${uploadedFiles!.bucketId}/files/${uploadedFiles!.id}/preview?project=${Appconstants.projectid}';
After, we will call the createDocument method from the Appwrite database function and set the data key and value pair to the attribute name created in the collection and our manually created URL, respectively.
Finally, we will create a future asynchronous function that will list the documents in our collection and map them to the model class List<DocModel>.
Consuming the service
We want to use some of the functions from our ChangeNotifier class within our UI. On the homepage.dart file of the UI template, we wrapped the body property in a Consumer class (from the provider library). Thus, we can call functions and getters from the ChangeNotifier class to the UI. Thus, we will set the value of the NetworImage as below:
image: NetworkImage(
   state.docmodel![index].url!)
    ),
Finally, here is how our application looks:
Conclusion
In this tutorial, we created an Appwrite service to store uploaded image files, built custom URLs for each uploaded image using the File list object, created a database collection for the URL, and retrieved the URL to map it to the user interface. Here are some related resources you might find useful”
Thanks for reading, and happy coding!


