A guide on how to deploy frontend repositories with Vercel API
Under the Hood
The story begins when we want to deploy our custom repositories to preview the deployment links for our users. We end up using code sandbox API, but it shows one problem of running containers within the frame in the browser, so we end up removing the deployment preview. In today’s story, we will solve the same problem but use Vercel API instead of code sandbox.
Getting Started
If you are new to Vercel, then read more in detail over here. We have a custom repository section that provides the ready-to-use repository to the users. Users can download, view, save and share the repository to grow together. Every custom repository needs a deployment to preview the outcome of the repository when runs successfully, for reference view the outcome of the code in the code sandbox on the right-hand side. It almost looks like a browser, clean, simple, and easy to use.
Our agenda is to accord an interface to preview the outcome of each and every custom repository that the user is viewing on the website.
Solution one
After a lot of research, we decide to use code sandbox API, which worked successfully for us but it comes with its own limitations. Every deployed repository is running within containers followed by displaying the outcome of the repository.
If you deploy a simple Next.js repository with just showing the h1 tag, the code sandbox will run the repository in the container using the commands such as yarn run dev followed by the display of the outcome of the repository.
Limitations
Following are the reasons why we are not happy with the code sandbox deployments API:
Code sandbox runs every deployed repository in the containers instead of directly deploying the repository.
Building and running a repository in the containers is time and internet-consuming.
Sometimes repository deployment failed without giving any errors which makes everything so difficult in debugging.
Solution Two
Of course, we do have an idea to create our custom deployment API and for that, we need some time as we have to work around Dockers mostly. And since we have already deployed our repositories on Vercel using an interface why not try Vercel API before creating our custom deployments?
Approach for Deployment
Our approach can be summarised in the following words -
Create a simple ready-to-use repository.
Create a JSON data structure for our repository architecture (I will explain this part in detail later in this article).
Create an endpoint for deployment that pass the repository JSON to the Vercel API and deploy it to the custom link.
Within 3 steps we can deploy our repository.
Execution
Let’s start with creating a simple next js repository only. I am not creating one because we have a custom repo section, that provides all ready-to-use repositories in one go. You can download your repository from here.
Once the repository is ready we can use the serverless function provided by next js to create a deployment endpoint. If you are new to this serverless function, here is the article link.
Then we create the JSON data structure for our repository and pass it to our serverless deployment endpoint. Our serverless deployment endpoint will use the POST /deployment endpoint provided by Vercel to deploy our simple next js repository.
Creating Integration
Before we start working with Vercel API. We need to grab the access token that we will be needing for every API request to the Vercel servers.
You can think of the access token as the JWT token or authorization token. On the Vercel website open your integration console and create one integration by filling all the required fields.
It will take less than 5 minutes to add your product details and create your integration.
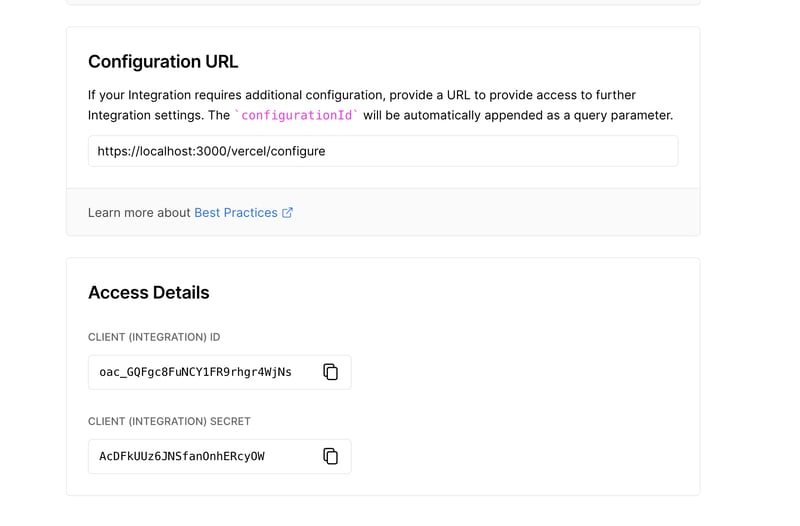
Once the integration is created successfully the integration console will show the client id and client secret that we need to store as we will be needing them to grab our access token.
Please do not use my client id and secret key as it will not work for you. Every user has a unique client id and secret key.
Installing Integration
We will now install the integration we have just created. 2 ways in which the installation can be achieved —
External way — Making an API request to Vercel servers to install the integration in your app
Internal way — Installing the integration directly from the integration marketplace on the Vercel website.
We will be following the external way as we will be dealing with the integration of our application itself.
On our application, we will create a button to add our integration. This button will trigger the POST request to the endpoint with the slug name of our application in the parameters of the API.
https://vercel.com/integrations/:slug/new
Pass your integration slug name in the params and open the link in the browser to connect the integration.
Once the integration is added successfully you will be redirected to the callback or redirect URI with the code appended in the parameters of the API
Save that code value as we will need it to create the access token.
Creating access token from client Id and Secret
The next and last part is to grab the access token by making another API request to the Vercel endpoint with client id and secret being passed in the params whose response will give us the access token in exchange for code.
The post request to the https://api.vercel.com/v2/oauth/access_token endpoint will return the user id and tokens.
List the deployed repositories
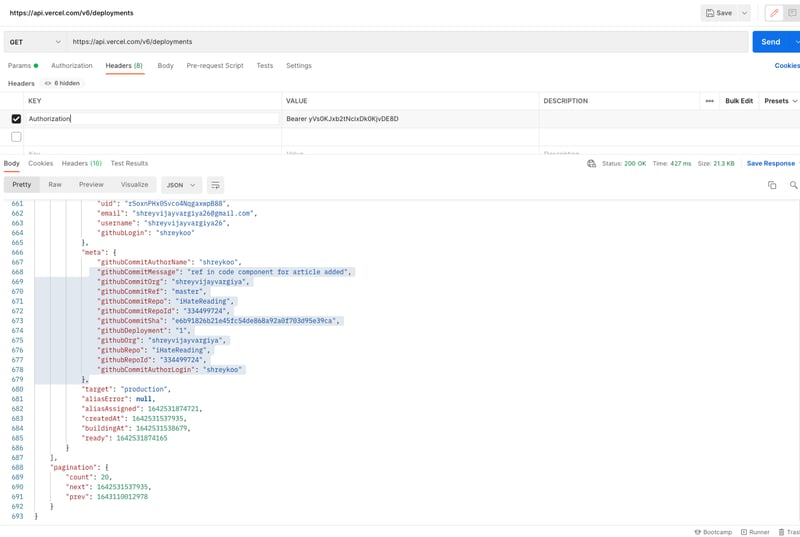
Vervel API provides an endpoint to view the list of all deployed repositories. The endpoint we will make a request is /v6/deployments with the access, tokens begin passed in the headers.
I am attaching the API response screenshot of the postman, make sure you used your access token otherwise it will throw an unauthorised error.
Once the user connects the Vercel within your application you can fetch all his/her deployed projects and view them on your application for better further features.
Deploying
We have reached the final stage where every repository can be deployed on the vervel subdomains using its API. We need an access token as the authorization token in the headers of every Vercel deployment API.
Add the token in the headers with the request data and Vercel API will deploy our repository and return us the deployed link and the deployed project id.
Until next time, have a good day.
Keep developing
Shrey
iHateReading


