In this article, we’re going to look at another fun way to build with Strapi. We’ll be building a music player app! We’ll be using Strapi as our backend, where our music files would be stored and fetched into our app. Think of it like a streaming app, yes! A streaming app like Spotify.
What is Strapi?
Strapi is an open-source content management system. It allows you to create customizable APIs in any frontend application. Strapi is so easy to use because it allows you to build flexible APIs with one-of-a-kind features that you'll love.
You can create custom content types and relationships between them to keep things organized. It also includes a media library for storing images and audio files. This is one of the many features of Strapi. Let’s get started.
Prerequisites
To follow through with this article, you must have the following:
- React: React is a user interface development library. It runs as an SPA (single-page app) on the client, but it can also build full-stack apps by communicating with a server/API. Because it is capable and directly comparable to frameworks such as Angular or Vue, React is frequently referred to as a frontend "framework." You can check out their website for a quick tutorial on it.
- Node.js installed (v14)
- Npm or yarn installed (npm v6 is more suited to install Strapi). Note: If you have problems installing Strapi, I recommend clearing the npm cache completely and downgrading to node 14 (by completely uninstalling the higher version of node from your system and anywhere node may appear). Accept the extra installation (the python scripts etc.) It worked for me.
Project Scope
Before we proceed, it is very important to know the scope of our project. What we want to archieve is build a simple music player in which all its music and details including the name of the artist, name of song and image acting as the cover music. Our music App should also be able to show us the next song on the list and the artist.
Setting up Strapi
To get started, we’ll first need to install Strapi. Create a folder called strapi-musicplayer, cd into it in our terminal, and run either of the following commands below:
    npx create-strapi-app@latest my-project --quickstart
    #or
    yarn create strapi-app my-project --quickstart
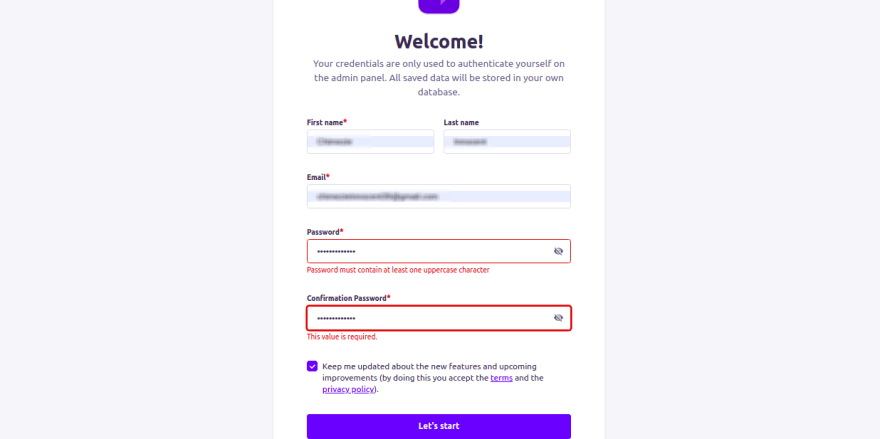
This will install all the necessary packages for this project. After installation, our Strapi app will be launched automatically in our browser. We should have something like this:
To start our project any other time, we use the command:
npm run devlop
We will be directed to the admin homepage after registering to configure our backend content and APIs. Let’s move to create our collection type.
Creating Our Collection Type
In order to create our collection type, on your admin homepage, go to Content-Type Builder and create a new collection type.
Give it a display name that is singular, not plural. It is automatically pluralized by Strapi. We will refer to our collection as music_player.
For our music_player, we’ll need a title in form of text type, the name of the artist also of the type text, the image source and the music source in form of media type.
Let’s go ahead and create them.
Click on Save to save our collection and. Let’s move on to populate our collection.
Populate the Collection
In the top-left corner of the admin page, select Content Manager. This will navigate you to the page where we will add contents to our database.
You can add as many songs with each of its corresponding details which includes the image, the title and artist. Once we are done, we can either save and test it first, or we skip that and go ahead to publish it.
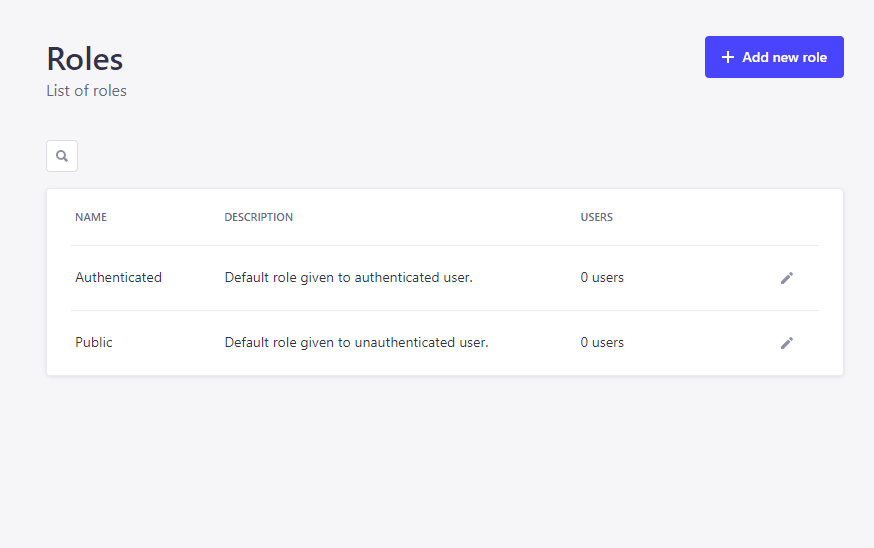
To make the music_player available to consume it in our React frontend, navigate to Roles under Users and Permissions Plugins. Then, click on the public and scroll down to permissions.
Under the Portfolio dropdown, select the find and findOne options by clicking on Public. This will make the portfolio content available to the public.
Whenever we try to retrieve it by using the Strapi API, it sends us the data. Now that we’re done, let’s move on to the frontend of our project.
Building the Frontend
For our frontend, we’ll be using React. Let's get started by installing React and all the necessary packages.
- Open your terminal once again and navigate to the folder where we want to install our React project:
npx create-react-app music-player
-
cdinto the just installed folder:
cd music-player
- Install axios.
npm install axios
- Lastly, install font awesome.
    npm i --save @fortawesome/fontawesome-svg-core
    npm install --save @fortawesome/free-solid-svg-icons
    npm install --save @fortawesome/react-fontawesome
Before we start up our app, let’s get rid of the files that we won’t be using in our src folder these are reportwebvitals, App.css, App.test.js, logo.svg, and setupTest.js. We also want to make some cleanup to our remaining files. for our index.js, we clean it up to look like this:
The next is our index.css. We’ll be deleting it all, leaving us with a blank file. Lastly, for our app, we’ll clean it up to look like this:
Now that we’ve done that, let’s start our app.
npm start
We have gotten everything cleaned and sorted out. So, let’s proceed with our project.
Creating Our Components
creating components is the next thing we’ll be doing. We’ll be creating three components, namely:
Index.js: This is where we’ll be adding our music API and also other functionalities.Player.js: This will be responsible for handling everything concerning our music player. Think of it as the captain of a squad, in which ourDetials.jsandControl.jsare under because it’ll be using their info ( this will be our props) to work.Details.js: This will contain details like the artist name and title of the song.Controls.jsThis will be responsible for the controls like the play, pause, next, and previous.
Inside our src folder, let’s create a new folder called components. Inside the folder, we’ll create our file called index.js, Player.js, Details.js, Controls.js
- Beginning with
index.js, paste this in it:
    import axios from "axios";
    import { useEffect, useState } from "react";
    import Player from "./Player";
    const Index = () => {
      const [songs, setsongs] = useState([]);
      const [currentSongIndex, setCurrentSongIndex] = useState(0);
      const [nextSongIndex, setNextSongIndex] = useState(0);
      // fetching our api
      useEffect(() => {
        const fetchData = async () => {
          try {
            const { data: response } = await axios.get(
              "http://localhost:1337/api/music-players?populate=*"
            );
            let _musics = response.data;
            _musics.map((music) => {
              let pload = {
                title: music.attributes.title,
                artist: music.attributes.artist,
                img_src:
                  "http://localhost:1337" +
                  music.attributes.img_src.data[0].attributes.url,
                src:
                  "http://localhost:1337" +
                  music.attributes.music_src.data[0].attributes.url,
              };
              setsongs((oldSongs) => [...oldSongs, pload]);
            });
          } catch (error) {
            console.error(error);
          }
        };
        fetchData();
      }, []);
      // .. calling
      useEffect(() => {
        setNextSongIndex(() => {
          if (currentSongIndex + 1 > songs.length - 1) {
            return 0;
          } else {
            return currentSongIndex + 1;
          }
        });
      }, [currentSongIndex]);
      // ..
      return (
        <div className="App">
          {songs.length > 0 && (
            <>
              <Player
                currentSongIndex={currentSongIndex}
                setCurrentSongIndex={setCurrentSongIndex}
                nextSongIndex={nextSongIndex}
                songs={songs}
              />
            </>
          )}
        </div>
      );
    };
    export default Index;
In Player.js, paste:
    import React, { useState, useRef, useEffect } from "react";
    import Controls from "./Controls";
    import Details from "./Details";
    function Player(props) {
      const audioEl = useRef(null);
      const [isPlaying, setIsPlaying] = useState(false);
      useEffect(() => {
        if (isPlaying) {
          audioEl.current.play();
        } else {
          audioEl.current.pause();
        }
      });
      const SkipSong = (forwards = true) => {
        if (forwards) {
          props.setCurrentSongIndex(() => {
            let temp = props.currentSongIndex;
            temp++;
            if (temp > props.songs.length - 1) {
              temp = 0;
            }
            return temp;
          });
        } else {
          props.setCurrentSongIndex(() => {
            let temp = props.currentSongIndex;
            temp--;
            if (temp < 0) {
              temp = props.songs.length - 1;
            }
            return temp;
          });
        }
      };
      return (
        <div className="my-player">
          <audio
            src={props.songs[props.currentSongIndex].src}
            ref={audioEl}
          ></audio>
          <h4>Playing now</h4>
          <Details song={props.songs[props.currentSongIndex]} />
          <Controls
            isPlaying={isPlaying}
            setIsPlaying={setIsPlaying}
            SkipSong={SkipSong}
          />
          <p>
            Next up:{" "}
            <span>
              {props.songs[props.nextSongIndex].title} by{" "}
              {props.songs[props.nextSongIndex].artist}
            </span>
          </p>
        </div>
      );
    }
    export default Player;
In Controls.js, paste:
    import React from "react";
    import { FontAwesomeIcon } from "@fortawesome/react-fontawesome";
    import {
      faPlay,
      faPause,
      faForward,
      faBackward,
    } from "@fortawesome/free-solid-svg-icons";
    function Controls(props) {
      return (
        <div className="my-player--controls">
          <button className="skip-btn" onClick={() => props.SkipSong(false)}>
            <FontAwesomeIcon icon={faBackward} />
          </button>
          <button
            className="play-btn"
            onClick={() => props.setIsPlaying(!props.isPlaying)}
          >
            <FontAwesomeIcon icon={props.isPlaying ? faPause : faPlay} />
          </button>
          <button className="skip-btn" onClick={() => props.SkipSong()}>
            <FontAwesomeIcon icon={faForward} />
          </button>
        </div>
      );
    }
    export default Controls;
In Details.js, paste:
    import React from "react";
    function Details(props) {
      return (
        <div className="my-player--details">
          <div className="details-img">
            <img src={props.song.img_src} alt="" />
          </div>
          <h3 className="details-title">{props.song.title}</h3>
          <h4 className="details-artist">{props.song.artist}</h4>
        </div>
      );
    }
    export default Details;
For our
index, we imported our player component, we then used ouraxiosto fetch our data and also put them in an array which we would be working with. We are performing a logic that will display our current song and also our next song to be played. We’ll be grabbing the info from ourPlayer.js.For our
player.js, we are importing ourDetailsandControlscomponents. It houses both components. Here, we are configuring the functionalities for our song display, details and controls like he play, the pause,the skip song and the previous song.Controls.jscontains the control interface of our app like the play , pause and all. OurPlayer.jsuses it’s props to configure the functionalities since it would be bulky if we included it all in the same file.Detailsis used to display the details of the music played. OurPlayer.jsalso uses the its props.
We just have to do two more things. The first is to pass in our index component into our App.js, since it holds the other components.
    import React from "react";
    function Details(props) {
      return (
        <div className="my-player--details">
          <div className="details-img">
            <img src={props.song.img_src} alt="" />
          </div>
          <h3 className="details-title">{props.song.title}</h3>
          <h4 className="details-artist">{props.song.artist}</h4>
        </div>
      );
    }
    export default Details;
Lastly, let’s style it. In index.css, paste this:
    * {
        margin: 0;
        padding: 0;
        box-sizing: border-box;
        font-family: "Fira Sans", sans-serif;
    }
    body {
        background-color: #DDD;
    }
    .App {
        display: flex;
        align-items: center;
        justify-content: center;
        min-height: 100vh;
    }
    .my-player {
        display: block;
        background-color: #313131;
        display: block;
        margin: 0px auto;
        padding: 50px;
        border-radius: 16px;
        box-shadow: inset -6px -6px 12px rgba(0, 0, 0, 0.8), inset 6px 6px 12px rgba(255, 255, 255, 0.4);
    }
    .my-player > h4 {
        color: #FFF;
        font-size: 14px;
        text-transform: uppercase;
        font-weight: 500;
        text-align: center;
    }
    .my-player > p {
        color: #AAA;
        font-size: 14px;
        text-align: center;
        font-weight: 600;
    }
    .my-player > p span {
        font-weight: 400;
    }
    .my-player--details .details-img {
        position: relative;
        width: fit-content;
        margin: 0 auto;
    }
    .my-player--details .details-img img {
        display: block;
        margin: 50px auto;
        width: 100%;
        max-width: 250px;
        border-radius: 50%;
        box-shadow: 6px 6px 12px rgba(0, 0, 0, 0.8), -6px -6px 12px rgba(255, 255, 255, 0.4);
    }
    .my-player--details .details-img:after {
        content: '';
        display: block;
        position: absolute;
        top: -25px;
        left: -25px;
        right: -25px;
        bottom: -25px;
        border-radius: 50%;
        border: 3px dashed rgb(0,0,255);
    }
    .my-player--details .details-title {
        color: #EEE;
        font-size: 28px;
        text-shadow: 2px 2px 4px rgba(0,0,0,0.8), -2px -2px 4px rgba(255,255,255,0.4);
        text-align: center;
        margin-bottom: 10px;
    }
    .my-player--details .details-artist {
        color: #AAA;
        font-size: 20px;
        text-shadow: 2px 2px 4px rgba(0,0,0,0.8), -2px -2px 4px rgba(255,255,255,0.4);
        text-align: center;
        margin-bottom: 20px;
    }
    .my-player--controls {
        display: flex;
        align-items: center;
        justify-content: center;
        margin-bottom: 30px;
    }
    .my-player--controls .play-btn {
        display: flex;
        margin: 0 30px;
        padding: 20px;
        border-radius: 50%;
        box-shadow: 4px 4px 10px rgba(0, 0, 0, 0.8), -4px -4px 10px rgba(255, 255, 255, 0.4), inset -4px -4px 10px rgba(0, 0, 0, 0.4), inset 4px 4px 10px rgba(255, 255, 255, 0.4);
        border: none;
        outline: none;
        background-color: #0000FF;
        color: #FFF;
        font-size: 24px;
        cursor: pointer;
    }
    .my-player--controls .skip-btn {
        background: none;
        border: none;
        outline: none;
        cursor: pointer;
        color: #888;
        font-size: 18px;
    }
Save all and check the result in our browser.
We just built ourselves a music player! Click here to access the full code on my GitHub Repo.
Conclusion
We have seen another innovative way to use Strapi by building a music player. Special thanks to Asaolu Elijah, who contributed to this article in a very crucial way.


