If you're aiming for high visibility of your blog content, then you have to post it on many channels like Dev.to, Hashnode, and Medium.
Not having a single source of truth for your content will cause a lot of manual work and soon your content becomes out of sync. Imagine how much time you could save if your blog post were automatically created and updated on multiple platforms.
Fortunately, there is a perfect solution. You can use Strapi as a single source of truth for your blog contents to automatically publish/update them on different platforms.
In this tutorial, we will explore how to do it by using Strapi and configuring webhooks in it. We also use Medium and Dev.to REST APIs, Hashnode GraphQL API, a serverless function that is hosted in AWS Lambda to handle the webhook call.
Pre-requisites
-
node <= 14.0.0Please visit Node Previous Releases Page to download node v14 or earlier. npm >= 6.0.0- Having an account in Dev.to, Hashnode and Medium
- Hosting platform for the serverless function, ideally AWS or GCP
Goals
In this tutorial, we'll learn how a single source of truth can help with content creation. We start by creating a simple content type for our blog post. Then we develop a serverless function that gets triggered by Strapi webhooks. This serverless function receives blog post data from Strapi and by using Dev.to, Medium, and Hahnode API, creates a post in those platforms.
Step 1 - Create a new Content Type for your blog post.
- Install Strapi. I used version 4 for this tutorial. To learn more about installation, please visit Strapi Installation Guide
- After you successfully installed Strapi, login to the admin dashboard
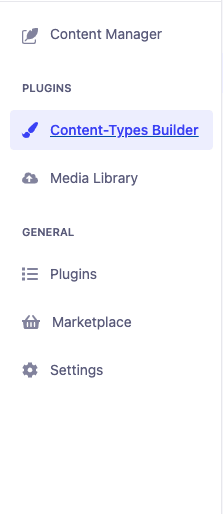
- On the left sidebar, click on
Content-Types Builder
- Under Collection Types, click on “Create new collection type”
- Name your collection type “Blog” and add the following fields to it
- title and its type as “text”
- Content, and its type as “rich text”
For this article, our blog post has a title, tags, and content, but you may add more fields to your blog content type depending on your needs.
- Now on the left sidebar, click on Content Manager and pick “Blogs”
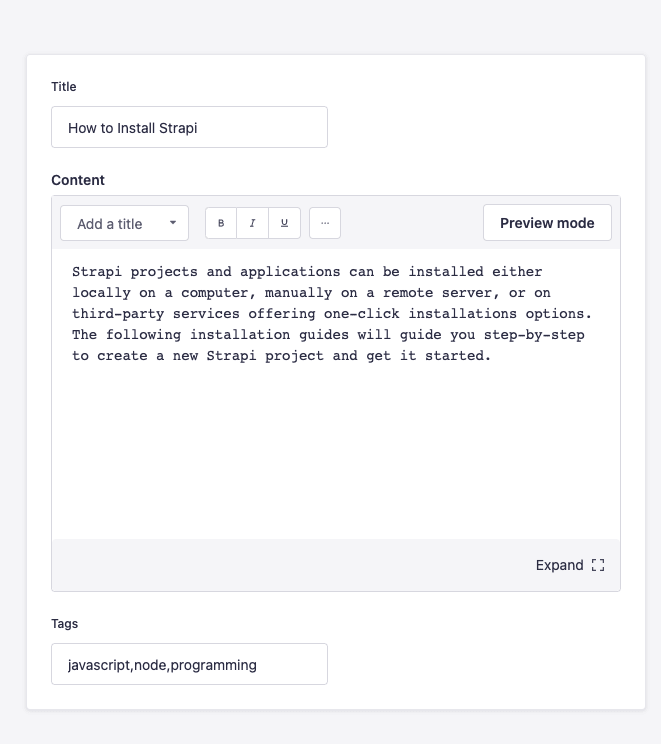
- Click on the “Add new entry” button and create a new blog post as the following:
Step 2 - Using Dev.to, Medium, and Hashnode APIs to post a blog
Generating an API key for Dev.to
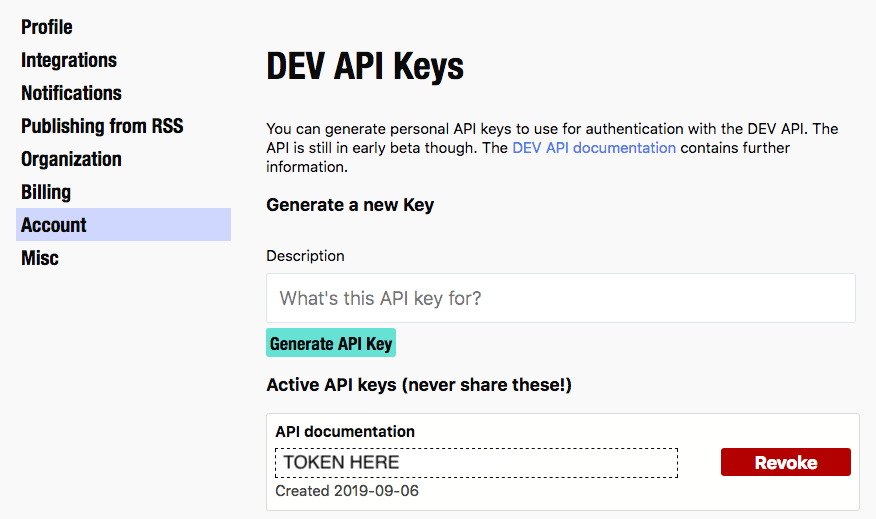
Dev.to has a rest API to create, read, update, and delete posts. Authentication is required to create and update articles. You need to generate an API key first. To obtain one, please follow these steps:
- Visit Dev.to Account settings
In the "DEV API Keys" section, create a new key by adding a description and clicking on the "Generate API Key" button.

You'll see the newly generated key in the same view. Please save this API key in a safe place, We are going to use it in the next step.
When you make an API call to the Articles endpoint - https://dev.to/api/articles - you should include api-key in the header like the following:
        headers = {
            'Content-Type': 'application/json',
            'api-key': 'YOUR-API-KEY',
        }
Authenticate your call to Medium APIs
Like Dev.to, Medium also has REST API to create posts. In this tutorial, we are going to work with /posts endpoint to create a new blog post.
Get the Authentication Token
To publish on behalf of a Medium account, you will need an access token. An access token grants limited access to a user’s account. To obtain one, please follow these steps:
- Login to Medium.
- Go to your account settings.
- On the Left Sidebar click on Integration tokens.
- Enter a description for your token and click the get integration token button.

Save this Authentication token in a safe place. You need this for the next step.
Get the user's ID
To create a post you need to make an HTTP post call to https://api.medium.com/v1/users/[user_id]/posts as you see you need user id. To get the user id you need to make an HTTP GET call to https://api.medium.com/v1/me . Run the following command in your terminal to get the user id.
curl https://api.medium.com/v1/me -H "Authorization: Bearer [YOUR-INTEGRATION-TOKEN]" -H "Content-Type: application/json"
This endpoint responds with your user information.
    {
       "data":{
          "username":"YOUR-USERNAME",
          "url":"https://medium.com/@your_user_id",
          "imageUrl":"YOUR-USER-IMAHE",
          "id":"YOU-USER-ID",
          "name":"YOUR-USER-NAME"
       }
    }
The "id" is what you need to add in the endpoint URL to make an HTTP Post call.
Authenticate your call to Hashnode APIs
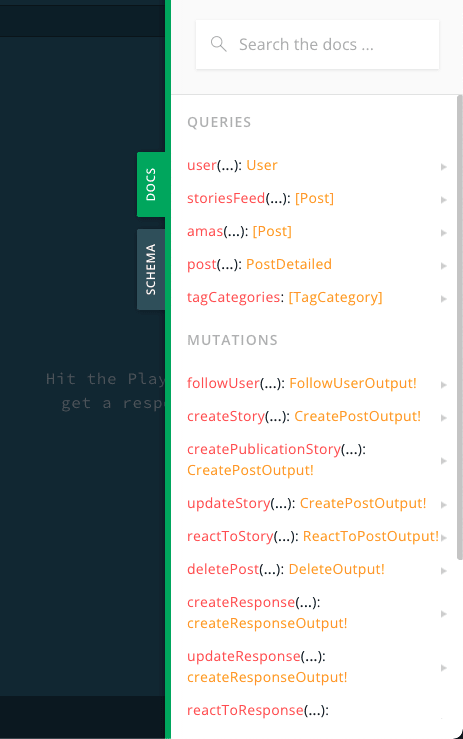
Hashnode APIs are different. Unlike Dev.to and Medium, they provide a GraphQL API.
If you are interested to learn more about their APIs, visit their API Playground and click on the Docs button on the right.
Generate API Token
Like the previous platforms, the first step to being able to use Hashnode API to create a new post is to get an authentication token. To get your token, follow these steps:
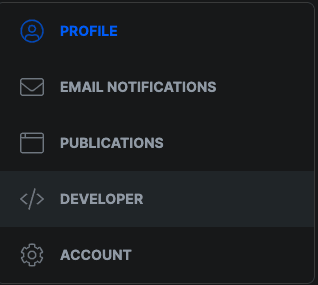
- Go to your account settings
- On the left sidebar, Click on Developer.
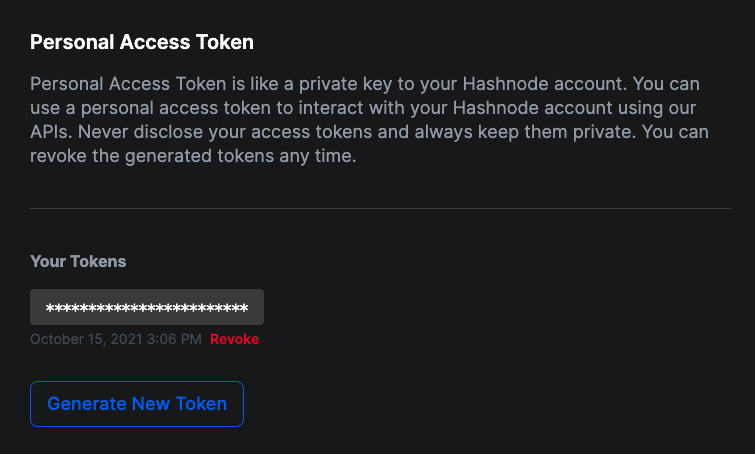
- Click on Generate New Token button.
Please remember to save this token in a safe place. We need it for the next step.
Get your publicationId
To successfully create a post on Hashnode you need to provide the publicationId in the GraphQL call. Go to your Hashnode blog dashboard.
In the URL in your browser between https://hashnode.com/ and /dashboard you see a long alphanumeric value, https://hashnode.com/{This is the publication id}/dashboard . That’s your publication id.
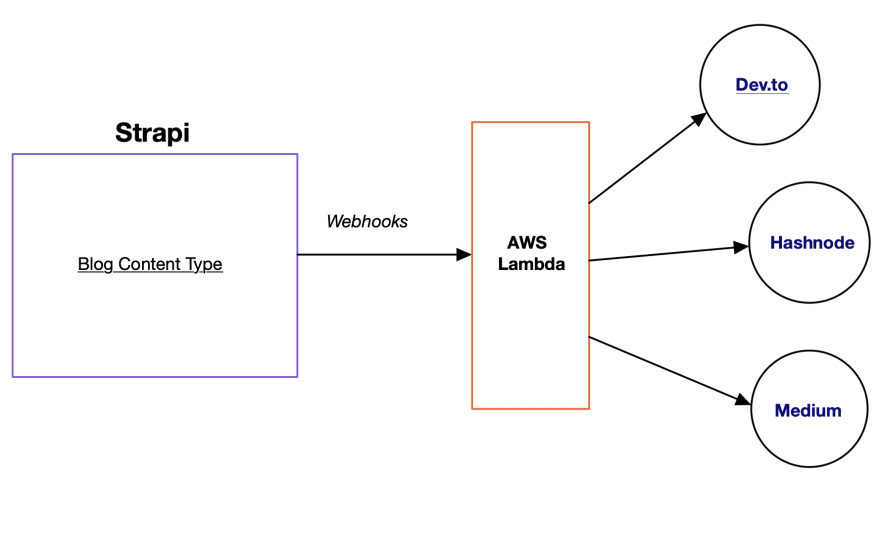
Ok, so now that we've set up our three platforms for successful API calls, let's talk more about the architecture of our solution and different pieces' responsibilities.
Step 3 - Publishing Workflow
Remember, the idea behind our solution is that you don't have to go back and forth between various platforms. You can create or update your blog post in one place, which automatically creates or updates it across all the different platforms.
Now let’s break down this diagram and talk about different pieces and their responsibilities.
-
Strapi:
- it’s the only place we create, update or delete our blog post. In Step 1 you installed and create a Content-Type for Blogs to host
-
Strapi Webhooks
- What is a webhook? Webhook is a way for one application to provide some data for another application when a specific event happens
- We want Strapi to send blog information to the serverless function when we publish blog content in Strapi. We talk more about the serverless function, but it’s a piece of code that handles blog creation in Dev.to, Hashnode and Medium.
-
AWS Lambda
- This is where we host our Serverless function, you can use other platforms like GCP or Linode.
- What is a serverless function? A serverless function is a piece of code that runs without installing any software on the server. Instead, it is invoked by an API call from a third-party service provider.
- In this tutorial, we are using Python as our programming language for our function. Feel free to use your language of choice that is supported by the hosting platform.
- You can visit AWS Lambda Developer Guide for more information
- Our Serverless Function in AWS Lambda receives the information about the blog post we just published in Strapi, and it makes API calls to Dev.to, Medium, and Hashnode APIs to create a blog accordingly.
Step 4 - Create a Serverless Function
As mentioned in the previous step, we are going to create a Serverless function to handle Webhooks call from Strapi. In this tutorial, we are using AWS Lambda but feel free to use your provider of choice.
-
Follow the instructions in AWS Lambda Developer Guide to create a Lambda Function
- My recommendation is to upload the code as a
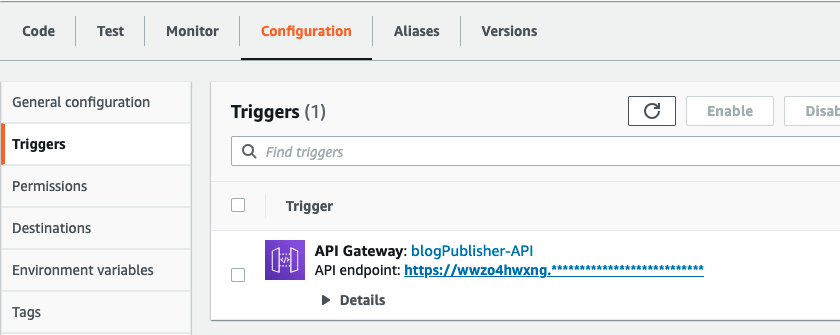
.zipfile to the Lambda dashboard because this code has some dependencies (requestsandgql) that should be installed before execution. To learn more about this, visit AWS Guide for Deploying .zip File - After creating the Lambda function successfully, In the function dashboard, Go to the Configuration tab → triggers and copy the API Gateway Endpoint. We use this URL for Strapi Webhooks.
- My recommendation is to upload the code as a
-
Replace the function code with the following:
- Don’t forget to replace all the strings that start with
CHANGE-ME-*with the actual value. For exampleCHANGE-ME-API-KEYwith your API key.
- Don’t forget to replace all the strings that start with
    import requests
    import json
    from gql import gql, Client
    from gql.transport.requests import RequestsHTTPTransport


    def devto_publisher(event, context):
        # creating API call headers
        headers = {
            'Content-Type': 'application/json',
            'api-key': 'CHANGE-ME-API-KEY',
        }
        # get the Strapi Webhook call data
        body = json.loads(event["body"])
        # Extract blog post title from Strapi webhook call
        title = body\["entry"\]["title"]
        # Extract blog content from Strapi webhook call
        body_markdown =body\["entry"\]["Content"]
        # Extract blog tags from Strapi webhook call
        tags =body\["entry"\]["tags"]
        # Create Dev.to article data sctruture
        article = {
            'title': title,
            'body_markdown': body_markdown,
            'published': True,
            'tags': tags.split(',')
        }
        # create a data dictionary with article key and value
        data = {
            'article': article
        }
        # make post call to dev.to endpoint to create an article
        response = requests.post(
            'https://dev.to/api/articles', headers=headers, json=data)


    def medium_publisher(event, context):
        # Get User's ID from Medium
        auth_headers = {
            'Content-Type': 'application/json',
            'Authorization': 'Bearer CHANGE-ME-YOUR-TOKEN',
        }
        auth_response = requests.get(
            'https://api.medium.com/v1/me', headers=auth_headers
        )
        medium_id = auth_response.json()\['data'\]['id']
        # Create Headers for making call to article creation endpoint
        article_headers = {
            'Content-Type': 'application/json',
            'Authorization': 'Bearer CHANGE-ME-YOUR-TOKEN',
        }
        # get the Strapi Webhook call data
        body = json.loads(event["body"])
        # Extract blog post title from Strapi webhook call
        title = body\["entry"\]["title"]
        # Extract blog content from Strapi webhook call
        body_markdown = body\["entry"\]["Content"]
        # Extract blog tags from Strapi webhook call
        tags = body\["entry"\]["tags"]
        # Create blog data sctructure for Medium Endpoint
        data = {
            'title': title,
            "contentFormat": "markdown",
            'content': body_markdown,
            'publishStatus': "public",
            'tags': tags.split(',')
        }
        medium_endpoint = "https://api.medium.com/v1/users/{user_id}/posts".format(user_id = medium_id)
        # Create article by making a call to Medium endpoint
        response = requests.post(
            medium_endpoint, headers=article_headers, json=data)


    def hashnode_publisher(event, context):
        # Create headers for GraphQL API Call
        headers = {"Authorization": "CHANGE-ME-YOUR-TOKEN"}
        _transport = RequestsHTTPTransport(
            url="https://api.hashnode.com",
            use_json=True,
            headers=headers,
        )
        client = Client(
            transport=_transport,
            fetch_schema_from_transport=True,
        )
        # get the Strapi Webhook call data
        body = json.loads(event["body"])
        # Extract blog post title from Strapi webhook call
        title = body\["entry"\]["title"]
        # Extract blog content from Strapi webhook call
        body_markdown = body\["entry"\]["Content"]
        # Extract blog post tags from Strapi webhook call
        tags = body\["entry"\]["tags"]
        # Create graphql mutation query for creating a post
        create_post_mutation = gql(
            """
                mutation ($input: CreateStoryInput!){
                    createPublicationStory(publicationId: "CHANGE-ME-YOUR-PUBLICATION-ID",input: $input){
                        message
                        post{
                        _id
                        title
                        }
                    }
                }
                """
        )
        # provide value for input variable
        post_input = {
            "input": {
                "title": title,
                "contentMarkdown": body_markdown,
                "tags": [
                    {
                        "_id": "56744721958ef13879b94c7e",
                        "name": "General Programming",
                        "slug": "programming"
                    }
                ]
            }
        }
        # execute graphql call to Hashnode Endpoint
        client.execute(
            create_post_mutation,
            variable_values=post_input
        )

    def lambda_handler(event, context):
        devto_publisher(event, context)
        medium_publisher(event, context)
        hashnode_publisher(event, context)
        return {
            'statusCode': 200,
            'body': json.dumps(event)
        }
In this serverless function, we have 4 functions:
-
devto_publisherthat is in charge of creating a post in Dev.to -
medium_publisherthat is in charge of creating a post in Medium -
hashnode_publisherthat is in charge of creating a post in Hashnode -
lambda_handlerthat is in charge of calling all the previous 3 functions, when your serverless function gets triggered.
Step 5 - Setup Strapi Webhooks
As I explained before webhooks send some data from one application to another application when a special event happens. In our case:
- One Application = Strapi
- Another Application = Serverless Function
- Special Event = When we publish a blog post in Strapi
- Some Data = Published Blog Post
To make it clear the reason we want this Webhook is to send Published Blog post data from Strapi to our serverless function so our function can create it on different platforms.
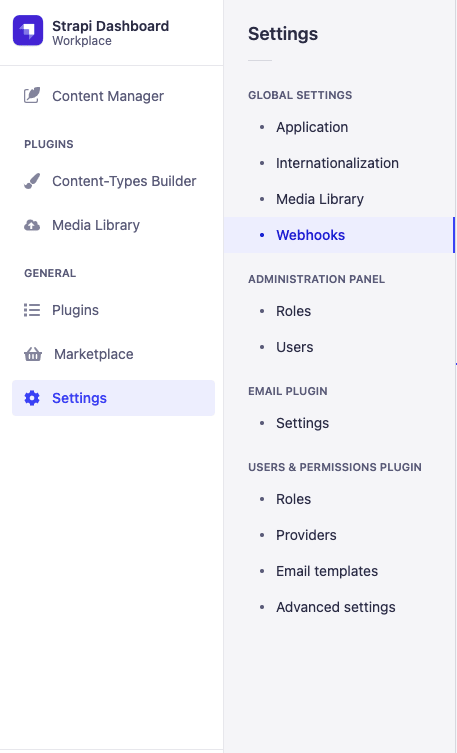
To create a new webhook login to your Strapi Instance, Click on Settings on the Left sidebar and pick Webhooks under the Global Settings.
Now click on the Add new webhook button, Give your webhook a name like “Blog Publisher Endpoint” and in the URL section paste the API Gateway URL of your Lambda function. In the Events section, mark the Publish Event for Entry.
In this article, we are triggering a webhook only when we publish a blog in Strapi but in the real world, you need to trigger your webhook when you create, update, and delete a blog post.
Let's see how it works in the real world
In this short video, you will see how my implementation works. By creating a content type for blog posts, adding a webhook to trigger my AWS Lambda function, and publishing the post in Strapi automatically creates new articles on multiple platforms!
Conclusion
In this tutorial, you learned how to use Strapi as a single source of truth for your blog posts and automatically publish them to multiple platforms. This means that once an article is created in Strapi - it can be published on three different platforms: Dev.to, Hashnode, and Medium. If you are going to implement this as your publishing solution keep in mind in this article our blog content type is really simple but in the real world, you need to add more fields to it. You also need to be able to edit and delete posts. To do so you need to enable webhooks trigger for content deletion as well and in your serverless function, you need to implement a way to update existing posts and delete them via APIs.

